This project involved the fabrication a set of characters from my story entitled Notturno, which combines my love for classical music and the beveled plastic edge of electronic children's toys. Notturno tells the story of Naima and Celeste, a pair of student musicians, who explore a conservatory bewitched by a Nocturne.

CELESTE
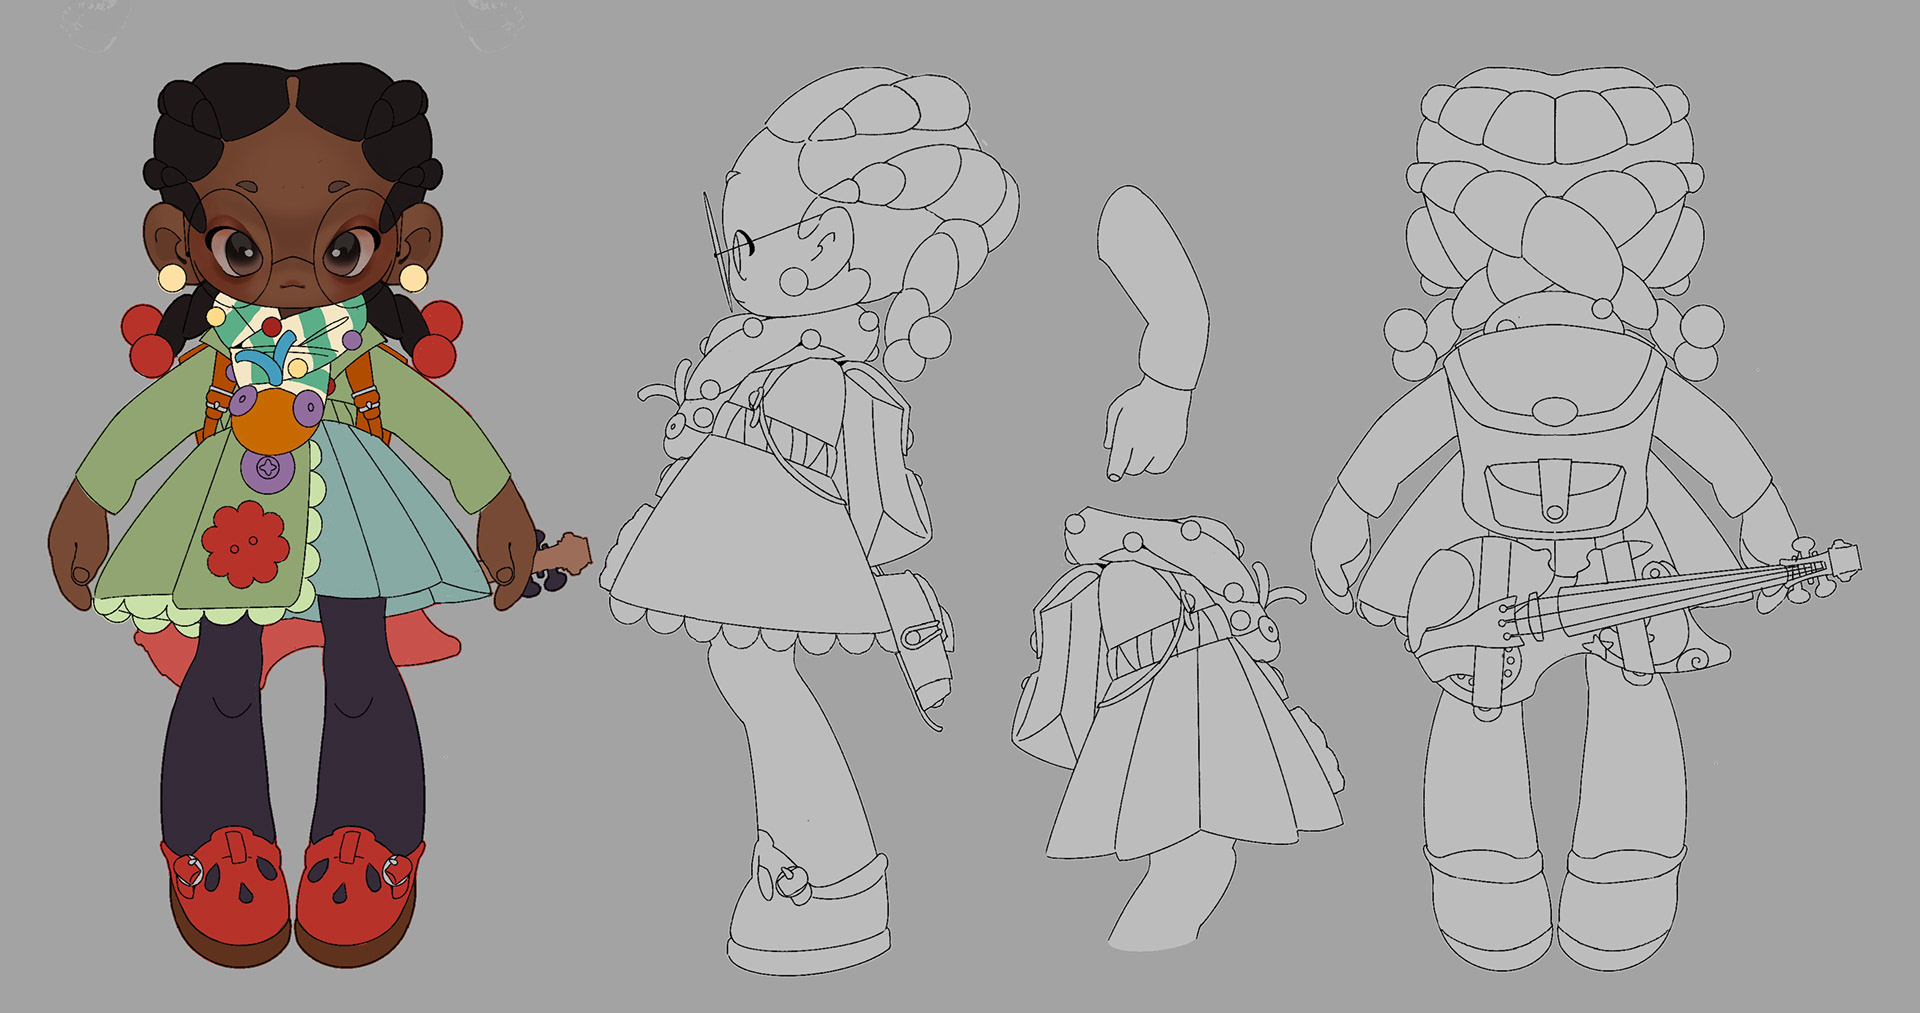
NAIMA

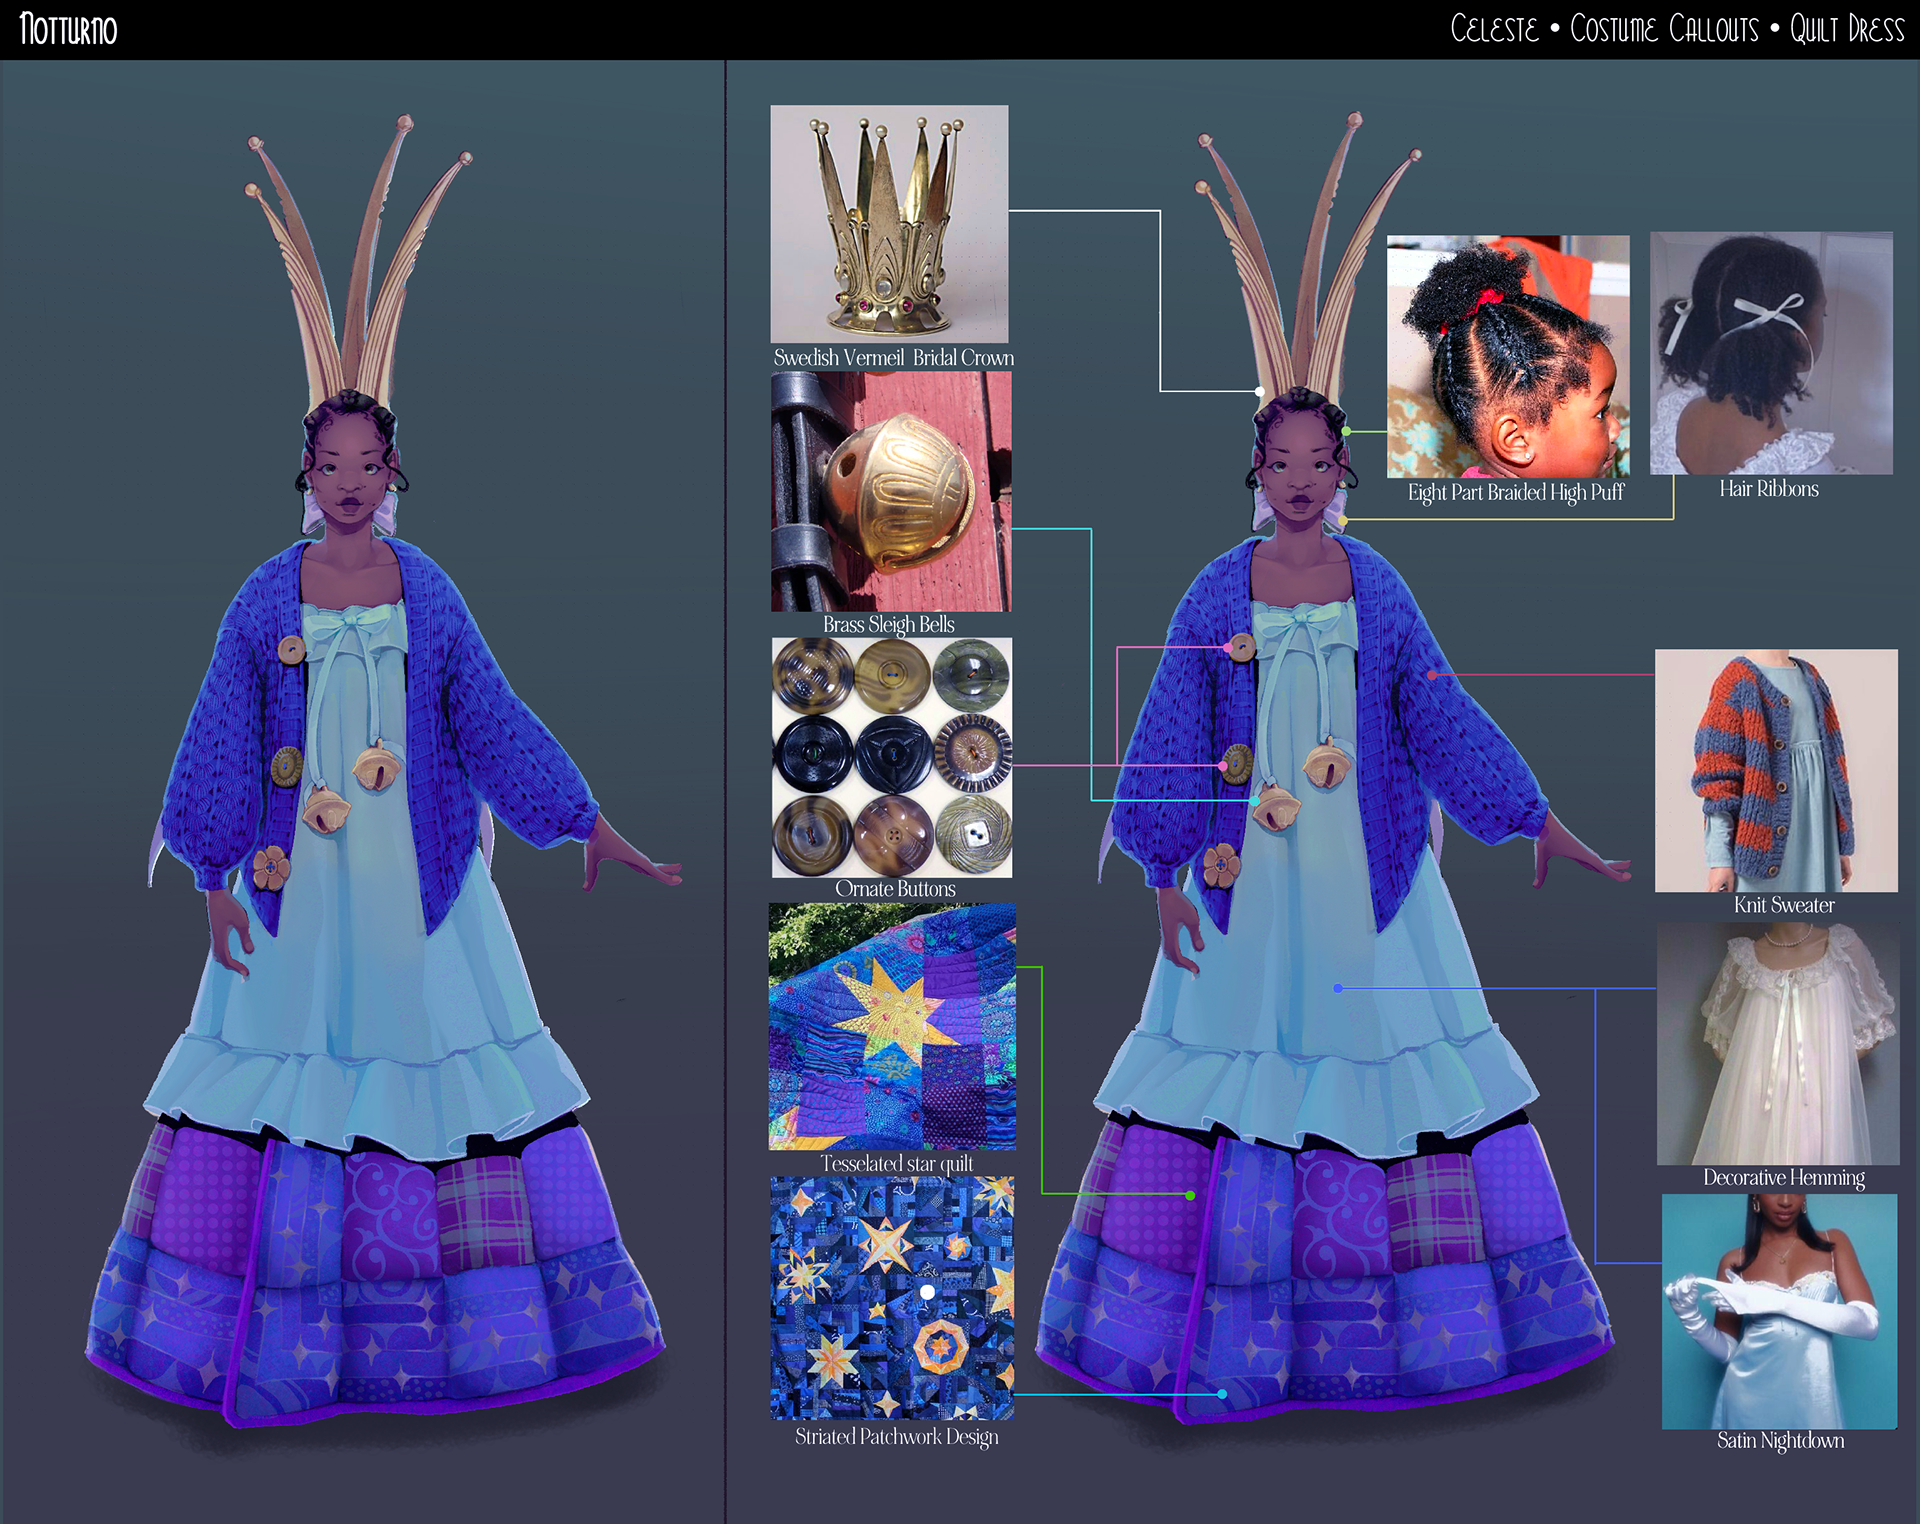


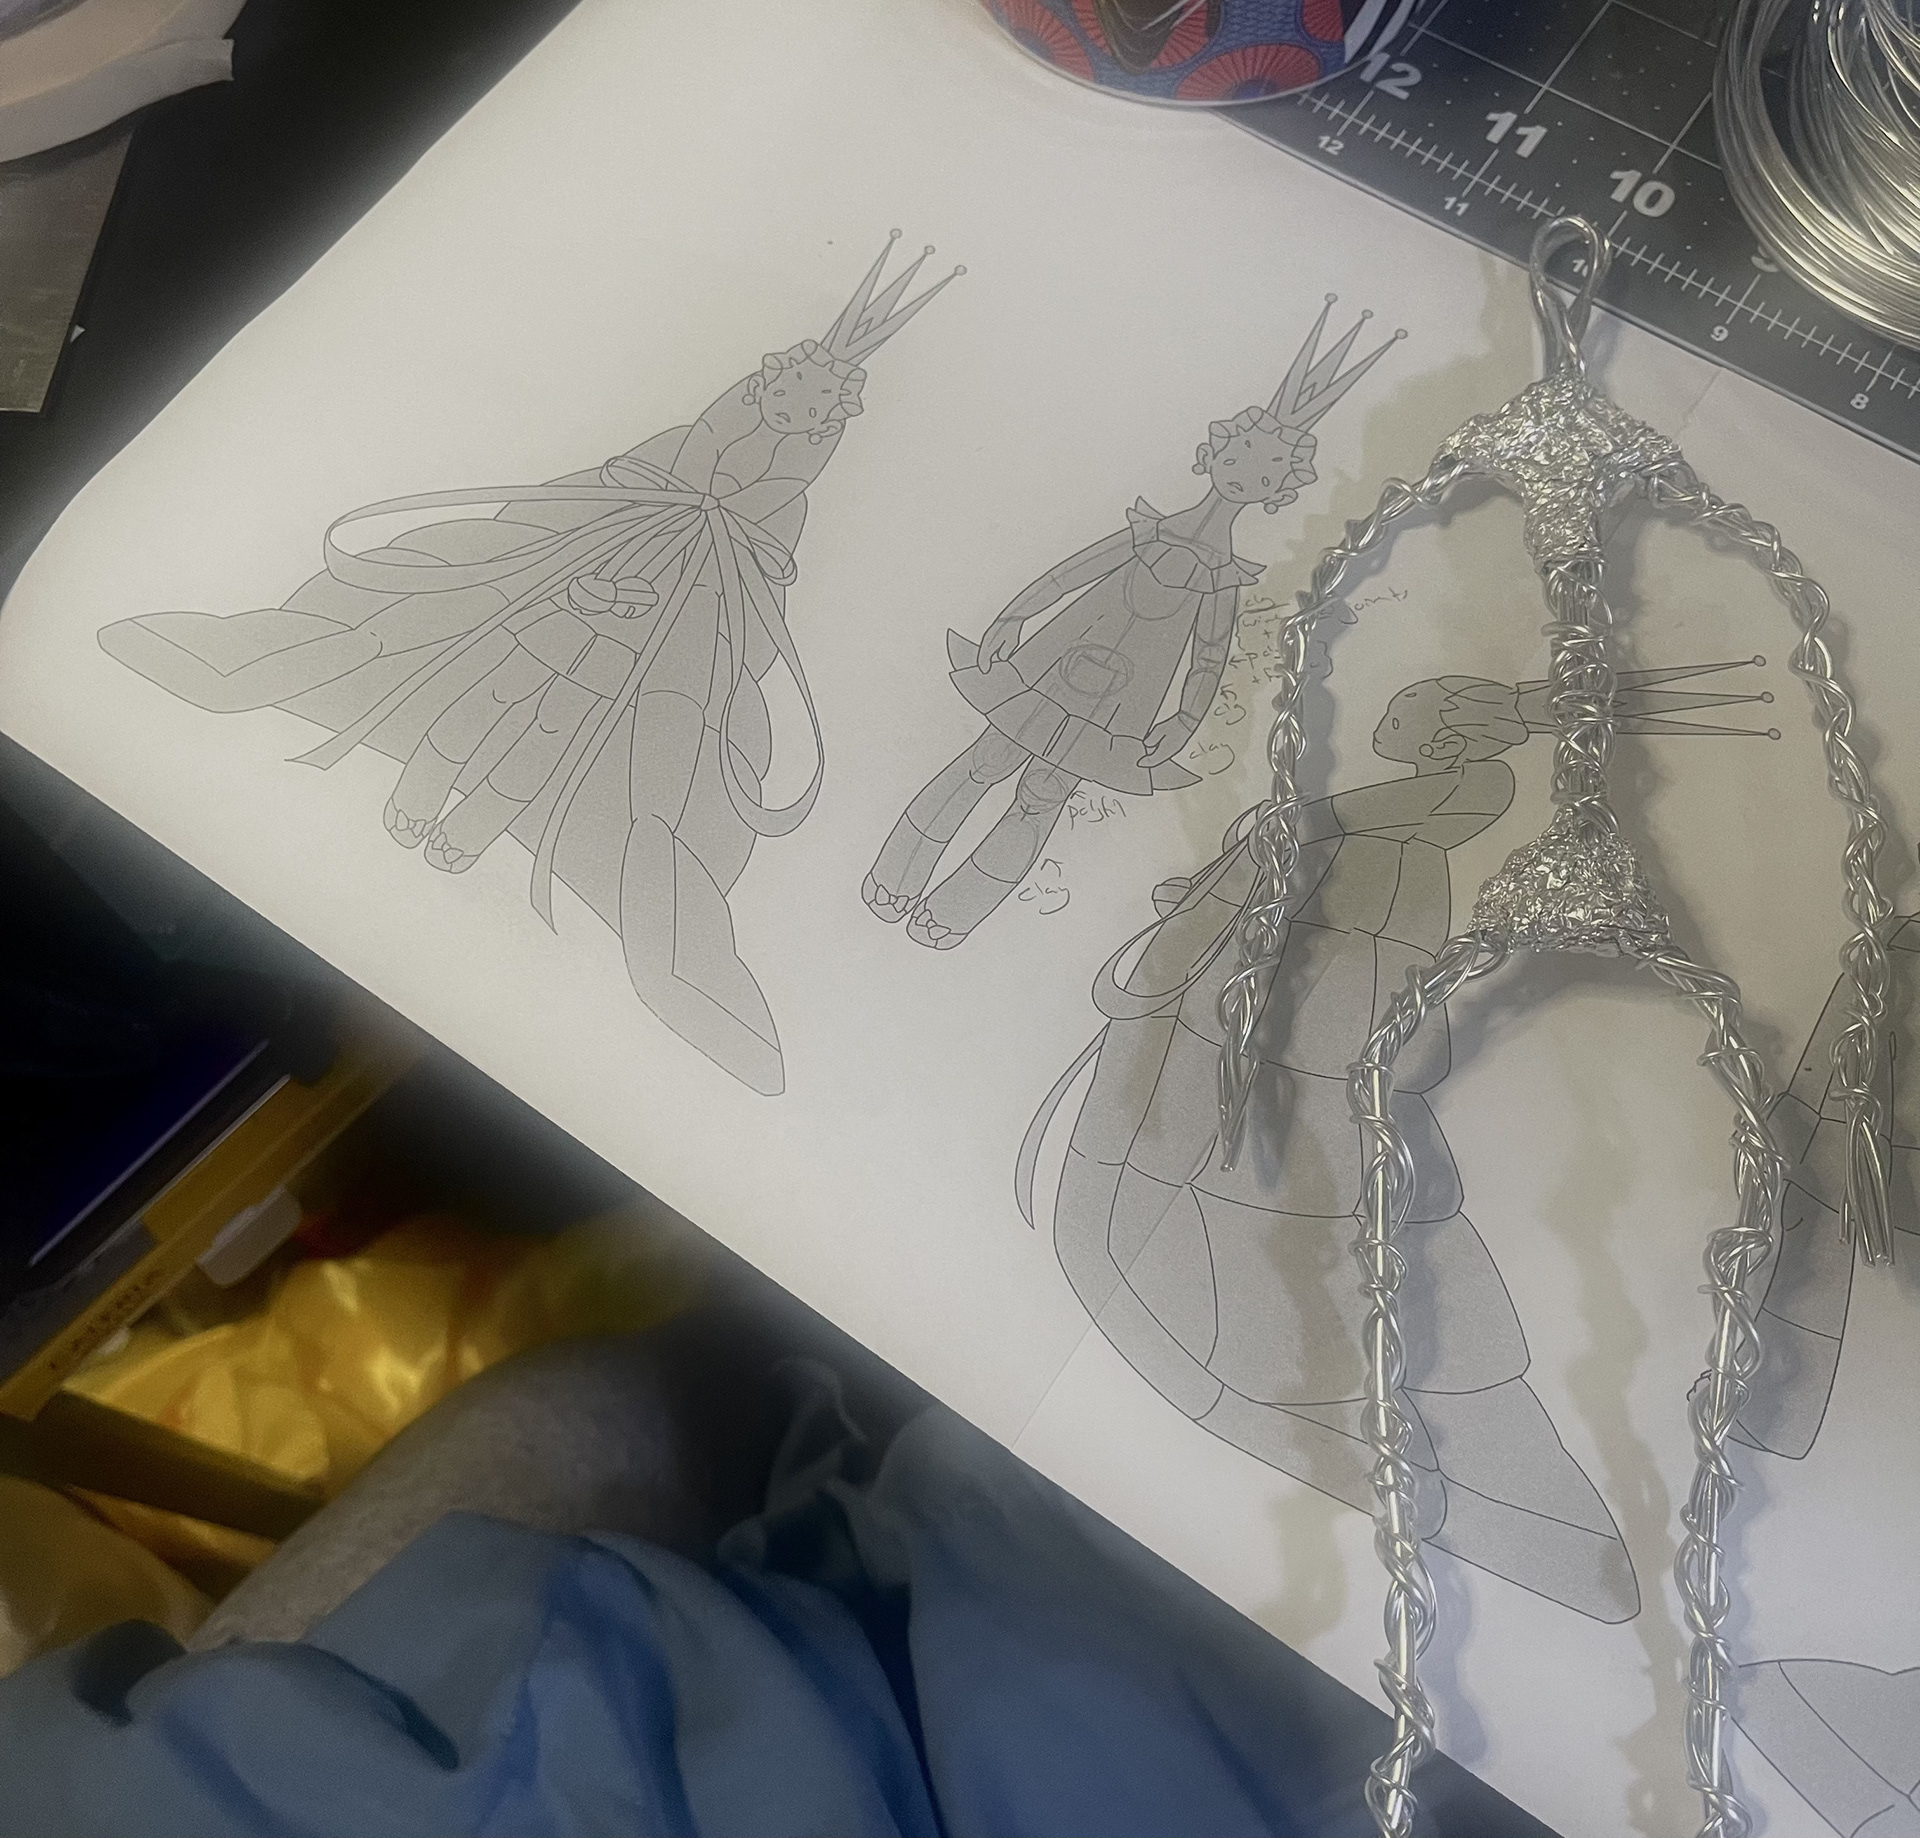
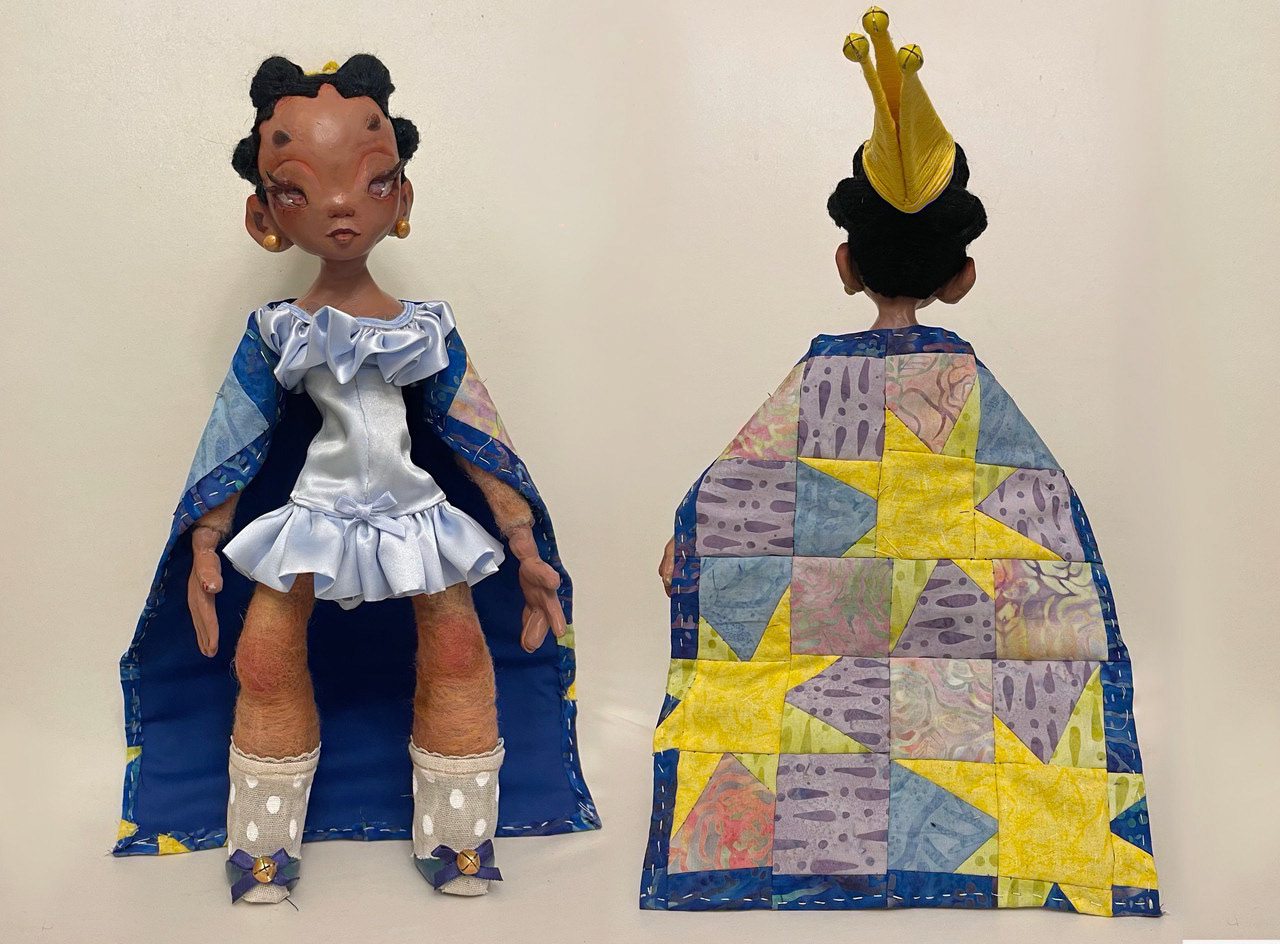
I firstly focused on identifying key characteristics of Celeste’s design such as color, shape, and symbols to make her design more toyetic. Her character is inspired by Charmaine Wilkerson’s Black Cake and princesses of the Russian Ballet- so I made her look playfully regal, as a prototypical sleeping beauty. The initial costuming process gave me the opportunity to iron out her fabrication and textile constraints, so this finalized sketch was isolated to ironing out her new shape language.
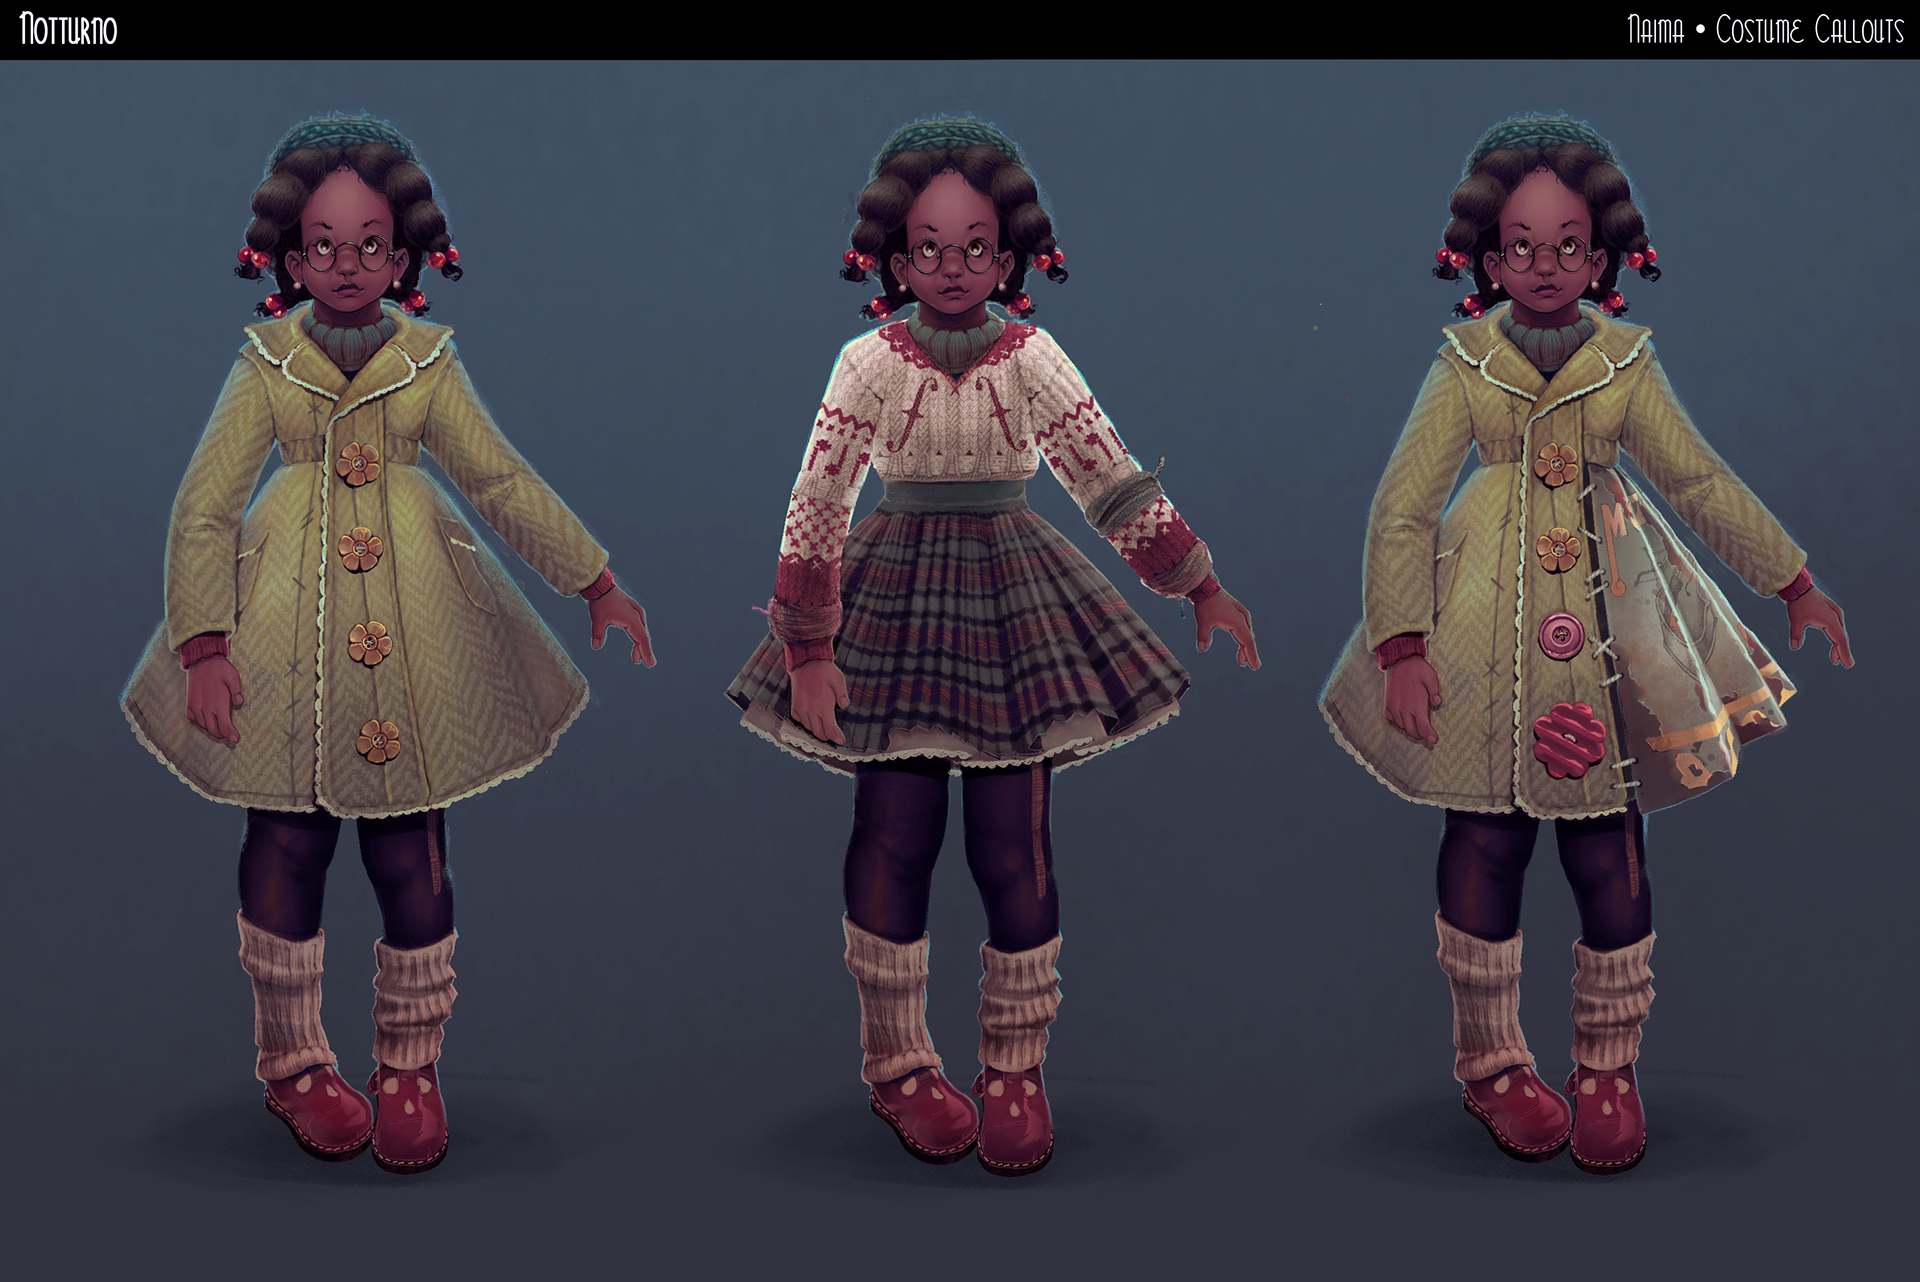
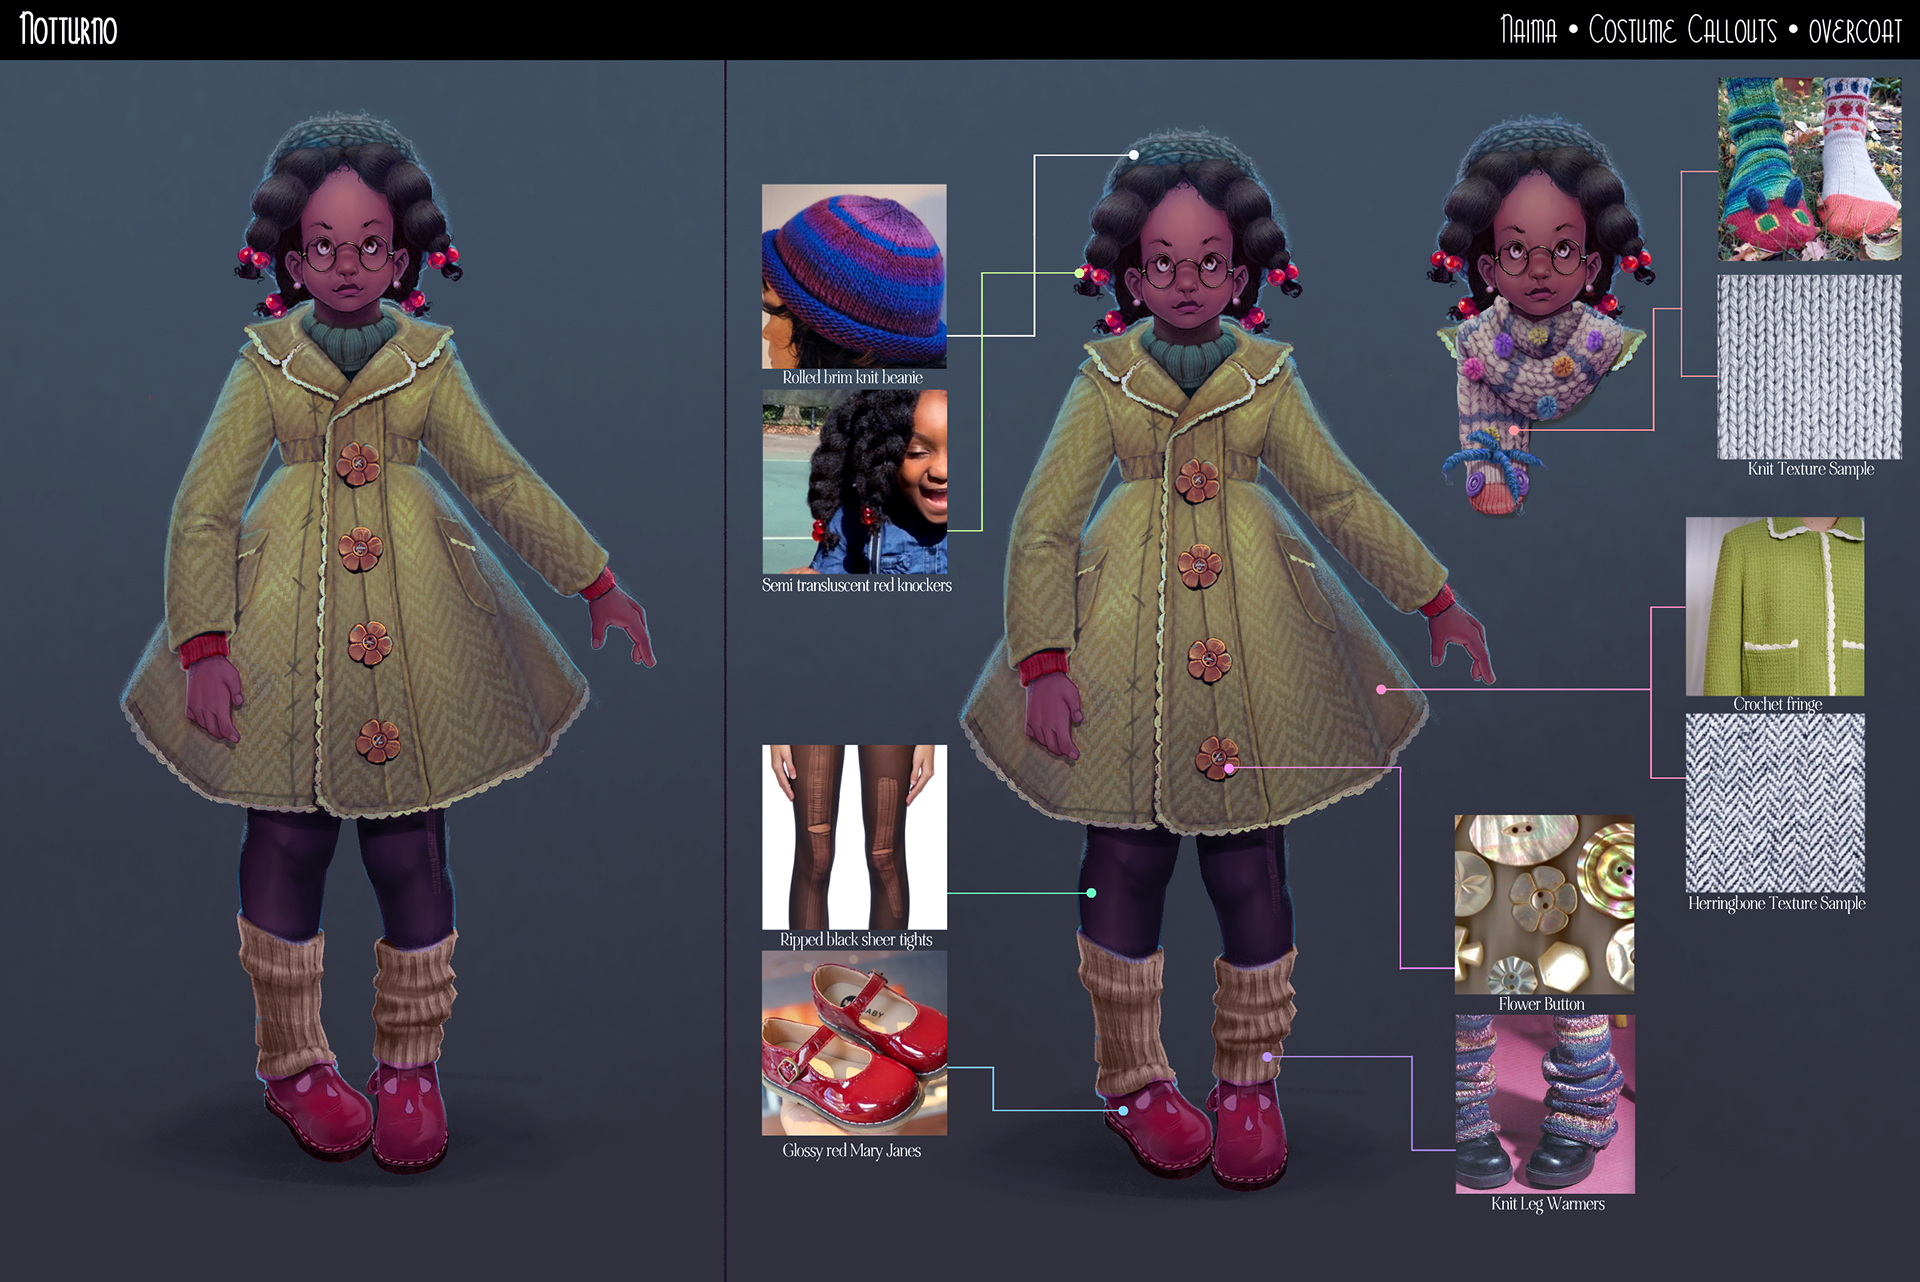
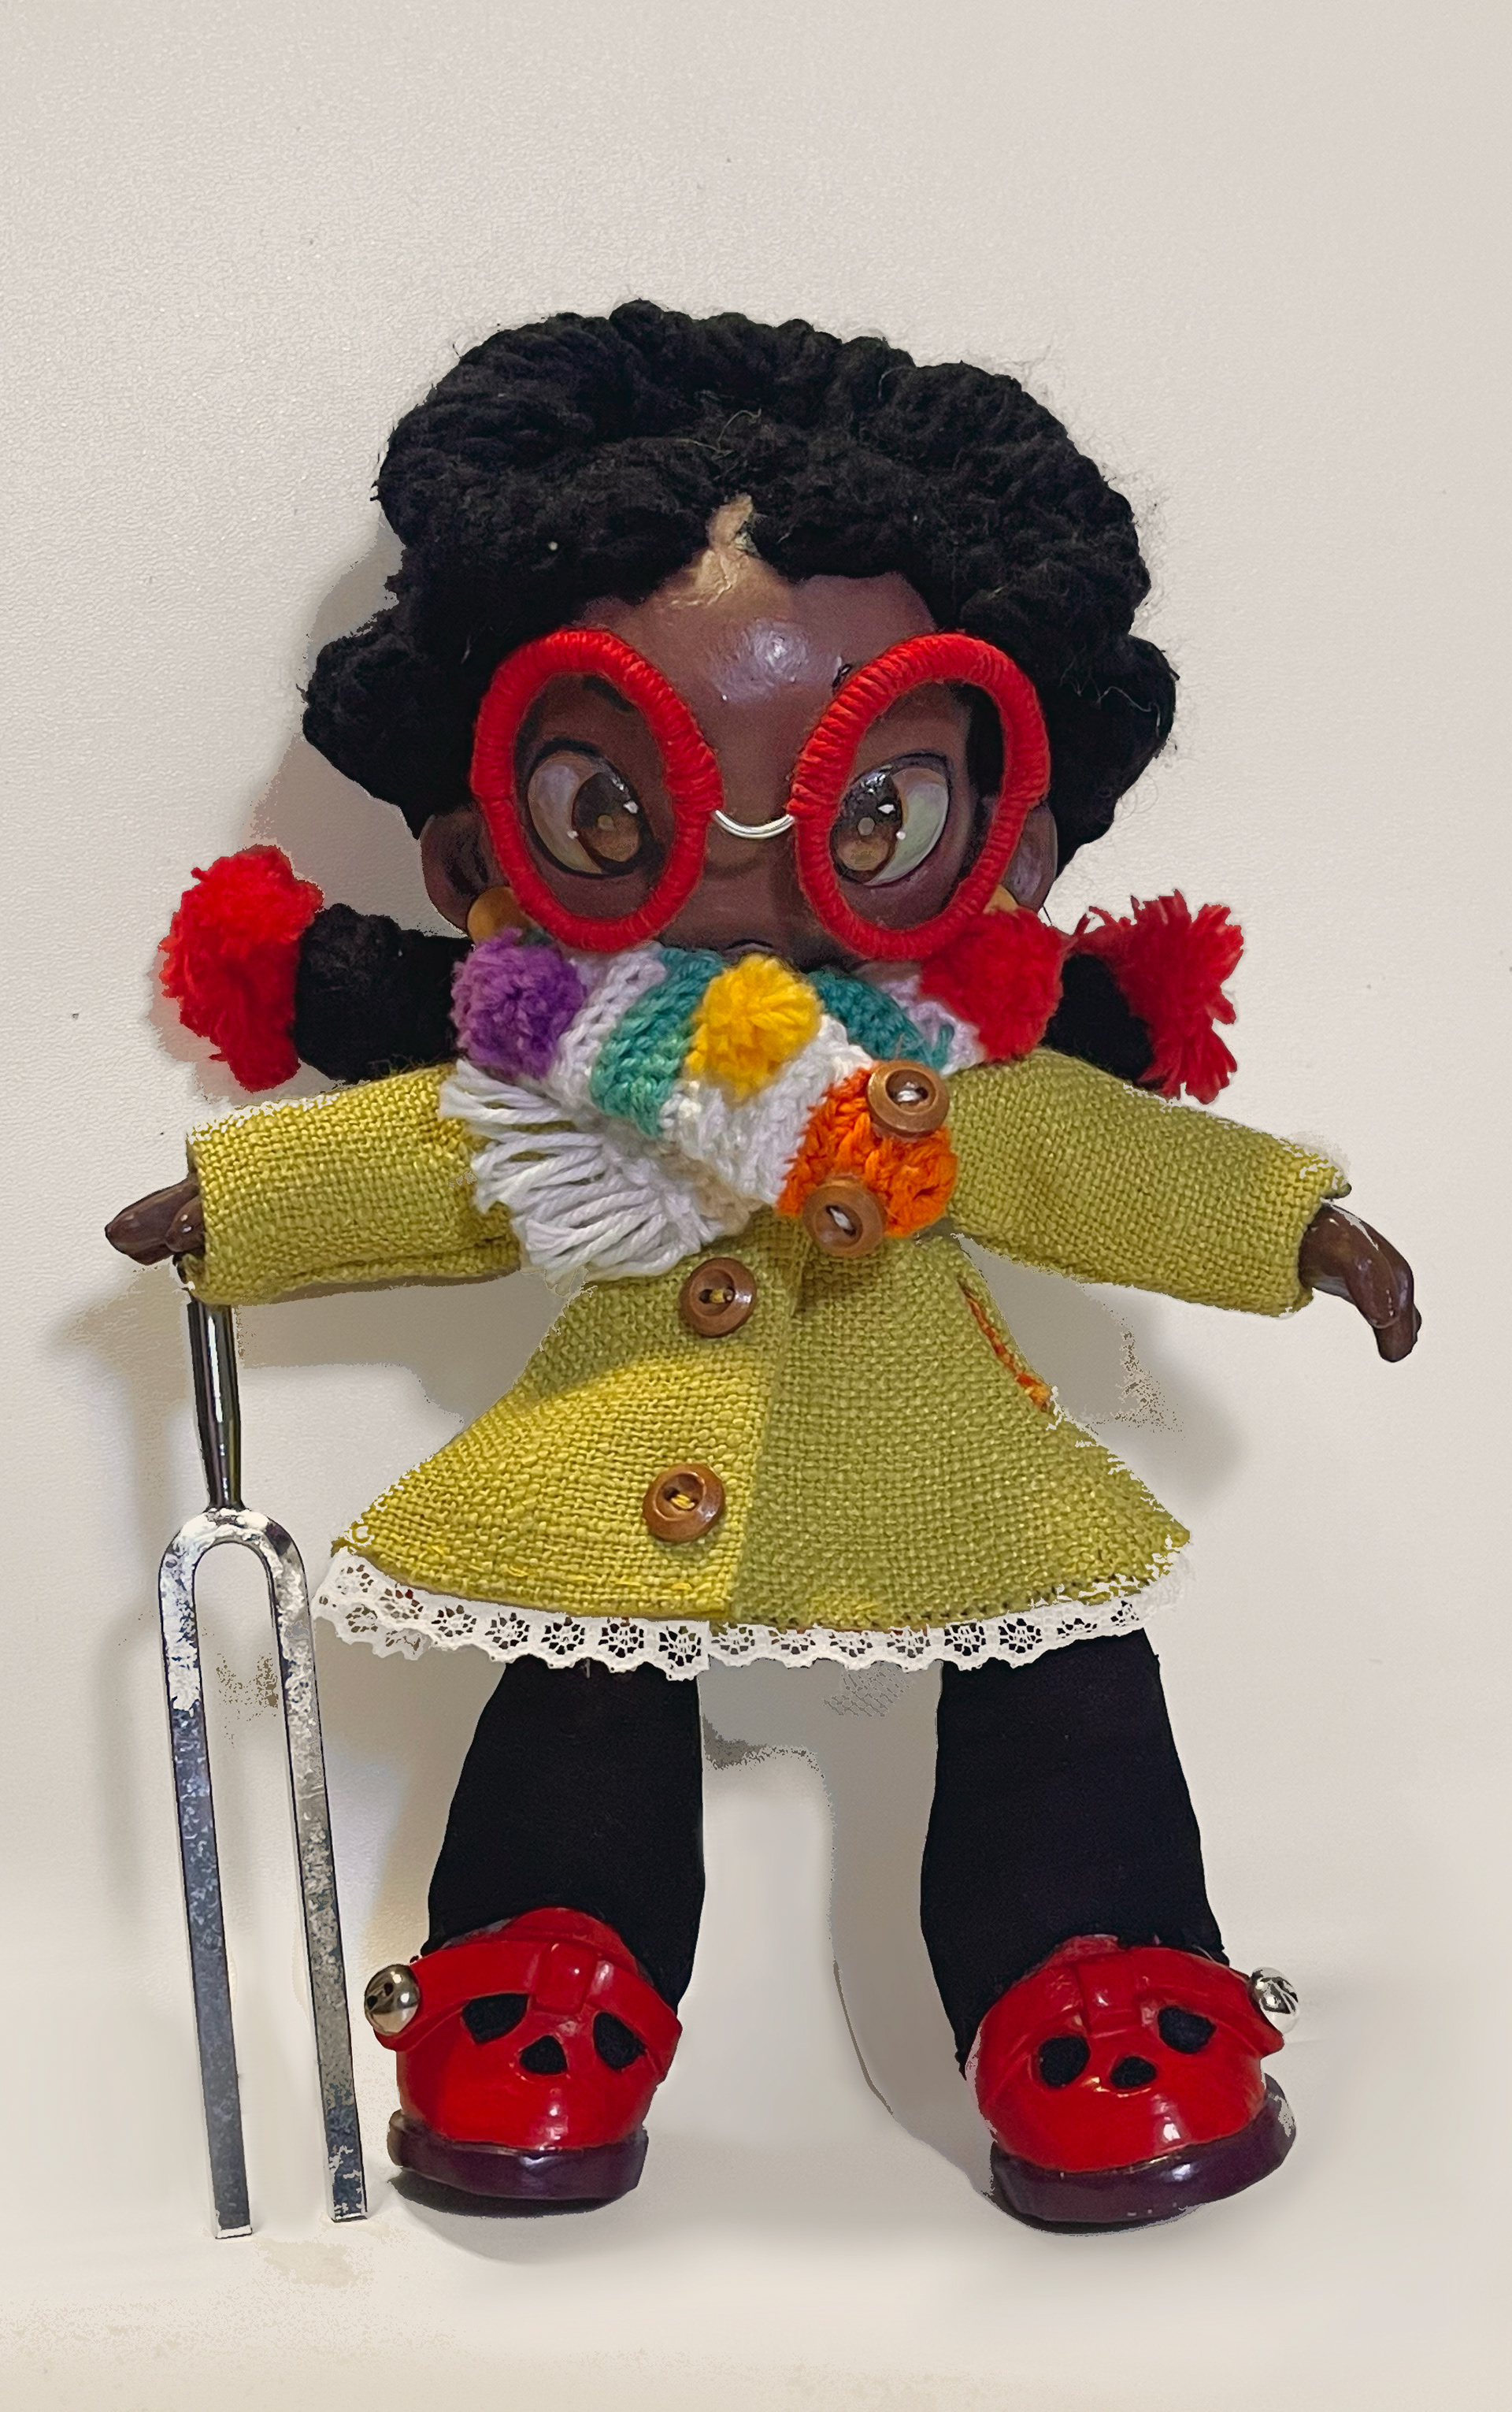
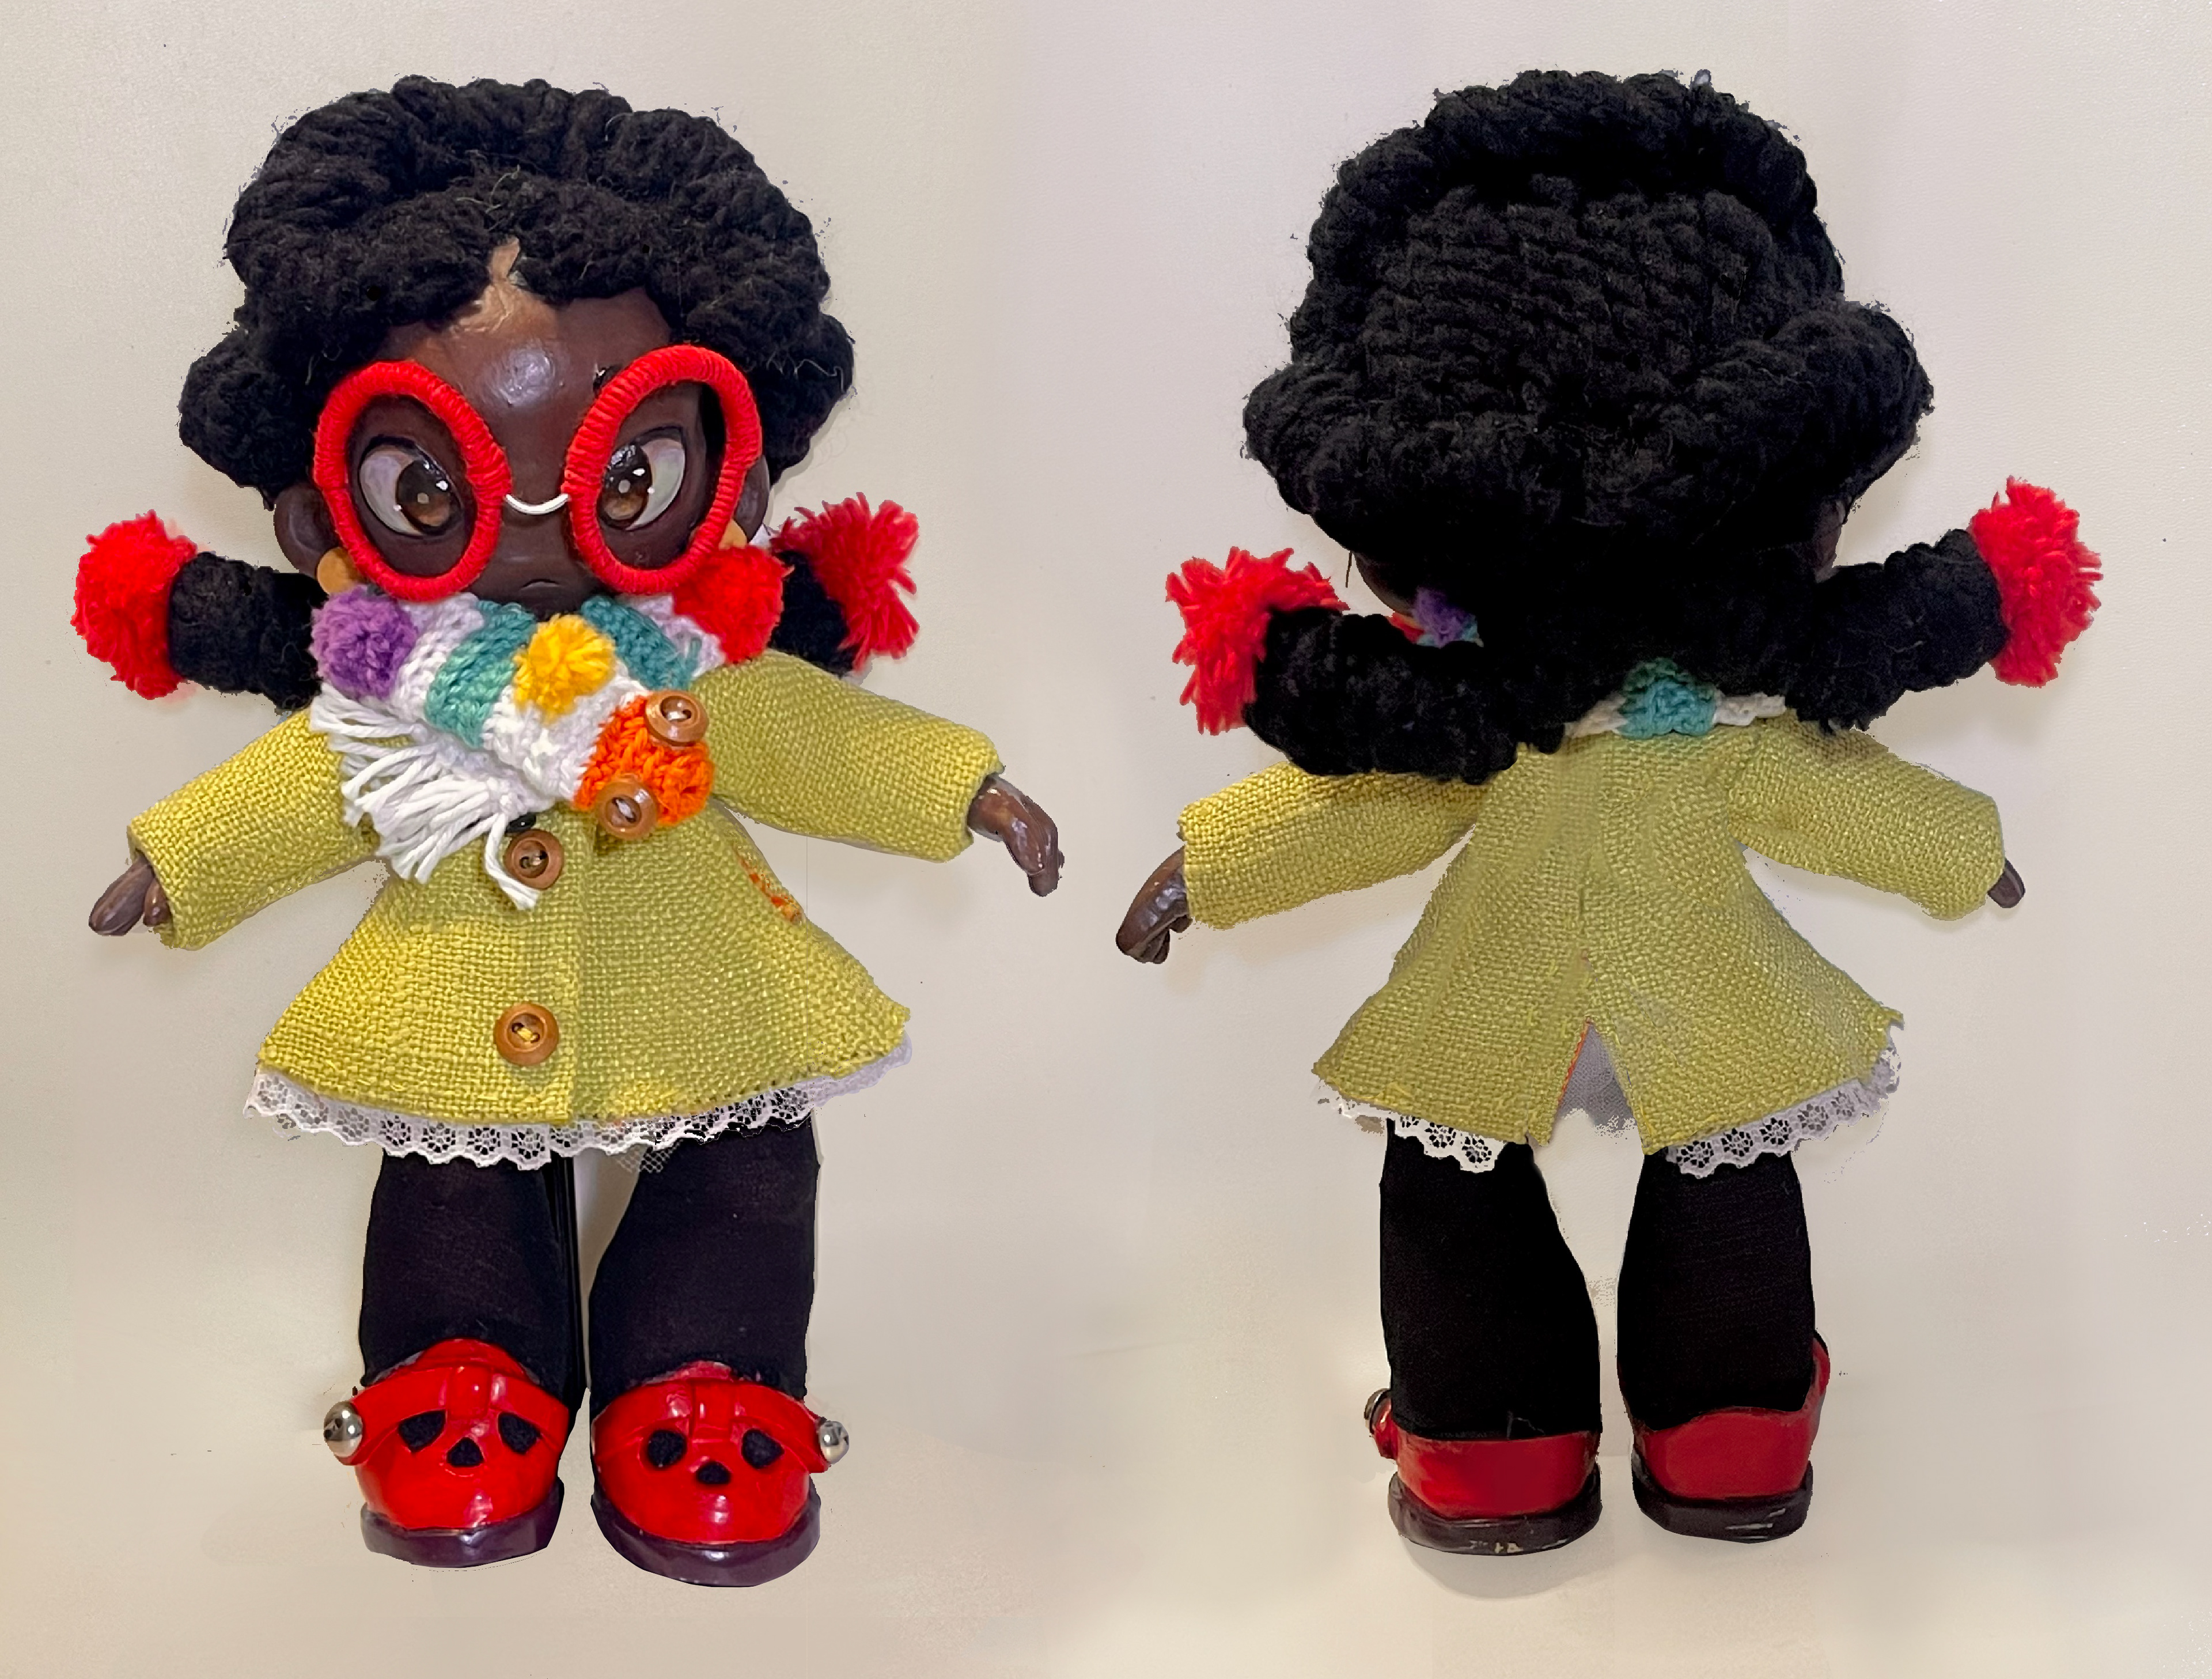
Naima's design was inspired by Alice in Wonderland. Translating the unyieldingly curious and temperamental child into an image reflecting my own upbringing was a fun and challenging process in the balancing of nostalgic artefacts into a contemporary image. Her jacket was one of my favorite part of her outfit to design- inspired by a seafoam green recital coat I wore during one of my first performances.
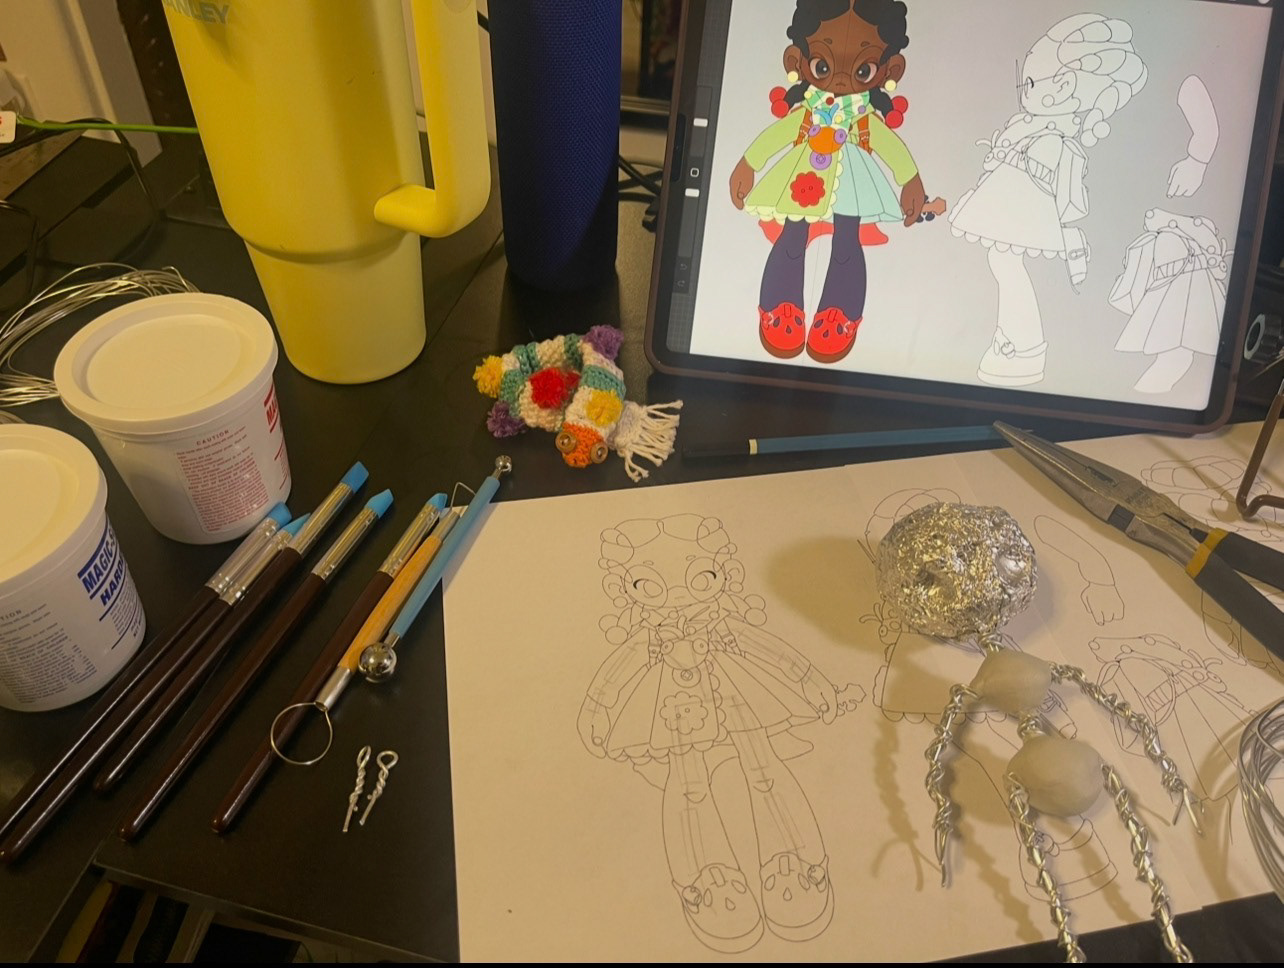
I started by building Celeste's armature from aluminum wire and foil. I knew I wanted her to appear lanky, so I shortened her chest and extended the size of her lower leg to lean into that knock-kneed, pubescent stature.
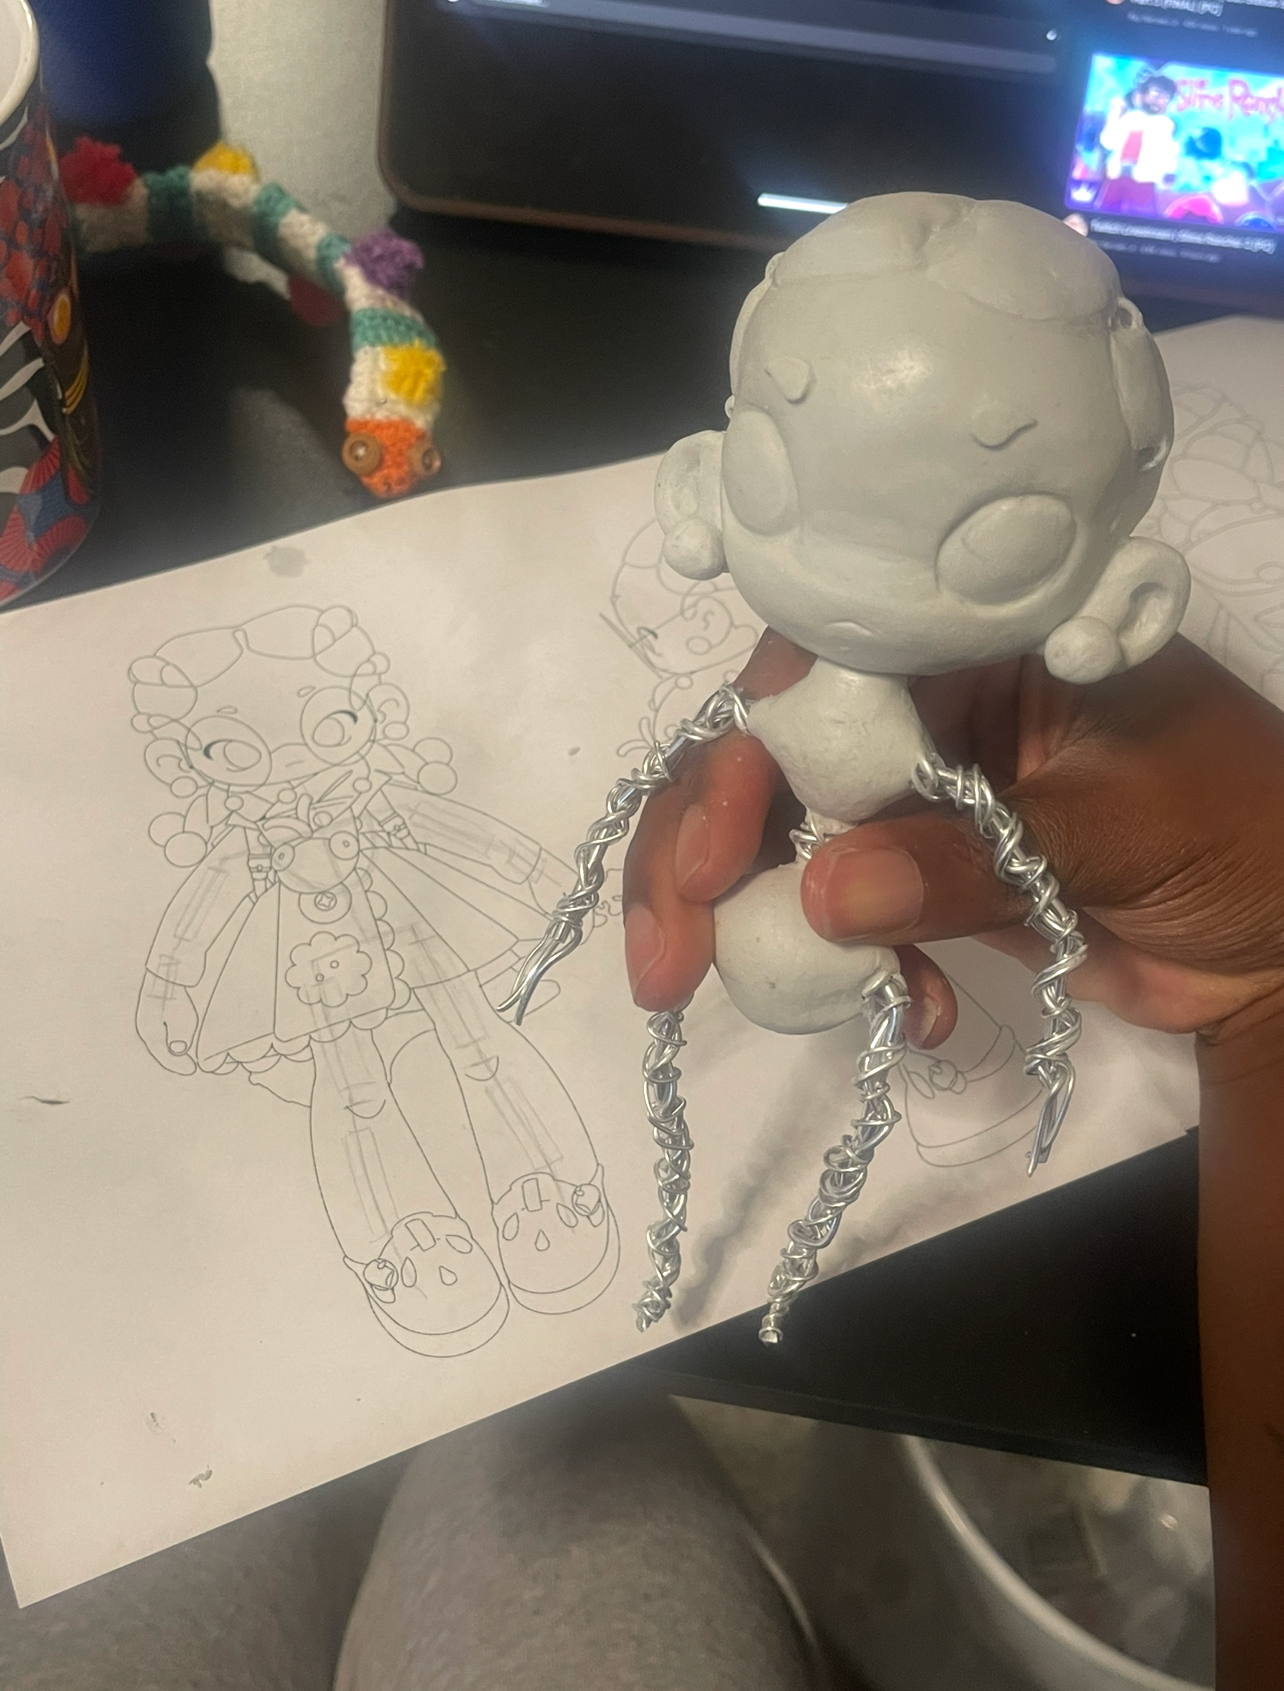
I began with a similar process for Naima. Her model is considerably more stout than Celeste's, so I focused on grounding the majority of her weight to the middle of her body to balance the weight of her head.
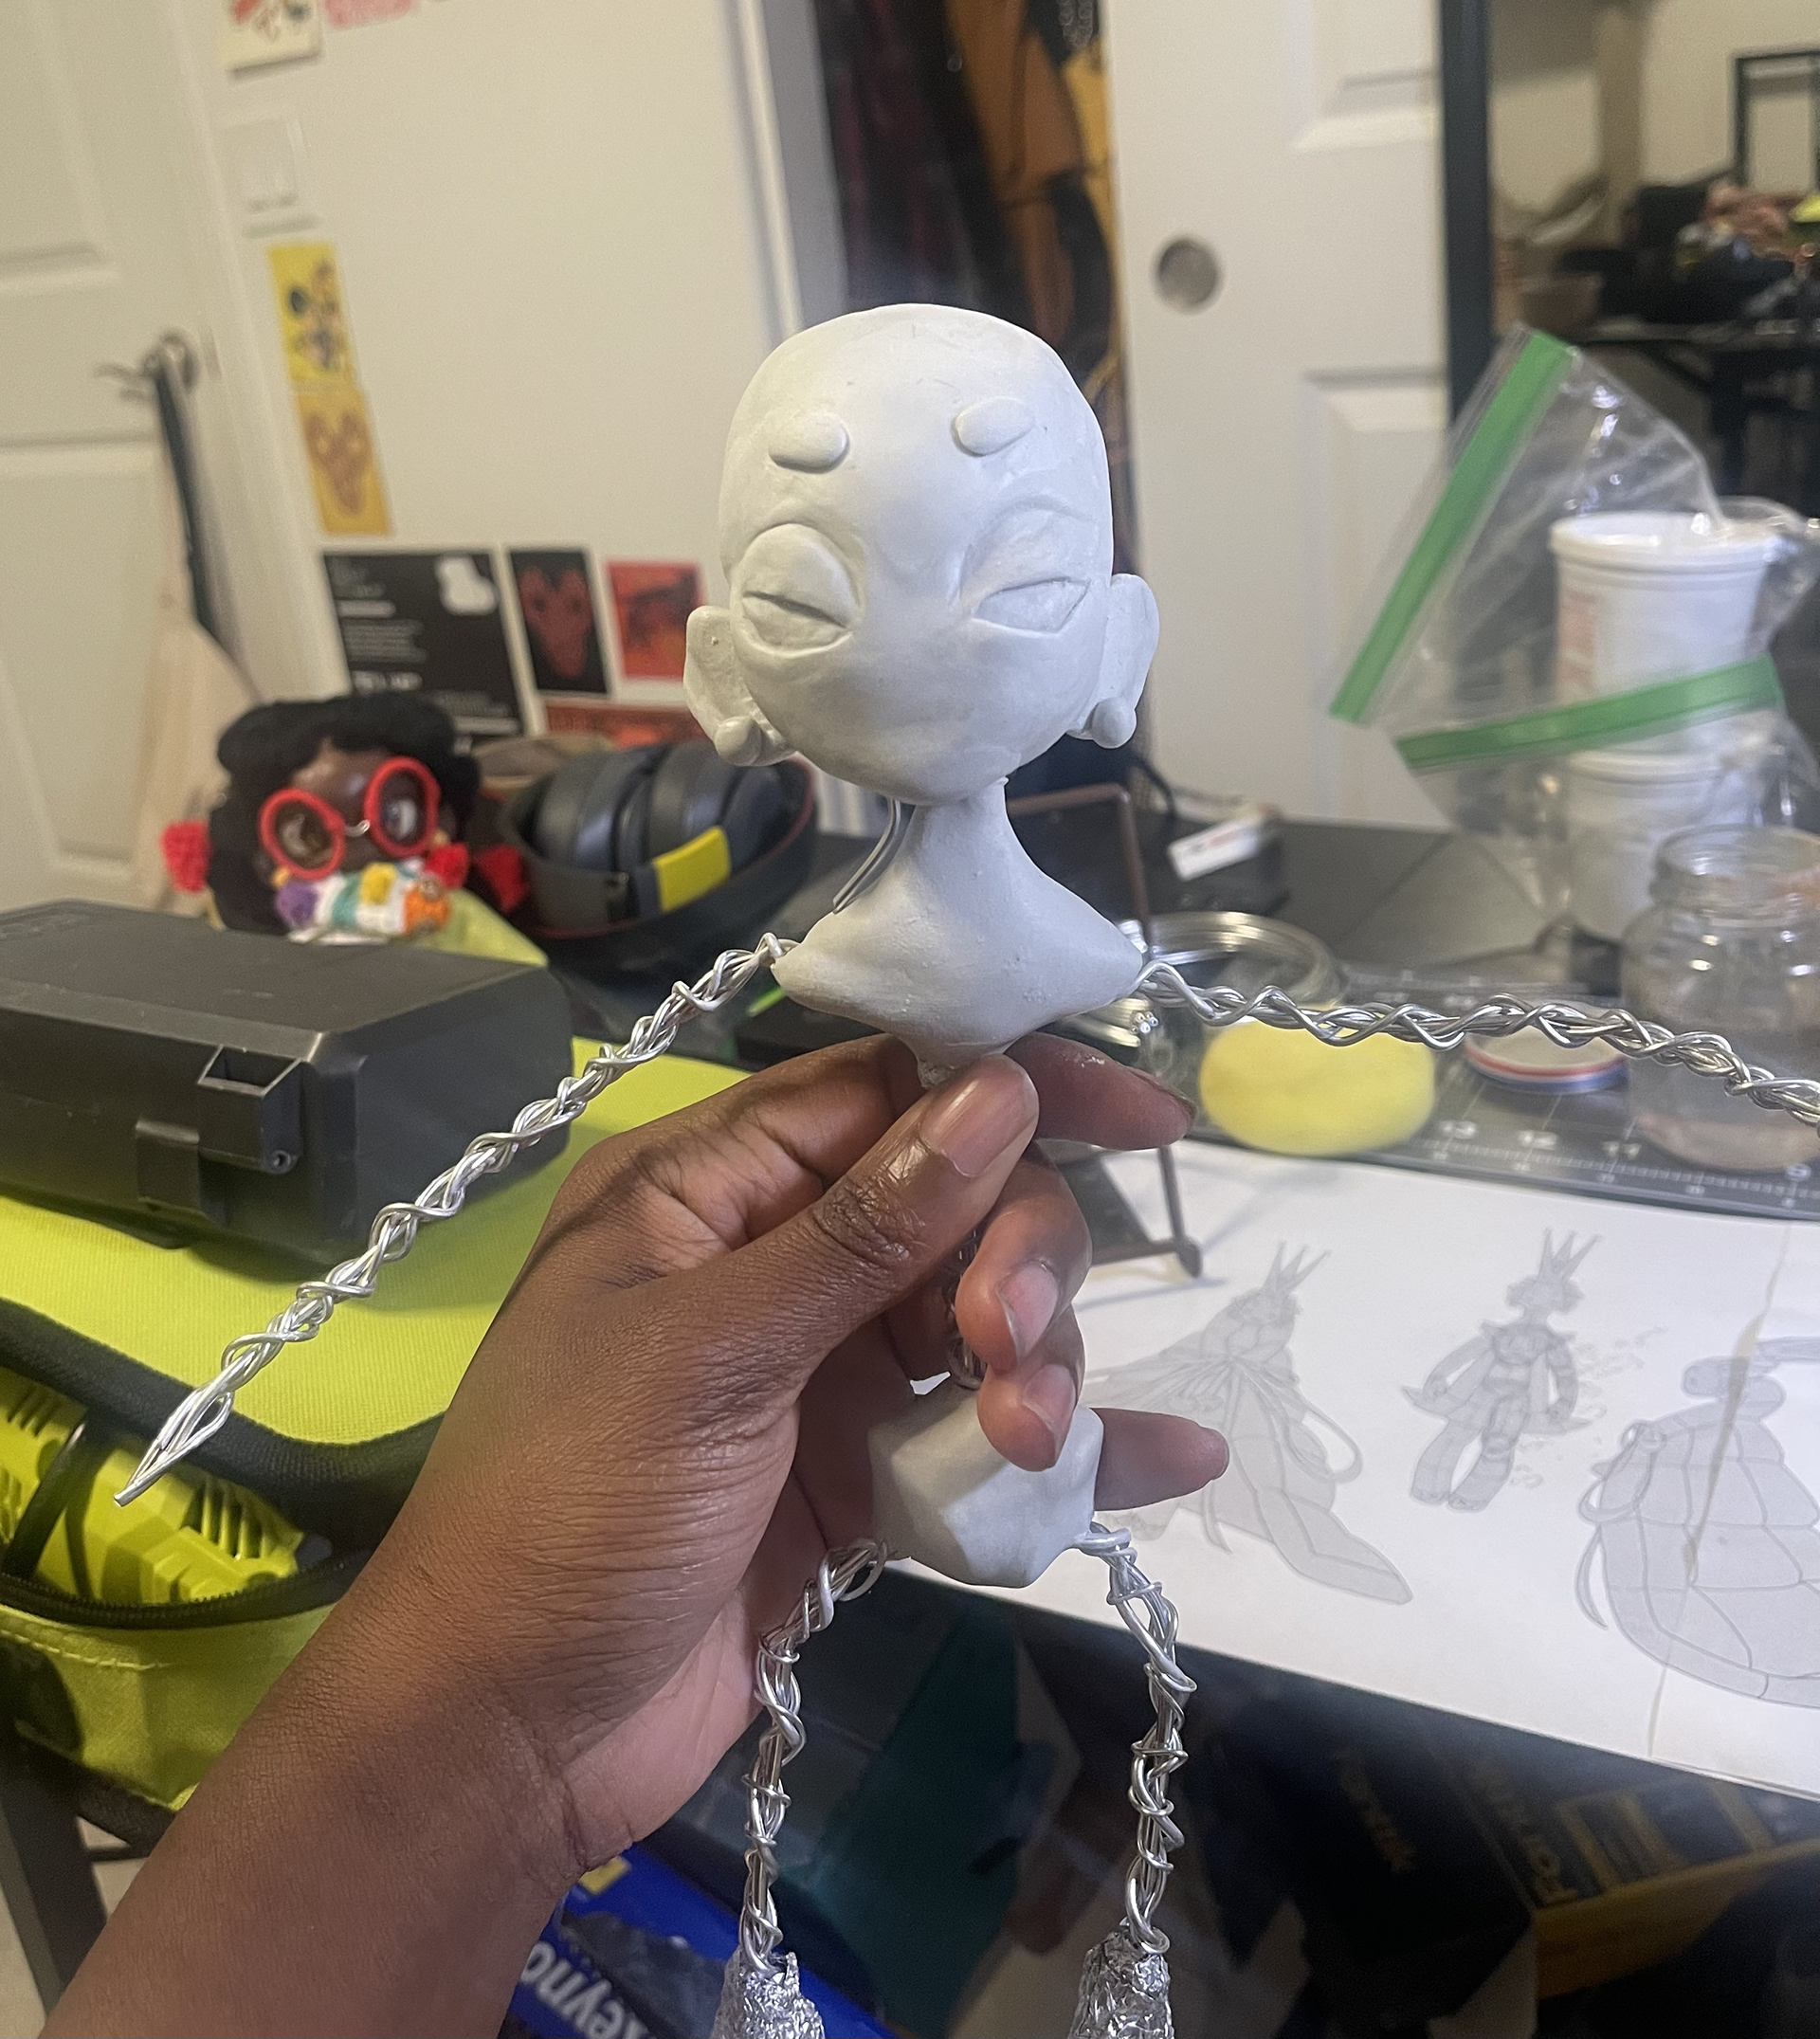
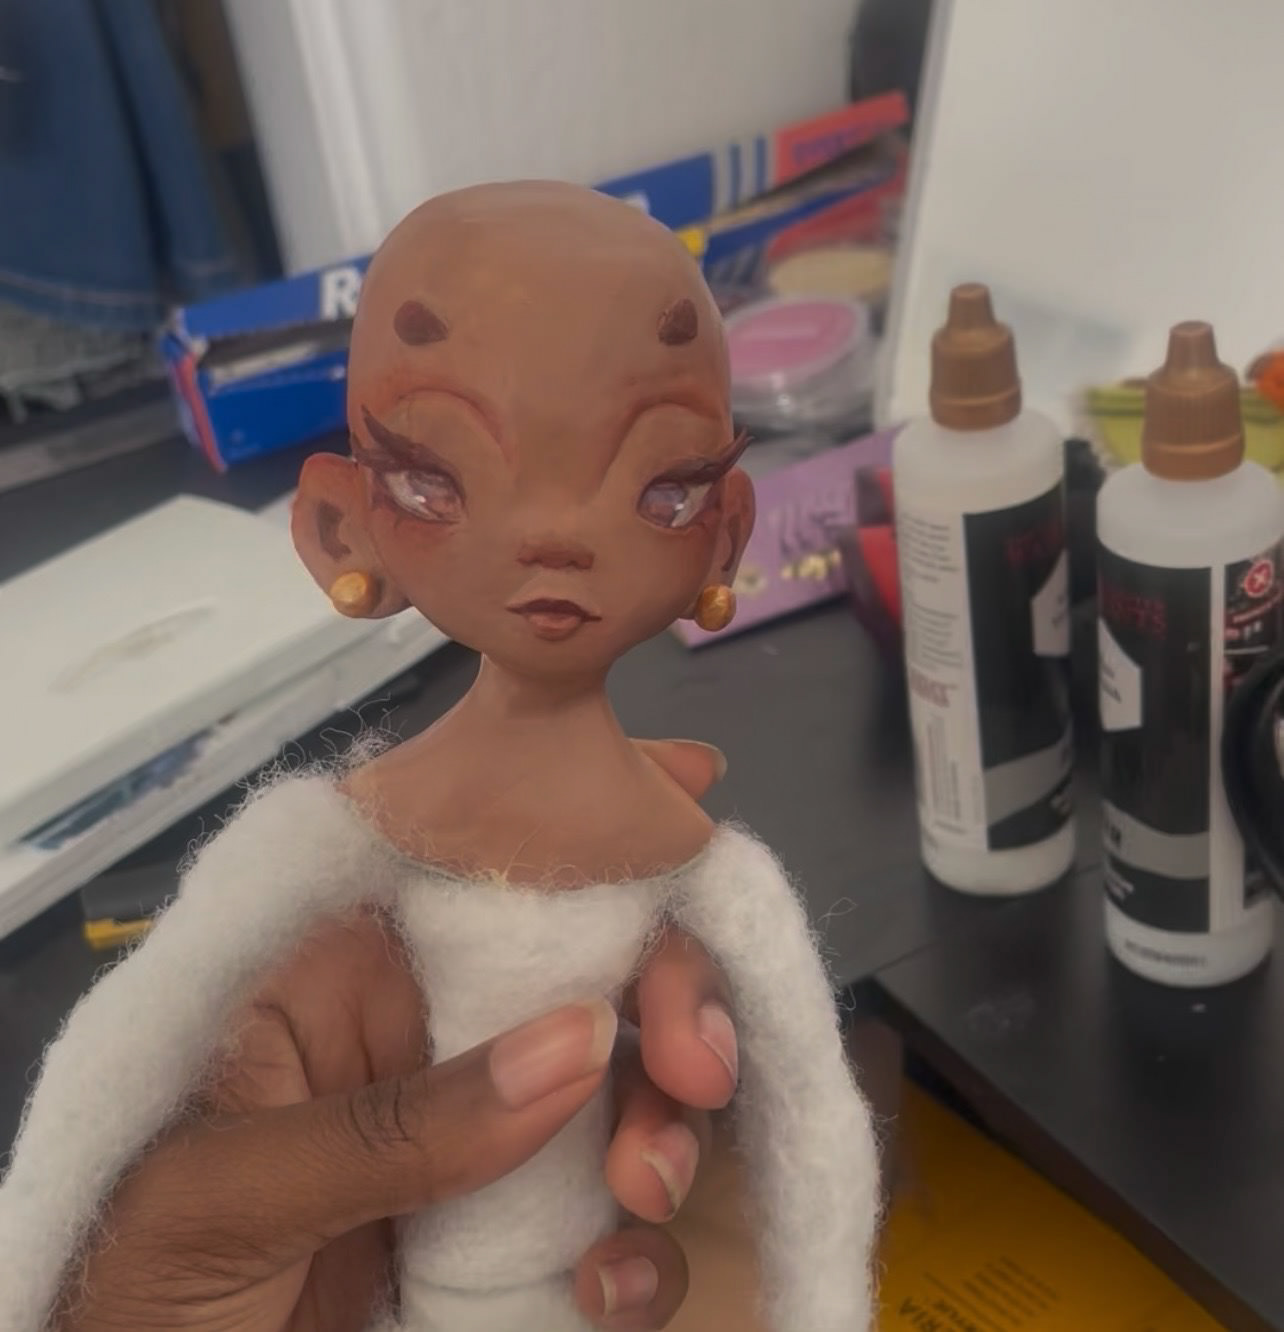
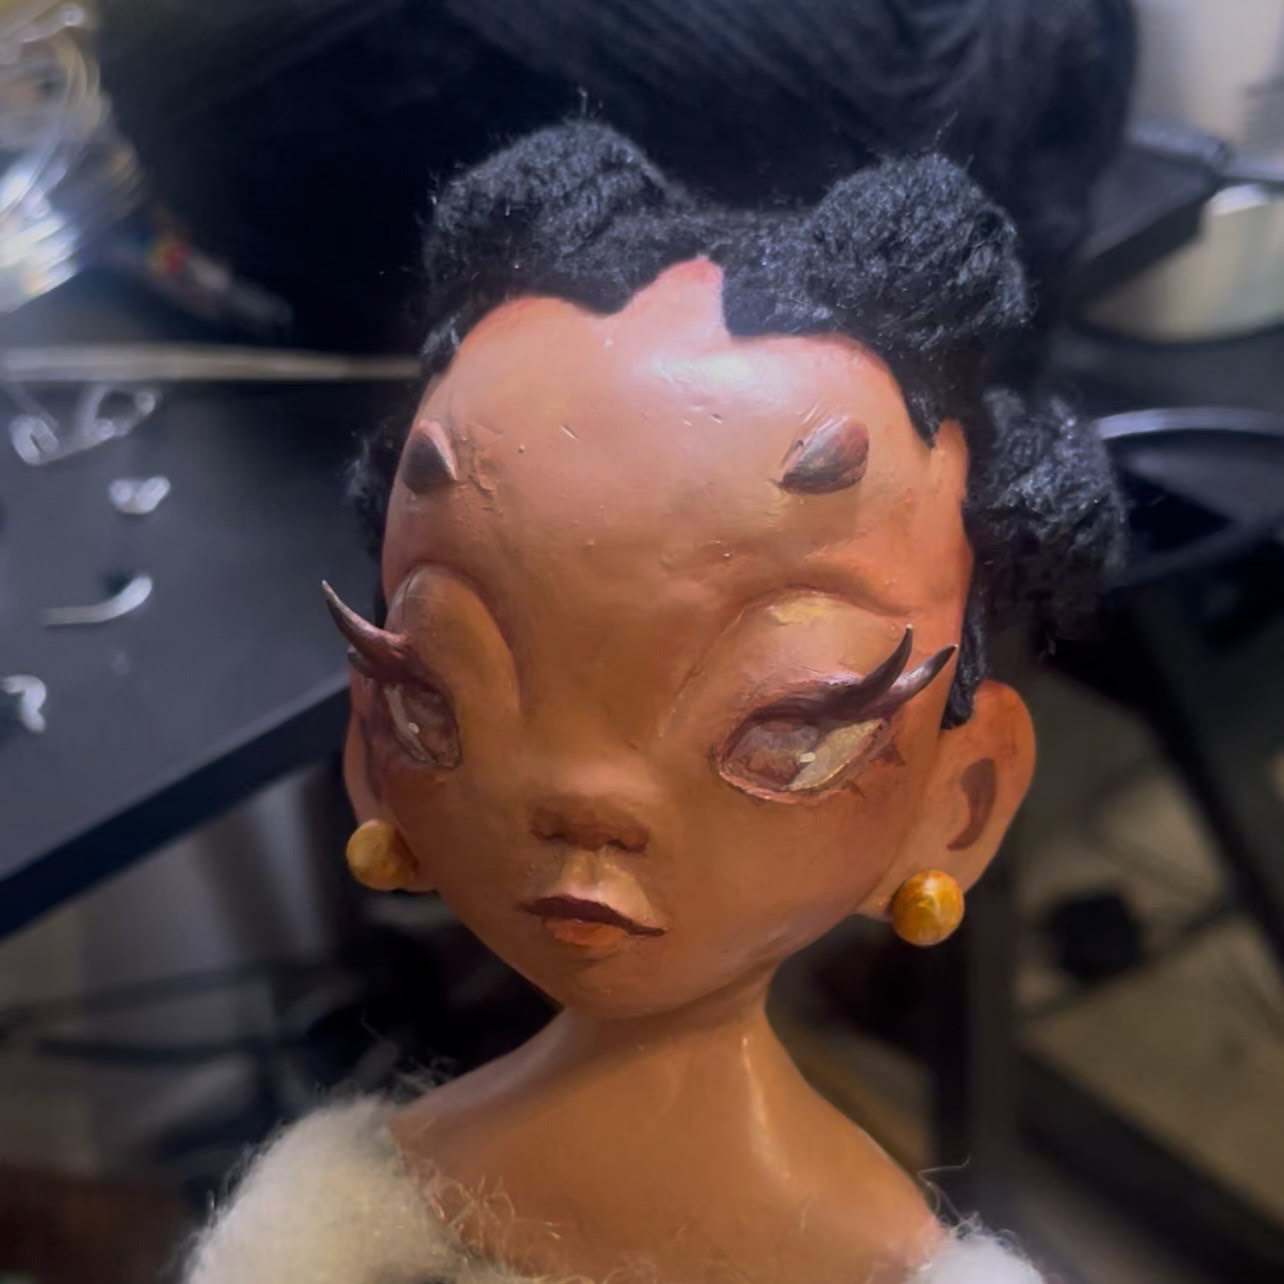
The initial sculpting pass on the head and pelvis using Apoxie sculpt. I initially wanted to make her head bobble and left spacing between the base of her skull and her neck, but with the weight constraints of her head, hair, and crown, I ended up affixing her head to her neck with extra wire.
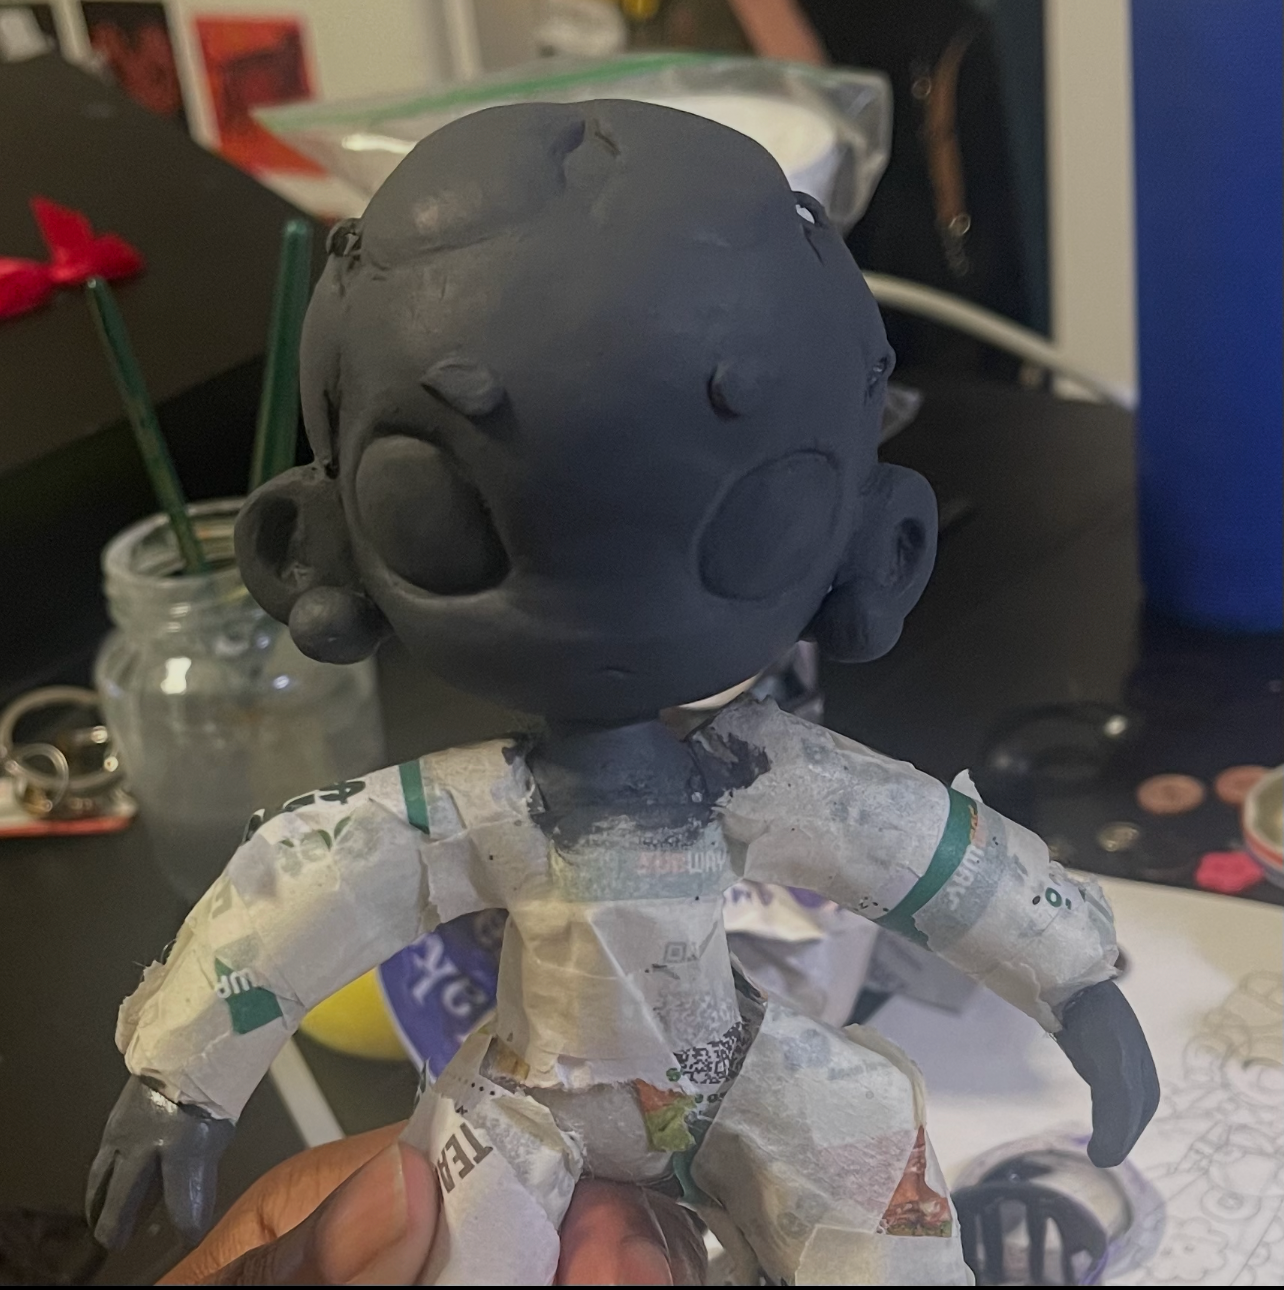
The initial body pass. Naima is a successfully bobble-headed doll, and her head sculpt leaned heavily into a bug-eyed design. I knew I was going to be reckoning with a large pair of glasses, so I emphasized the width of her maxillofacial region to give them room.

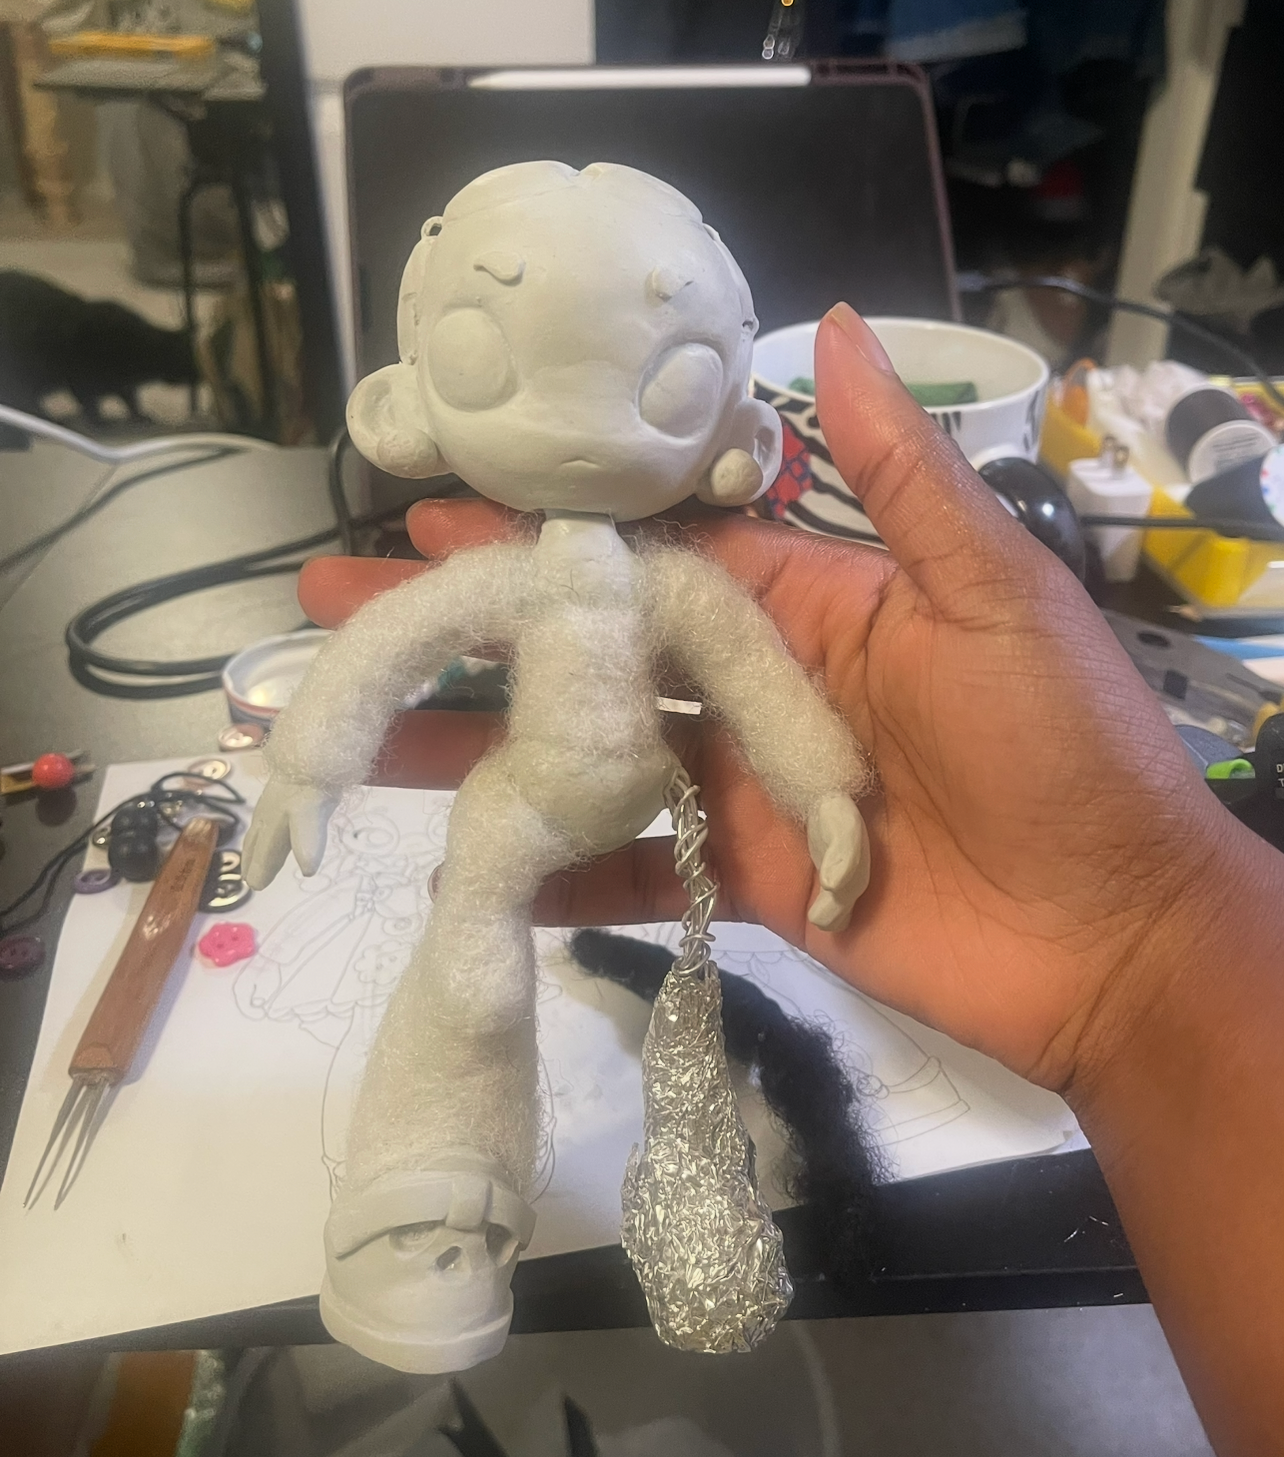
Further progress on Celeste's body. I chose to build out her appendages with Polyfil to give her some mobility and softness.
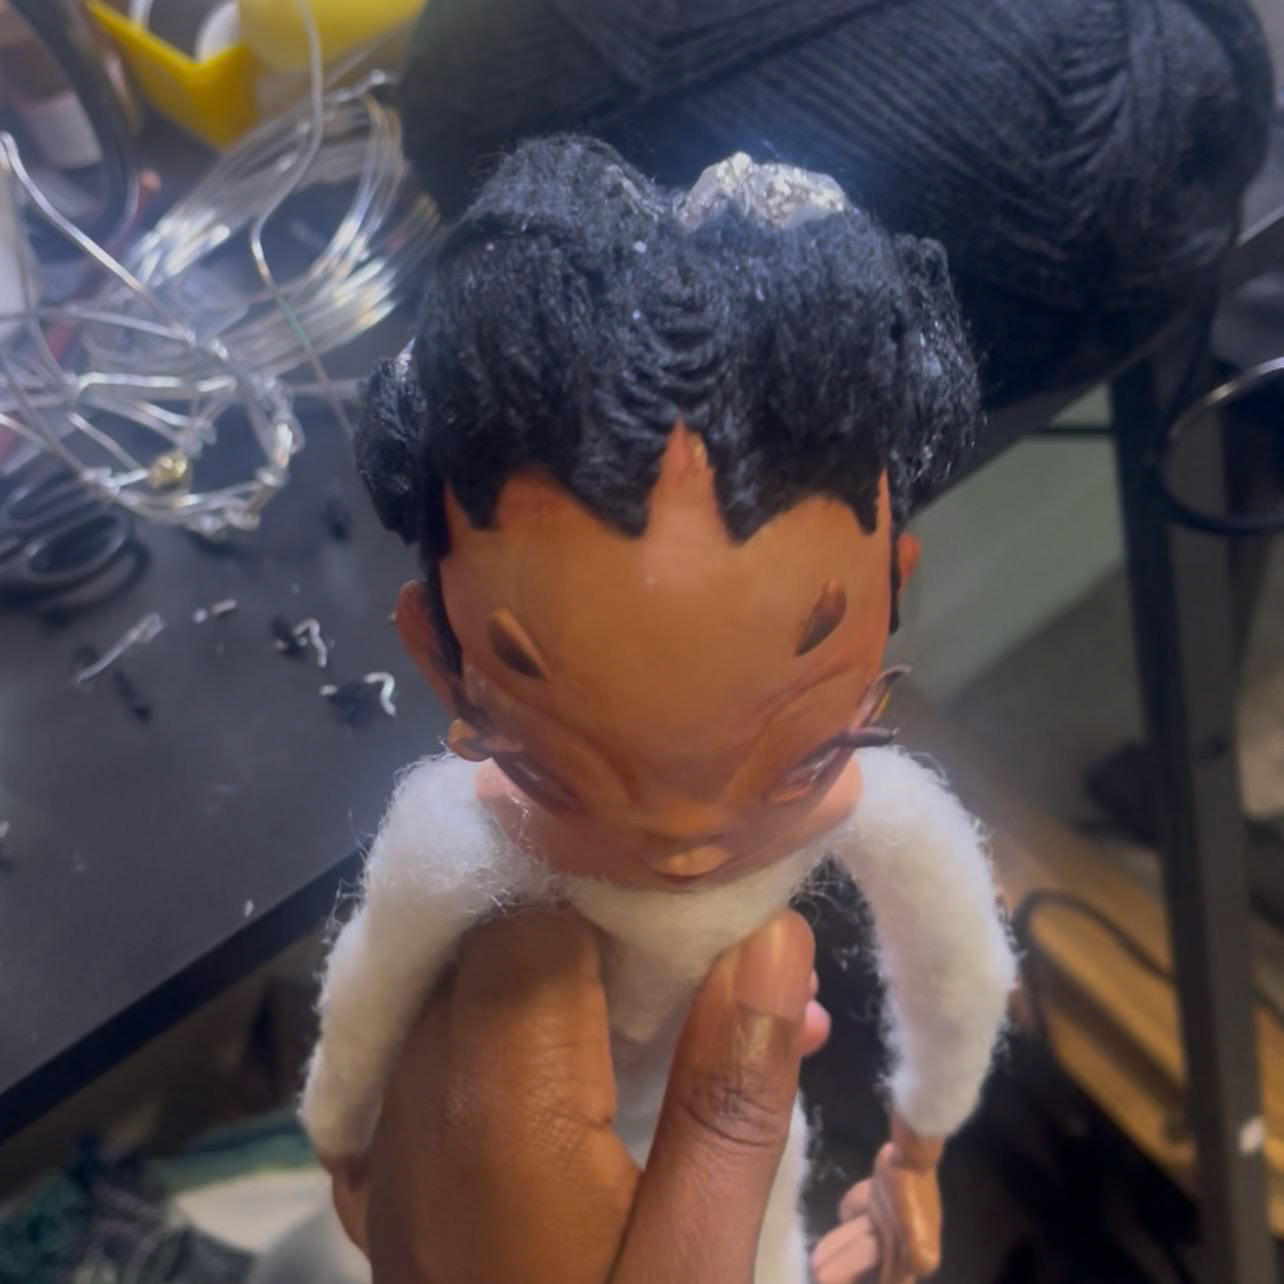
Even with a foil brain, Naima's head turned out a bit heavier than intended. I countered this by extending the width of her calves and shoes and using less foil in exchange for a heavier Apoxie clay, and packed her joints tight with Polyfil for mobility.
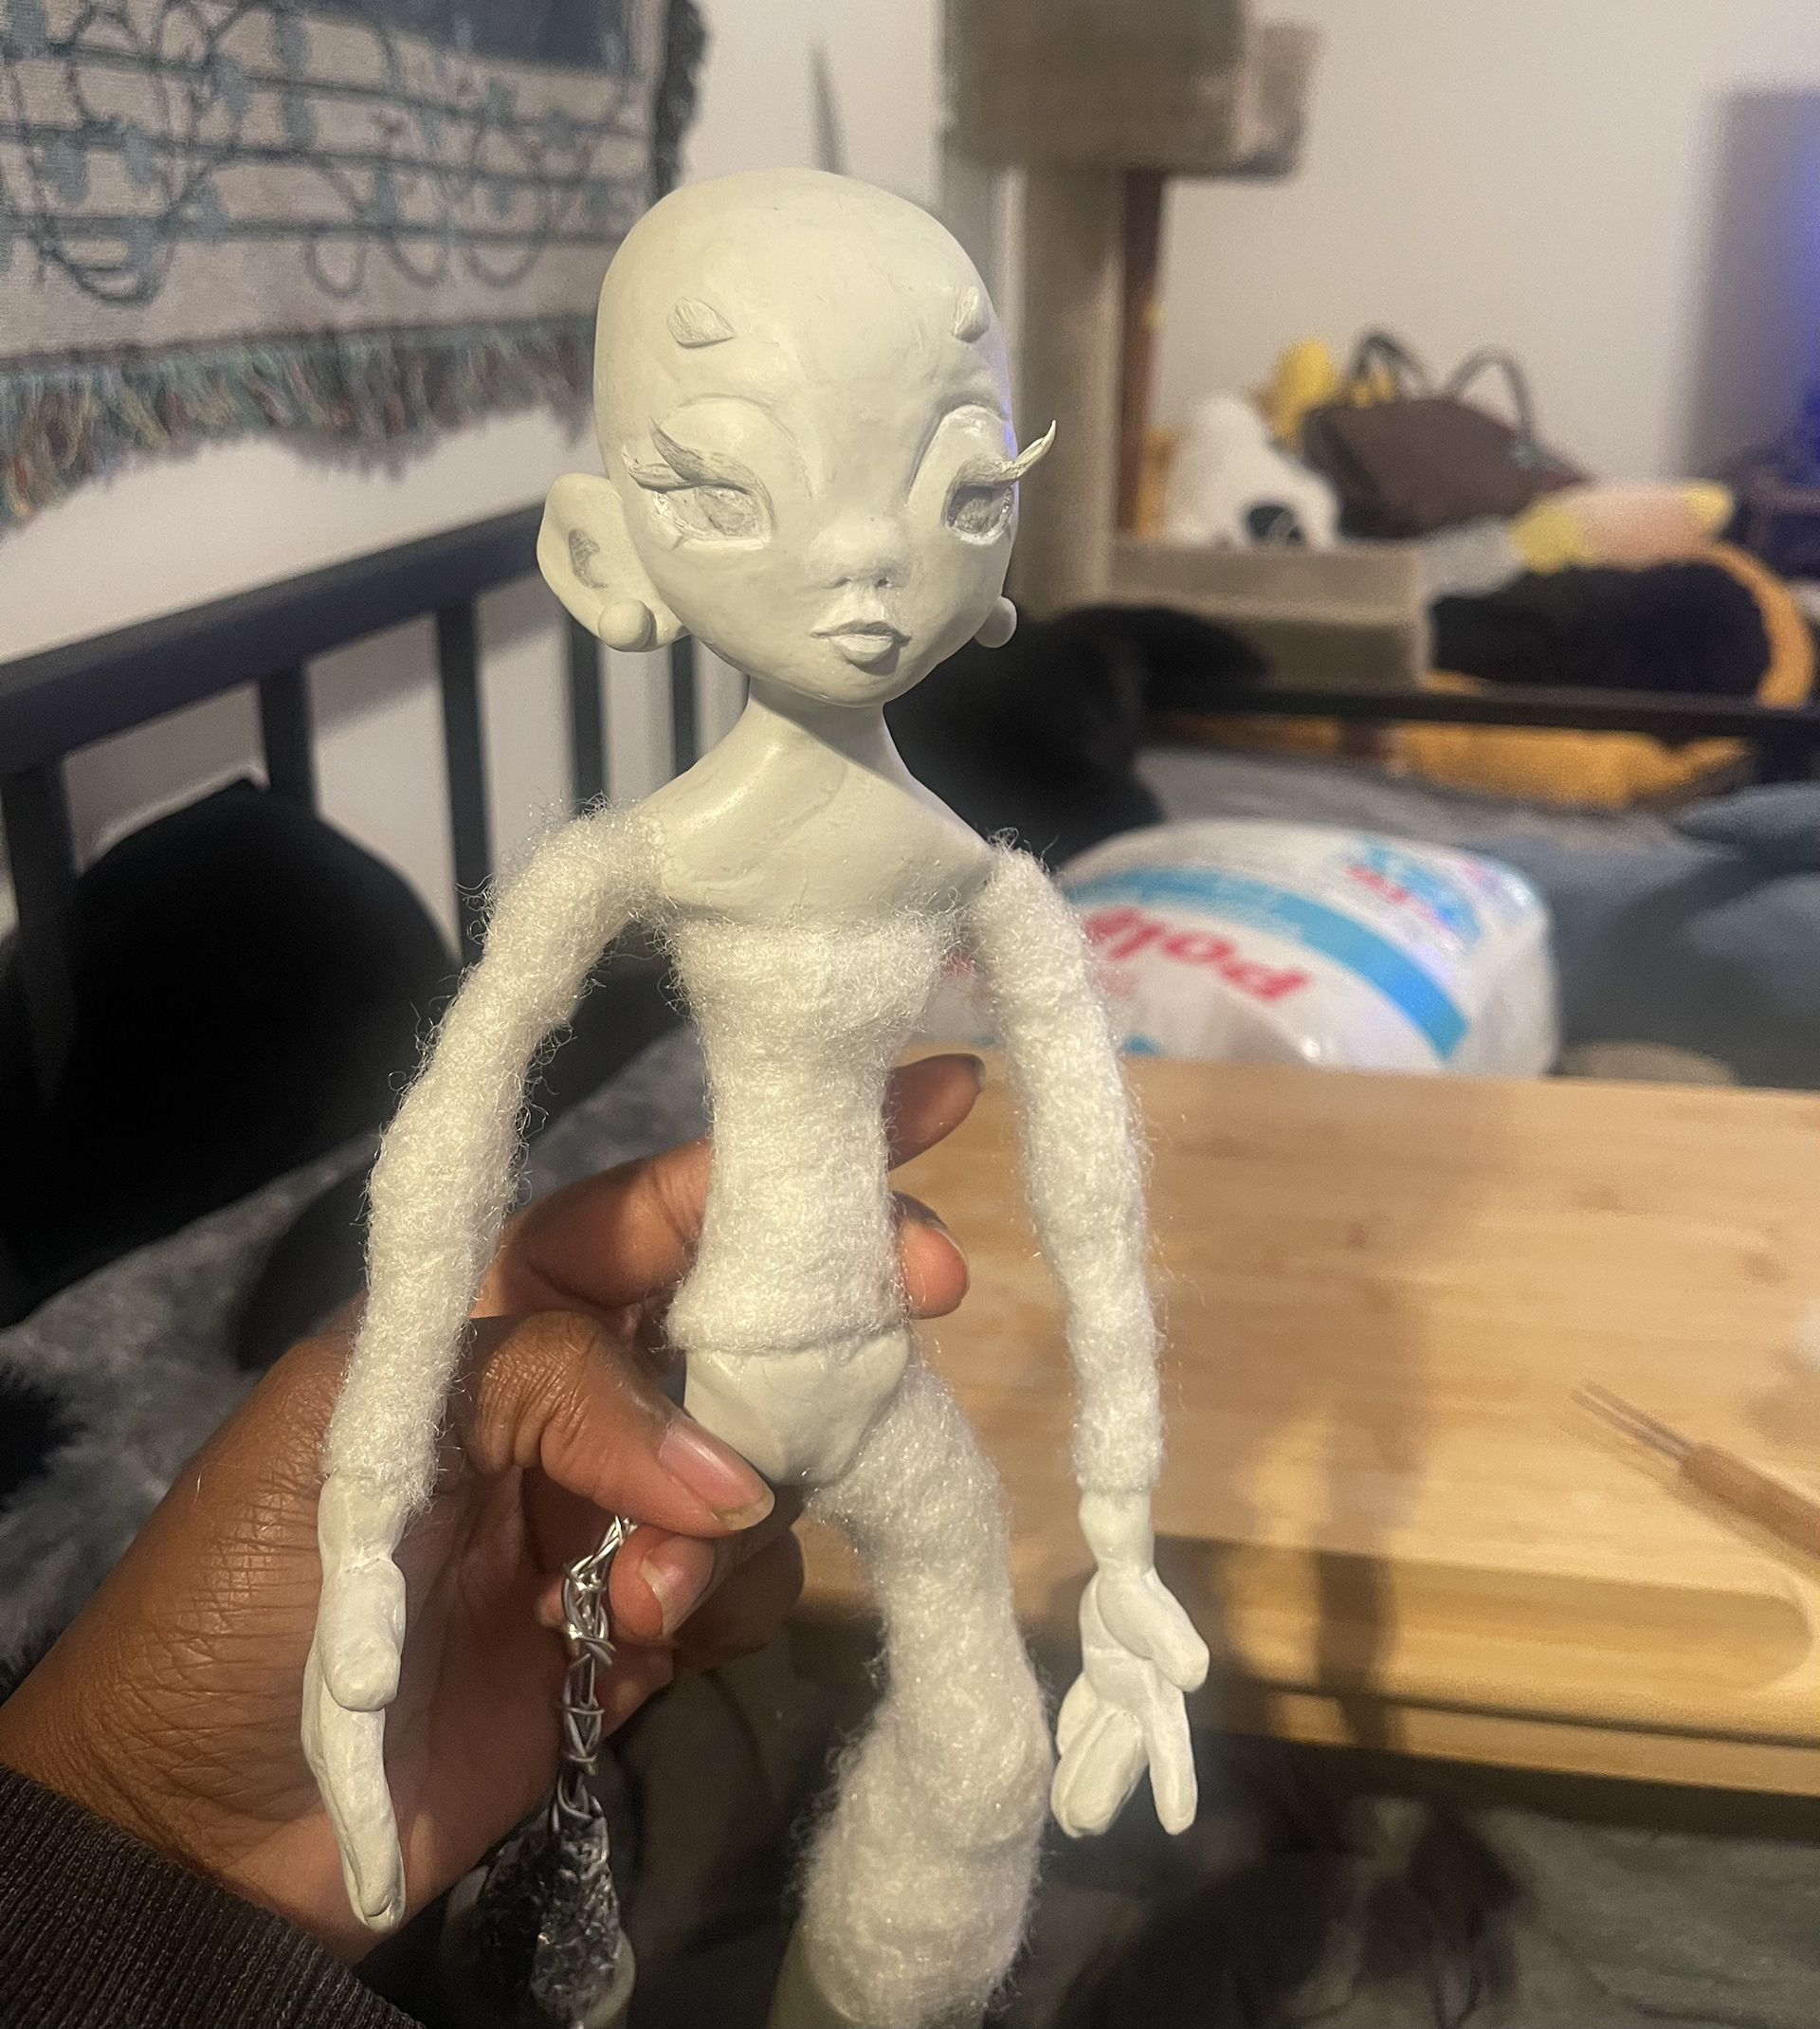
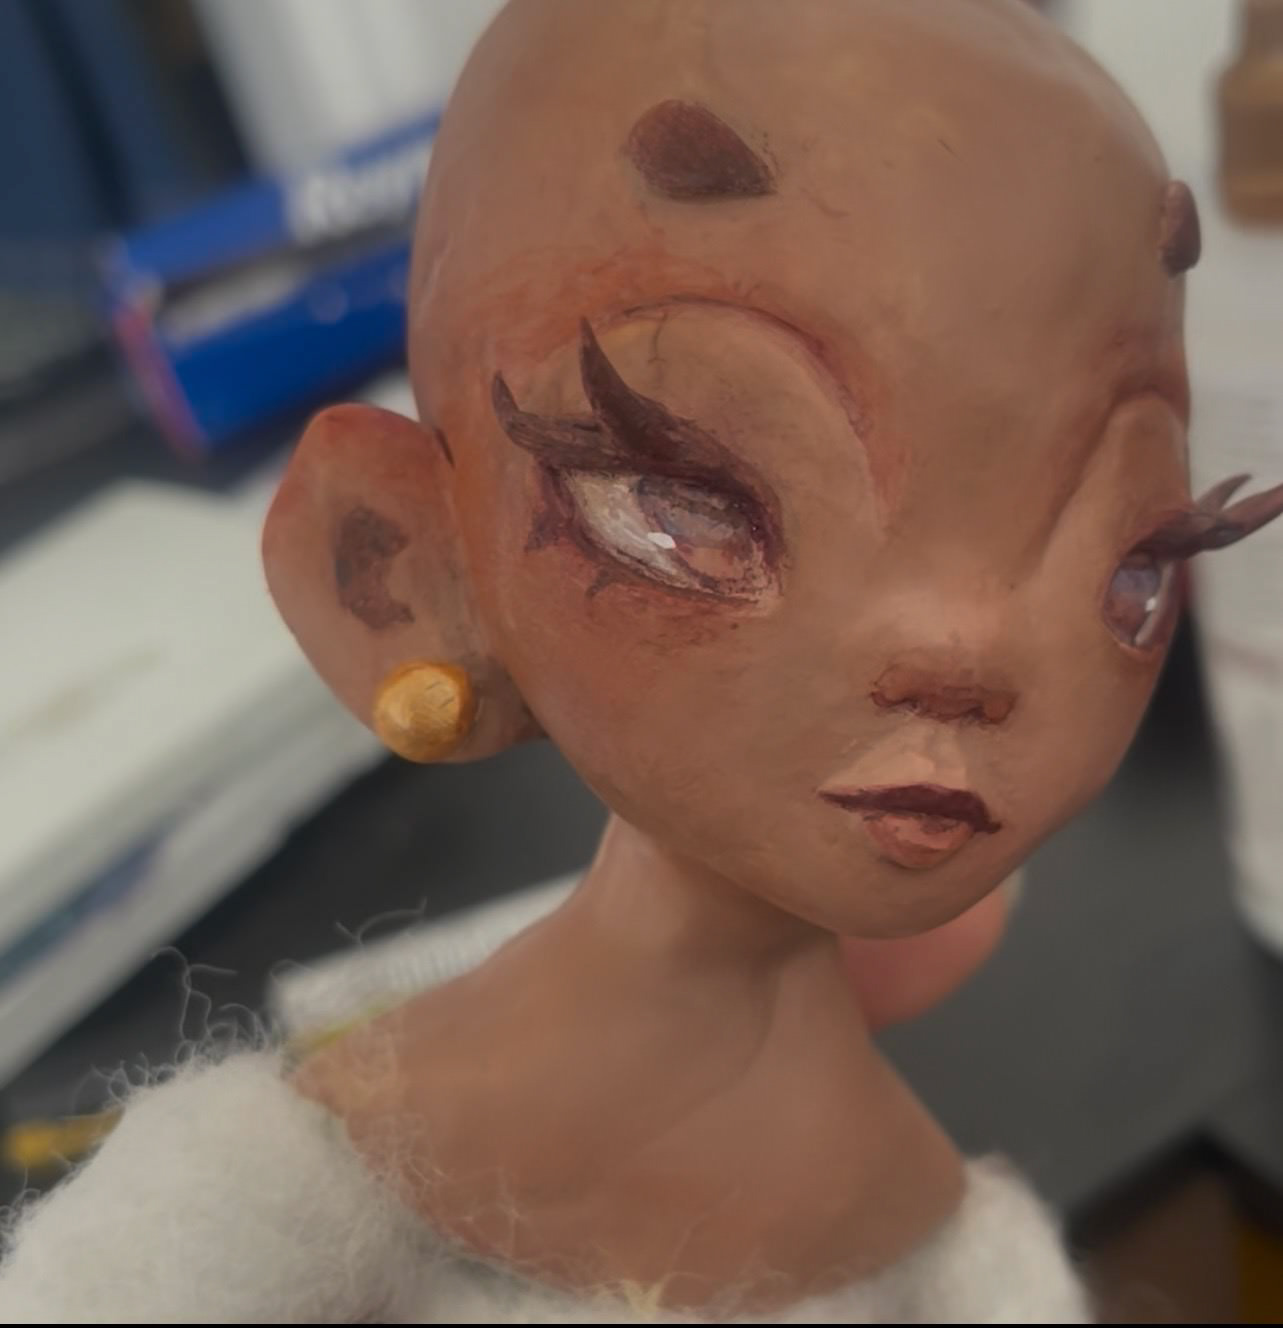
Second pass on the face to add a nose, redefine the eyelids, and add eyelashes.
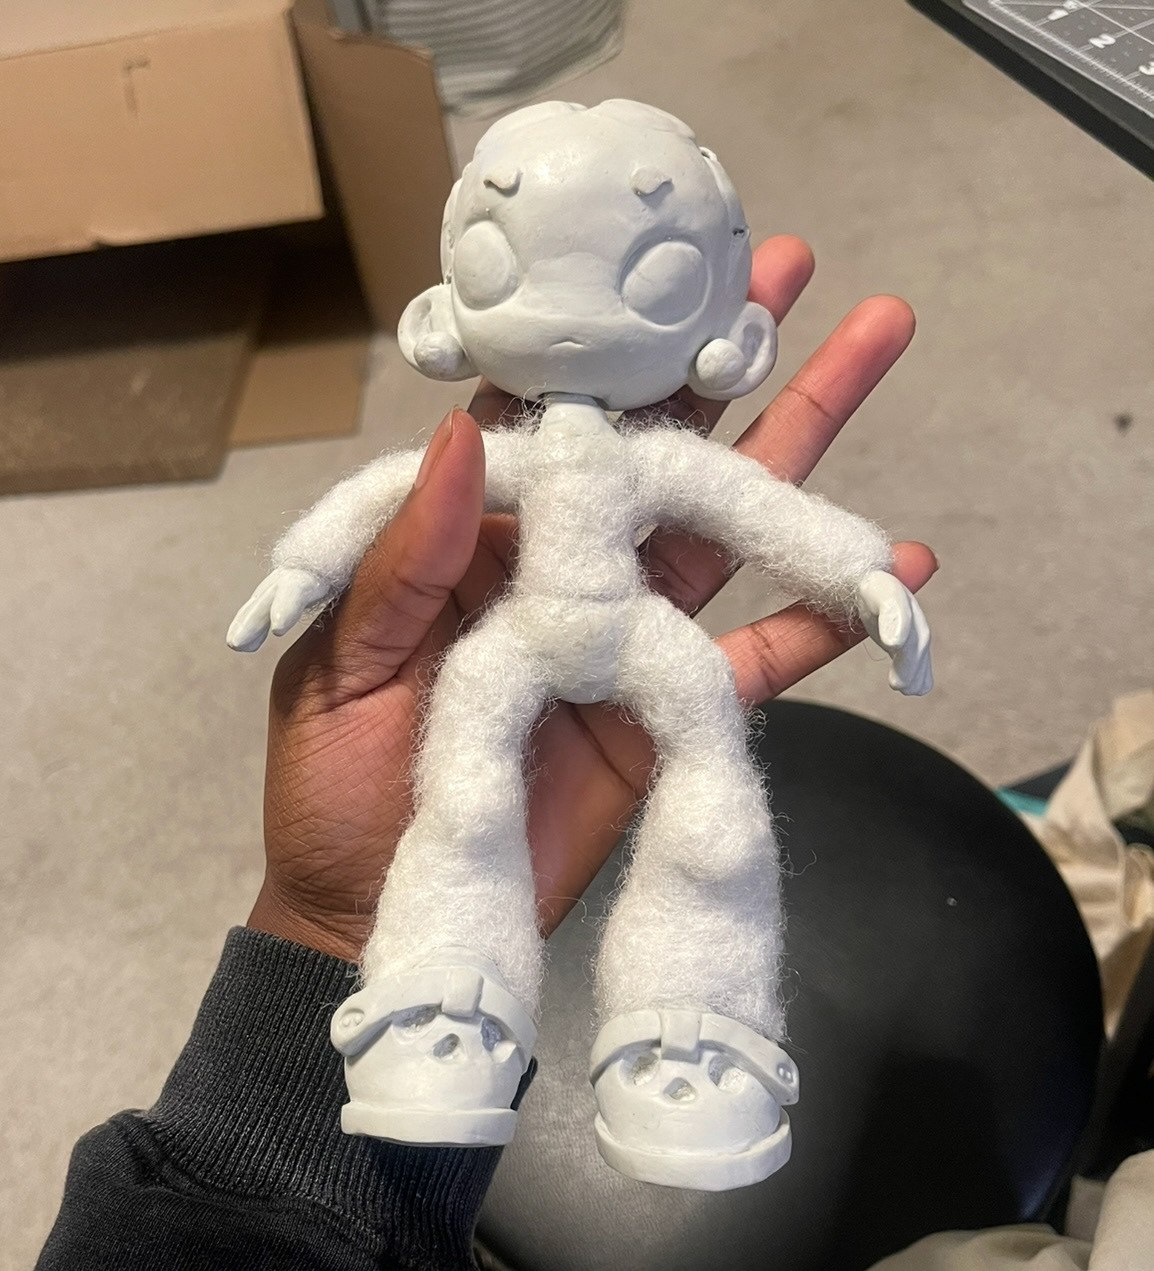
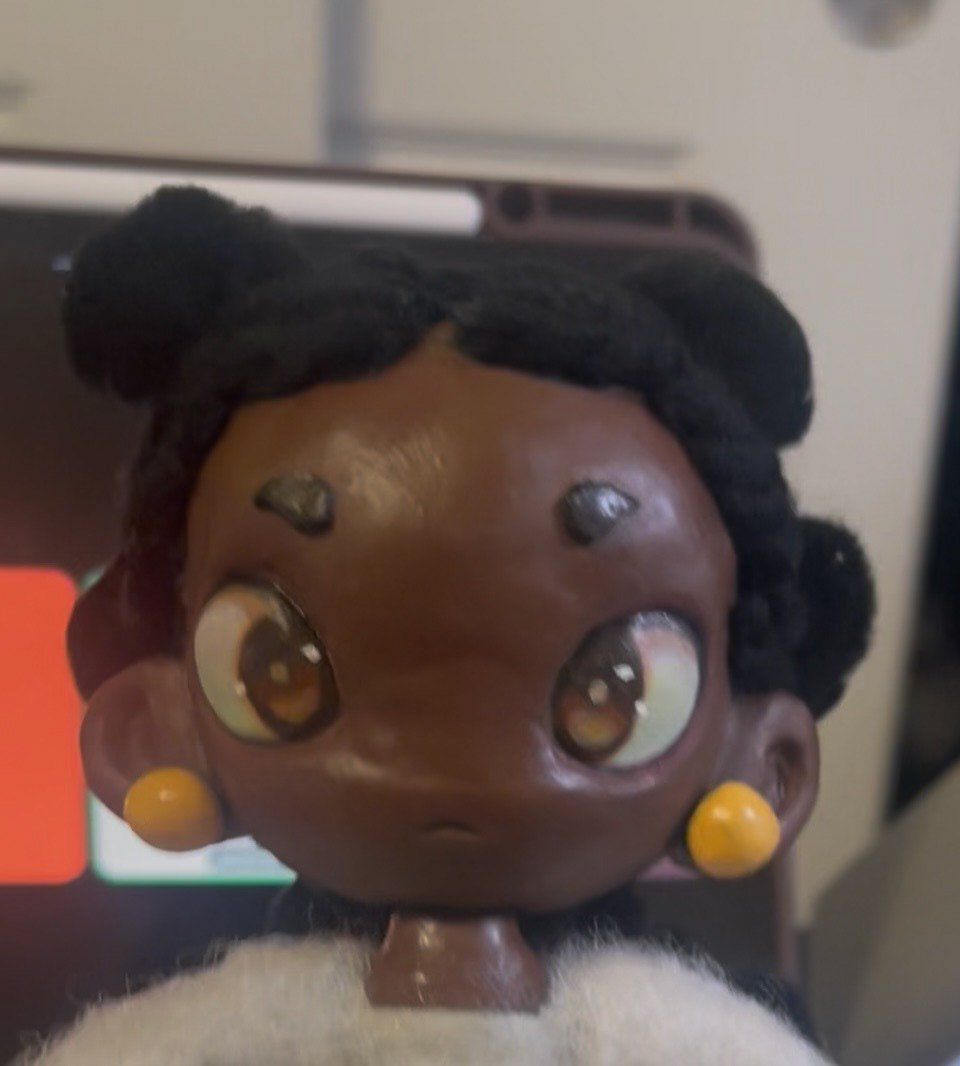
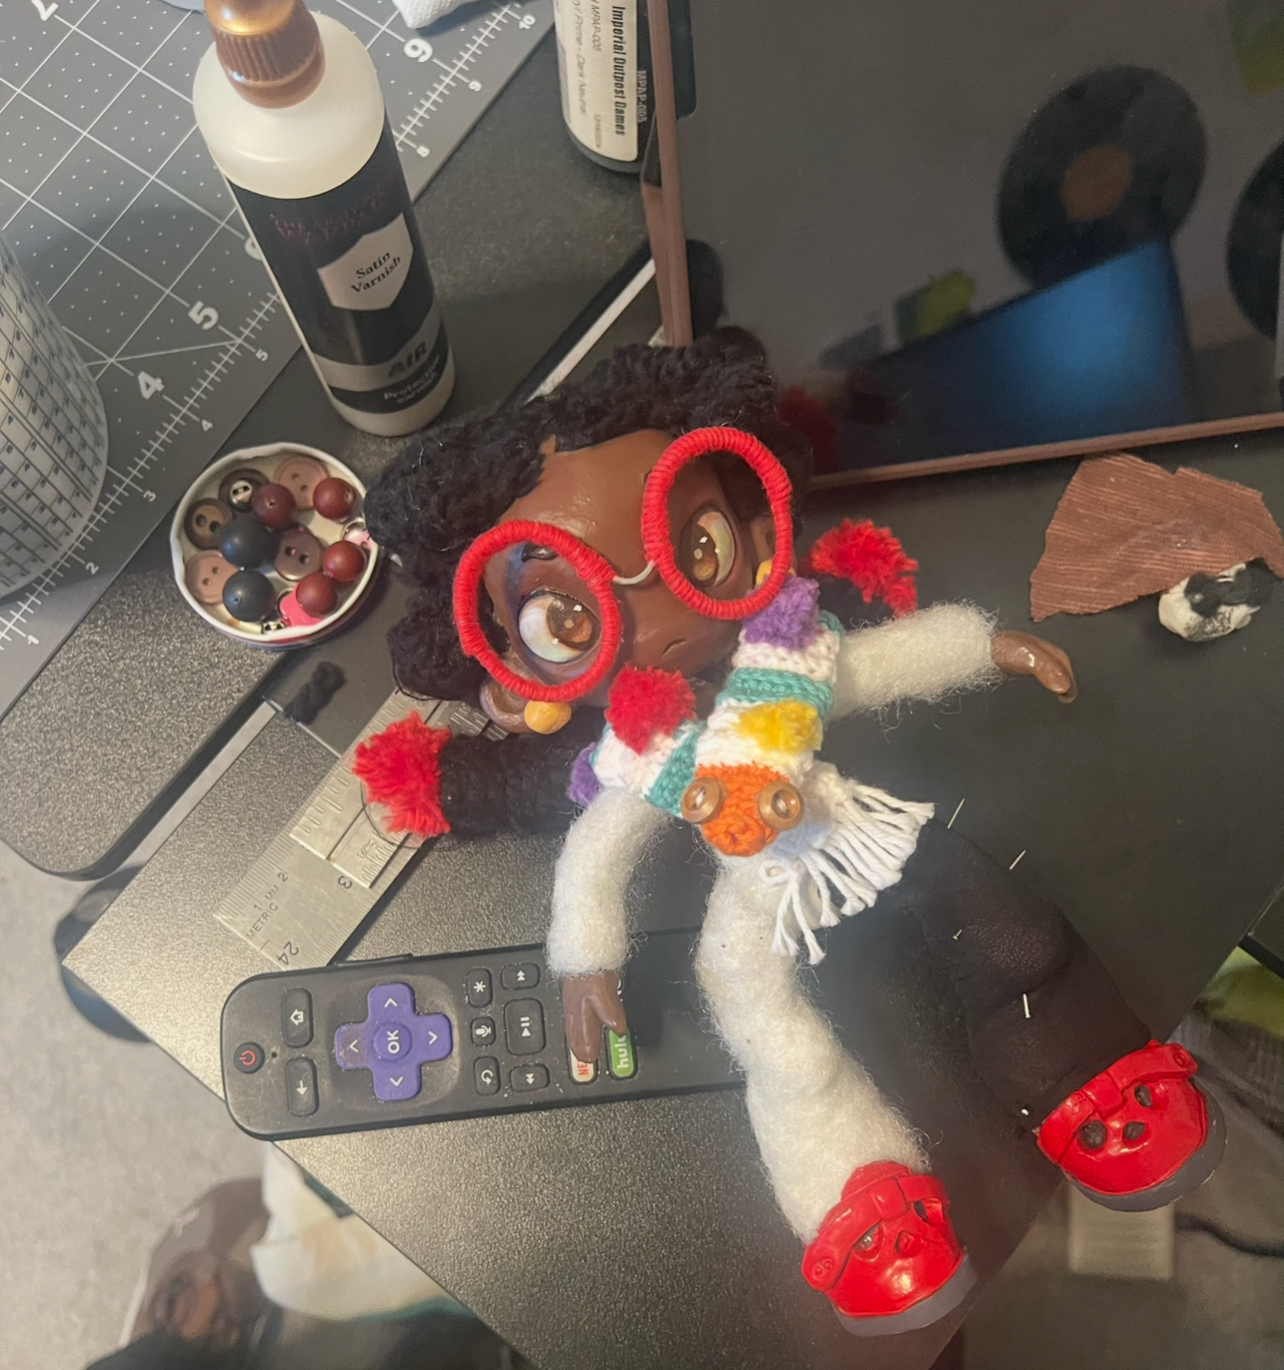
Naima's final form, prepped and ready to paint!


Celeste really started to come alive with the first pass of color. I used acrylic paint, watercolor, pan pastel, and soft colored pencils to give her features a grainy, handcrafted texture.
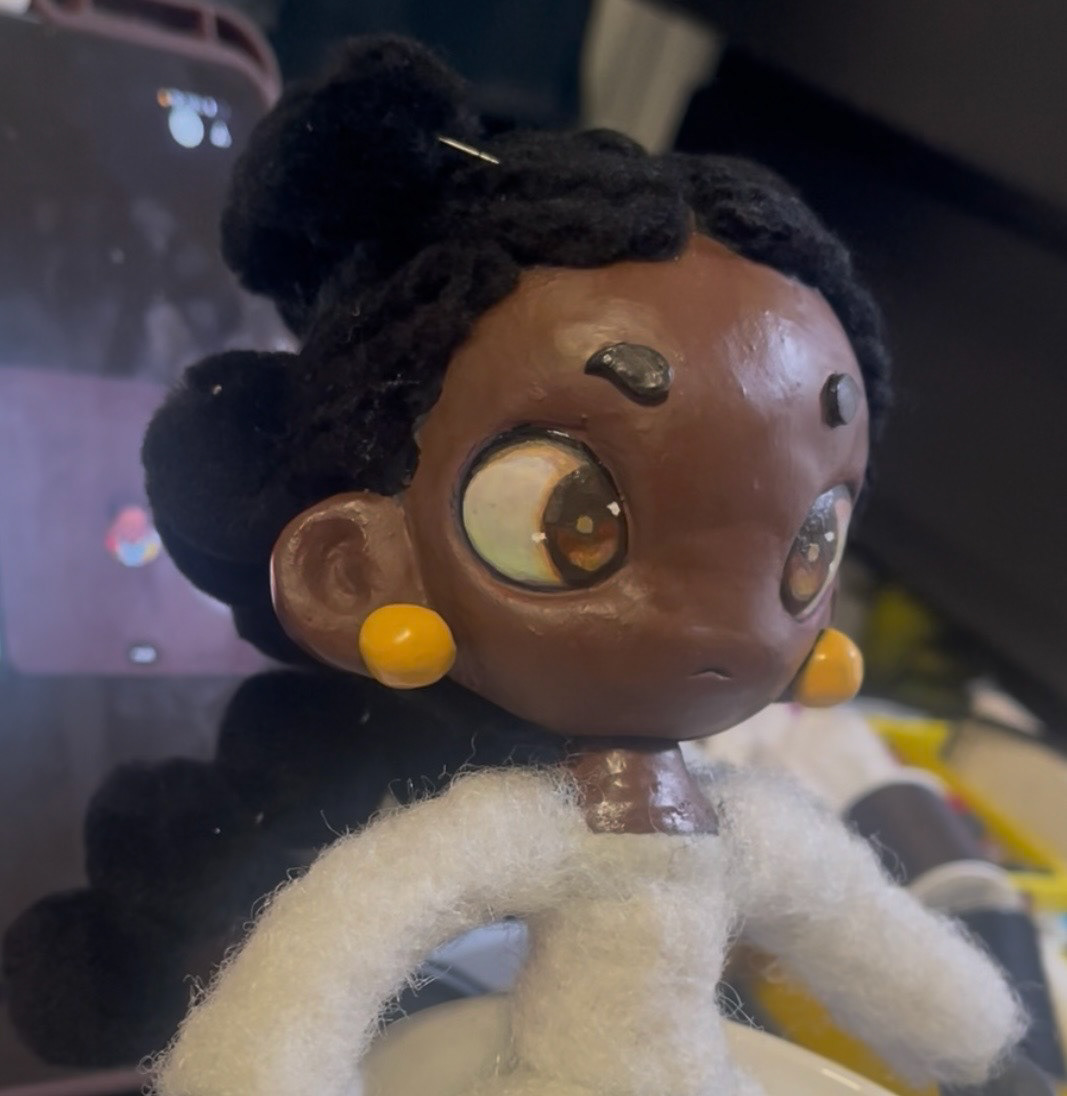
The first pass of color. I was initially very into the idea of the color of Naima's eyes complimenting Alto, her sentient snake/scarf companion, but later dialed this back to call more attention to her accessories.
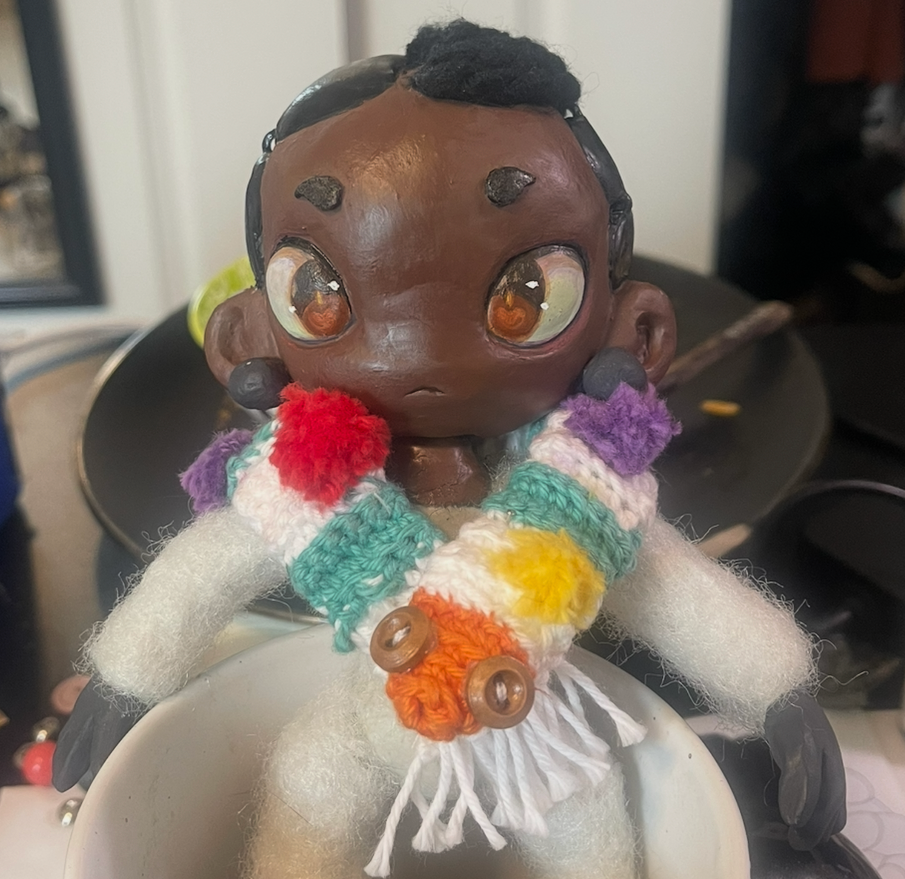
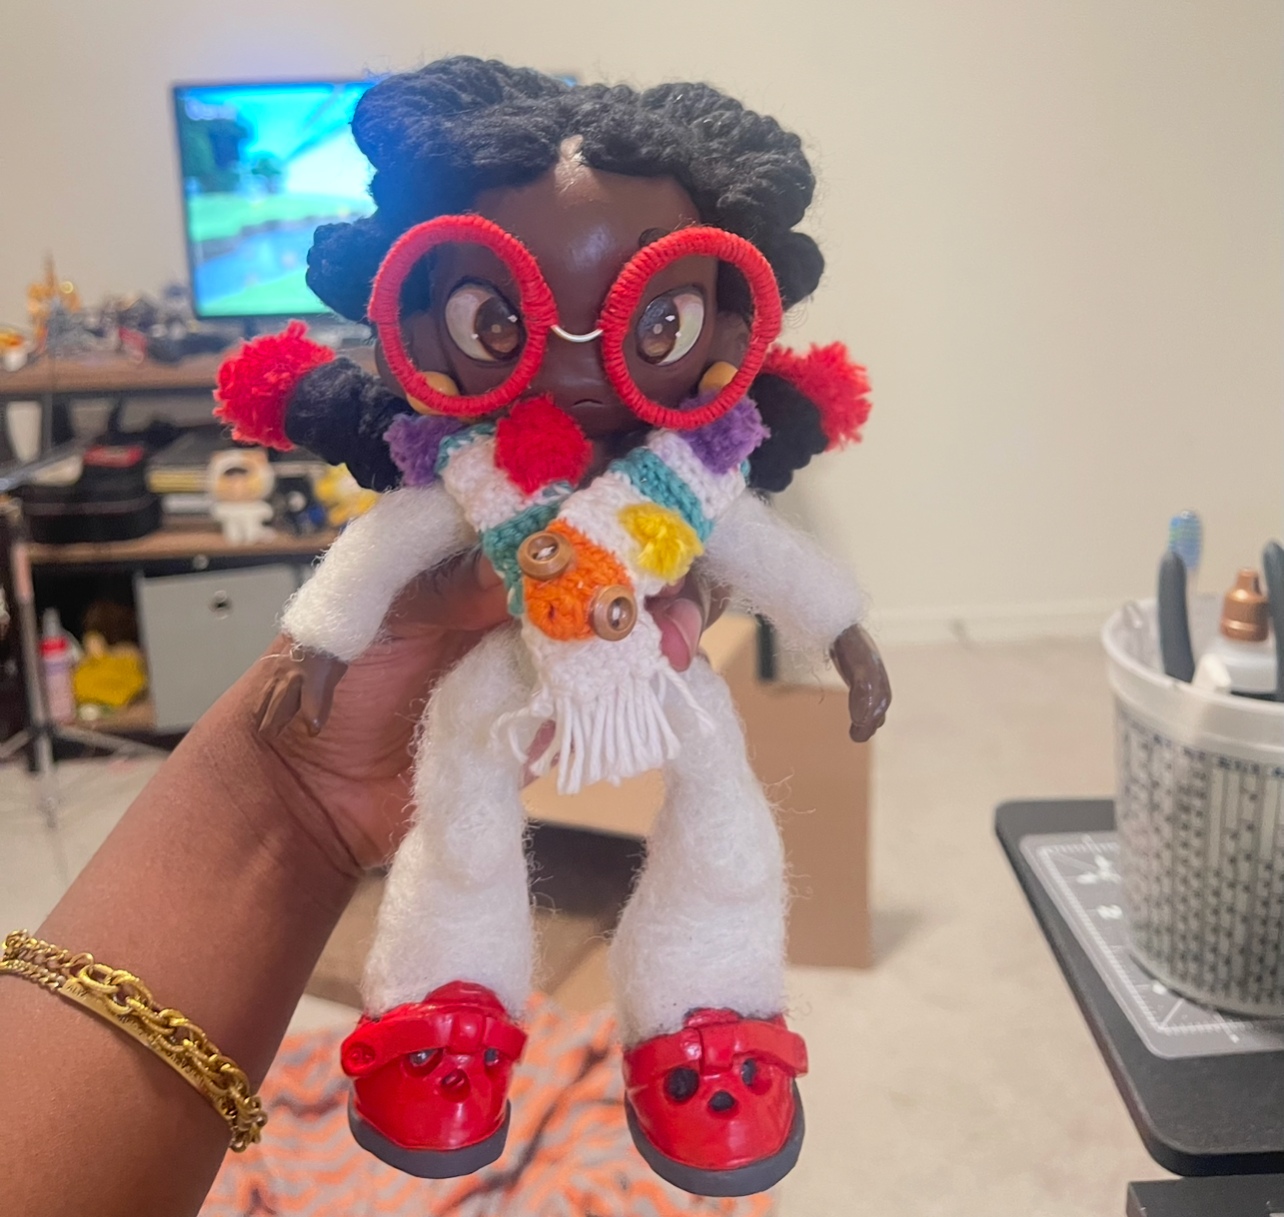
Alto was crocheted with a 2.5mm hook and affixed with pom-poms of various colors, as to emulate quarter notes on a staff line. He also talks!

The tail end of Celeste's hair process. I began by mapping out a pattern to path out each yarn strand and built out the bulk of her twists using aluminum foil, then secured the pieces with all-purpose adhesive and thread.
I began Naima's hair with black pom poms to build out the form of her twists, and ran aluminum wire through their centers in order to bend and shape them as I pleased.
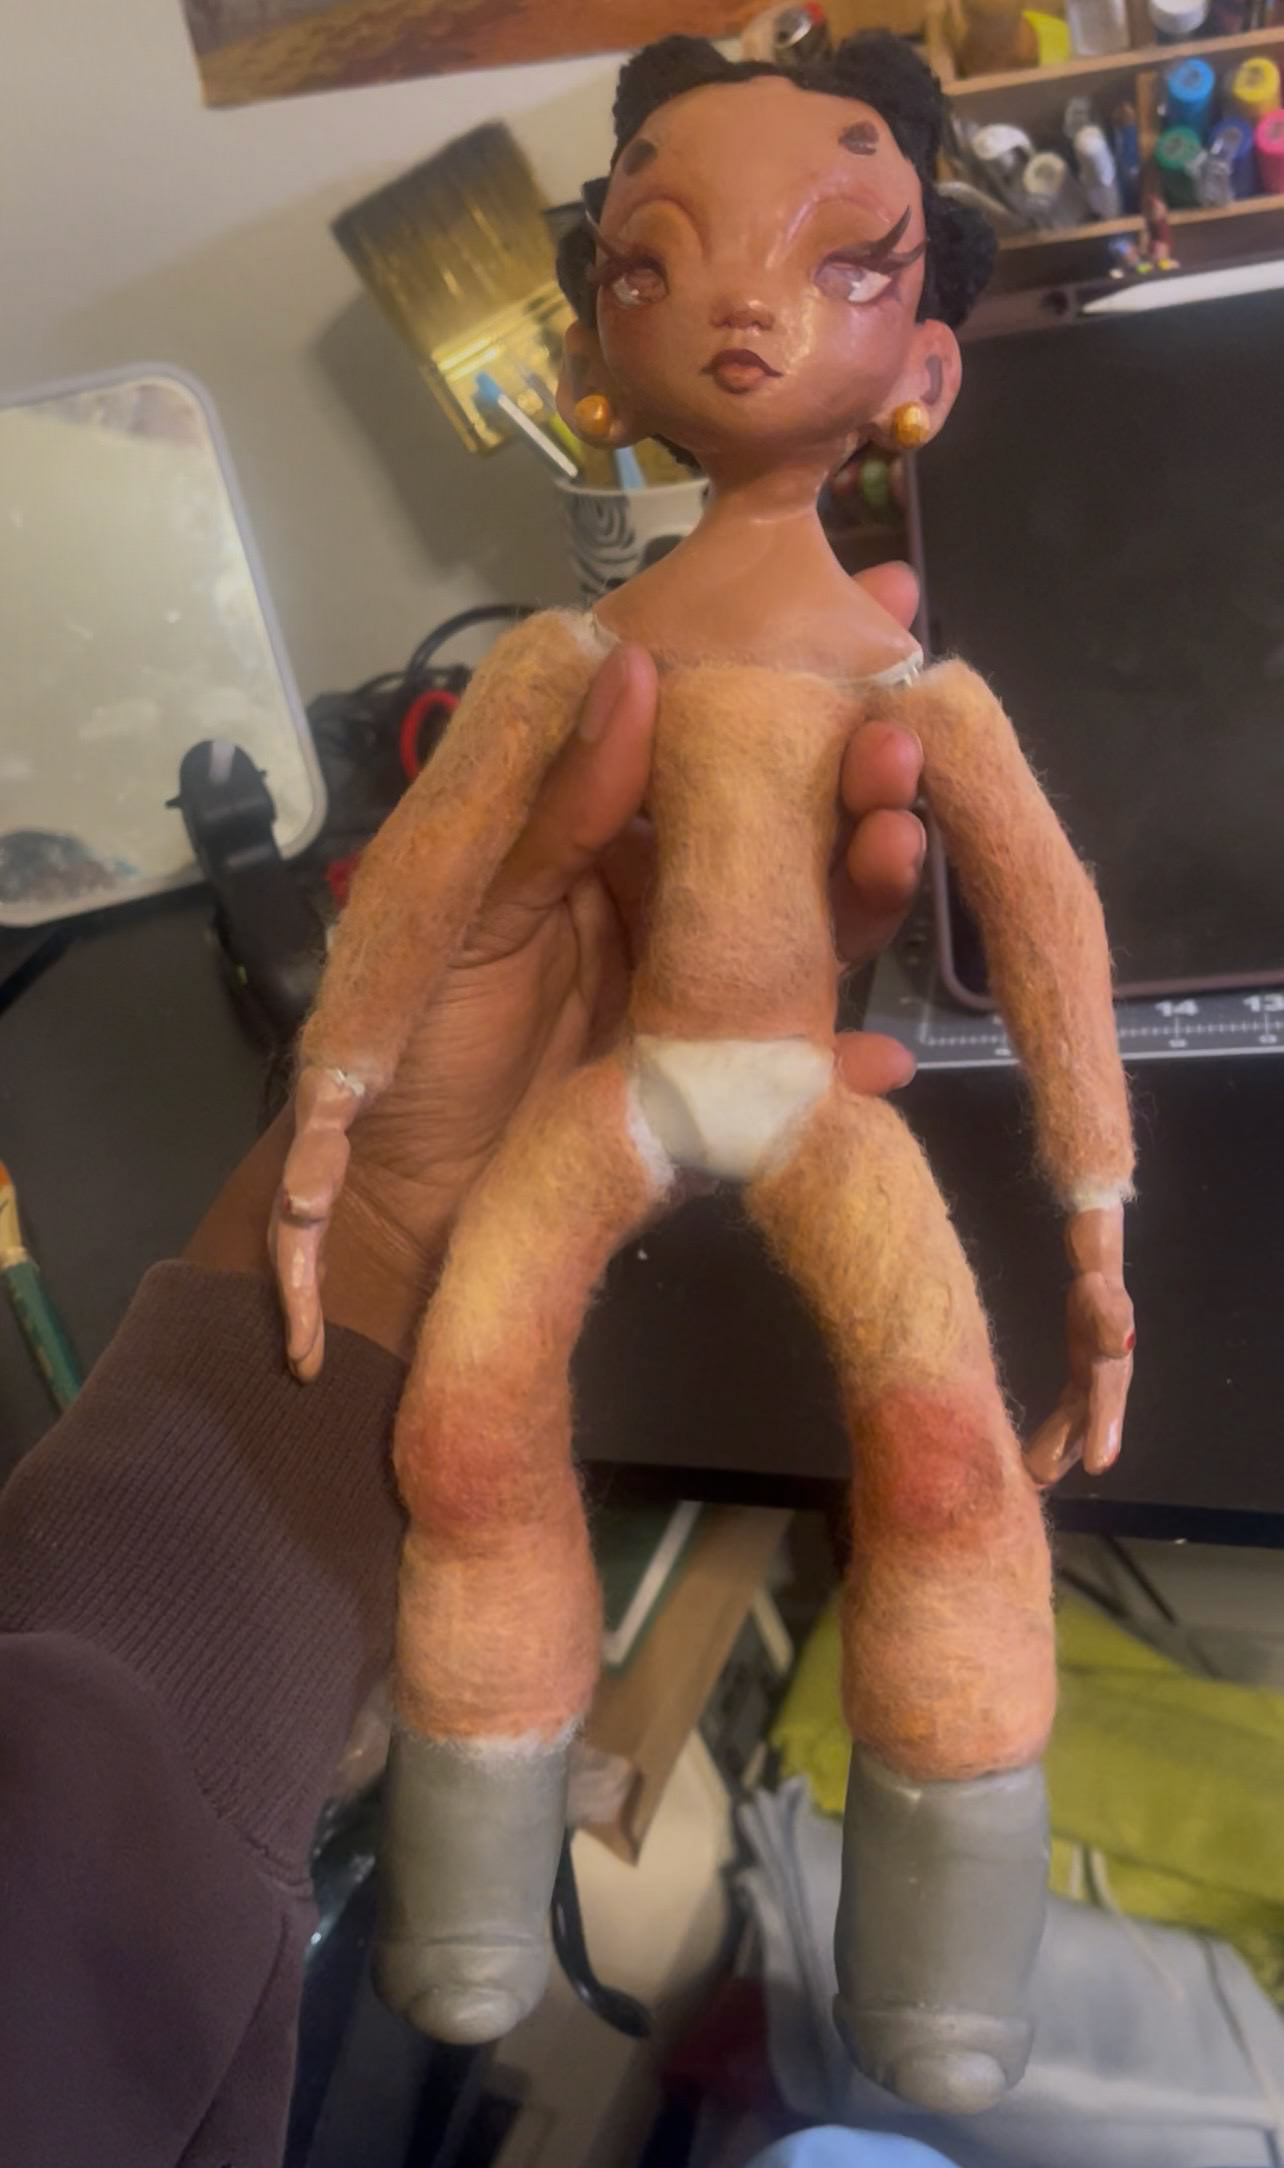
I experimented a bit when it came to toning the body. As Polyfil is notoriously difficult to dye, my initial idea was to sew ‘socks’ out of her appropriate skin fabric to slide up her legs and arms. This proved difficult given the proportion of her feet to the skinner region of her thighs and the splay of her hands, so I ultimately decided to needle felt wool over her extremities and further color corrected and defined planes with pan pastels.
Naima's completed hair, with all of her red accessories! I used a thicker yarn wrapped and stitched around the pom poms to build out the familiar twist shape, and attached pom poms as baubles to the ends. My initial idea was to give her knocker barrettes made of painted beads, but they weighed down her braids and I opted for a lighter alternative.
I designed her glasses by wrapping thin red yarn around more aluminum wire. I ended up having to make two pairs, as the first pair was way too massive for her face!
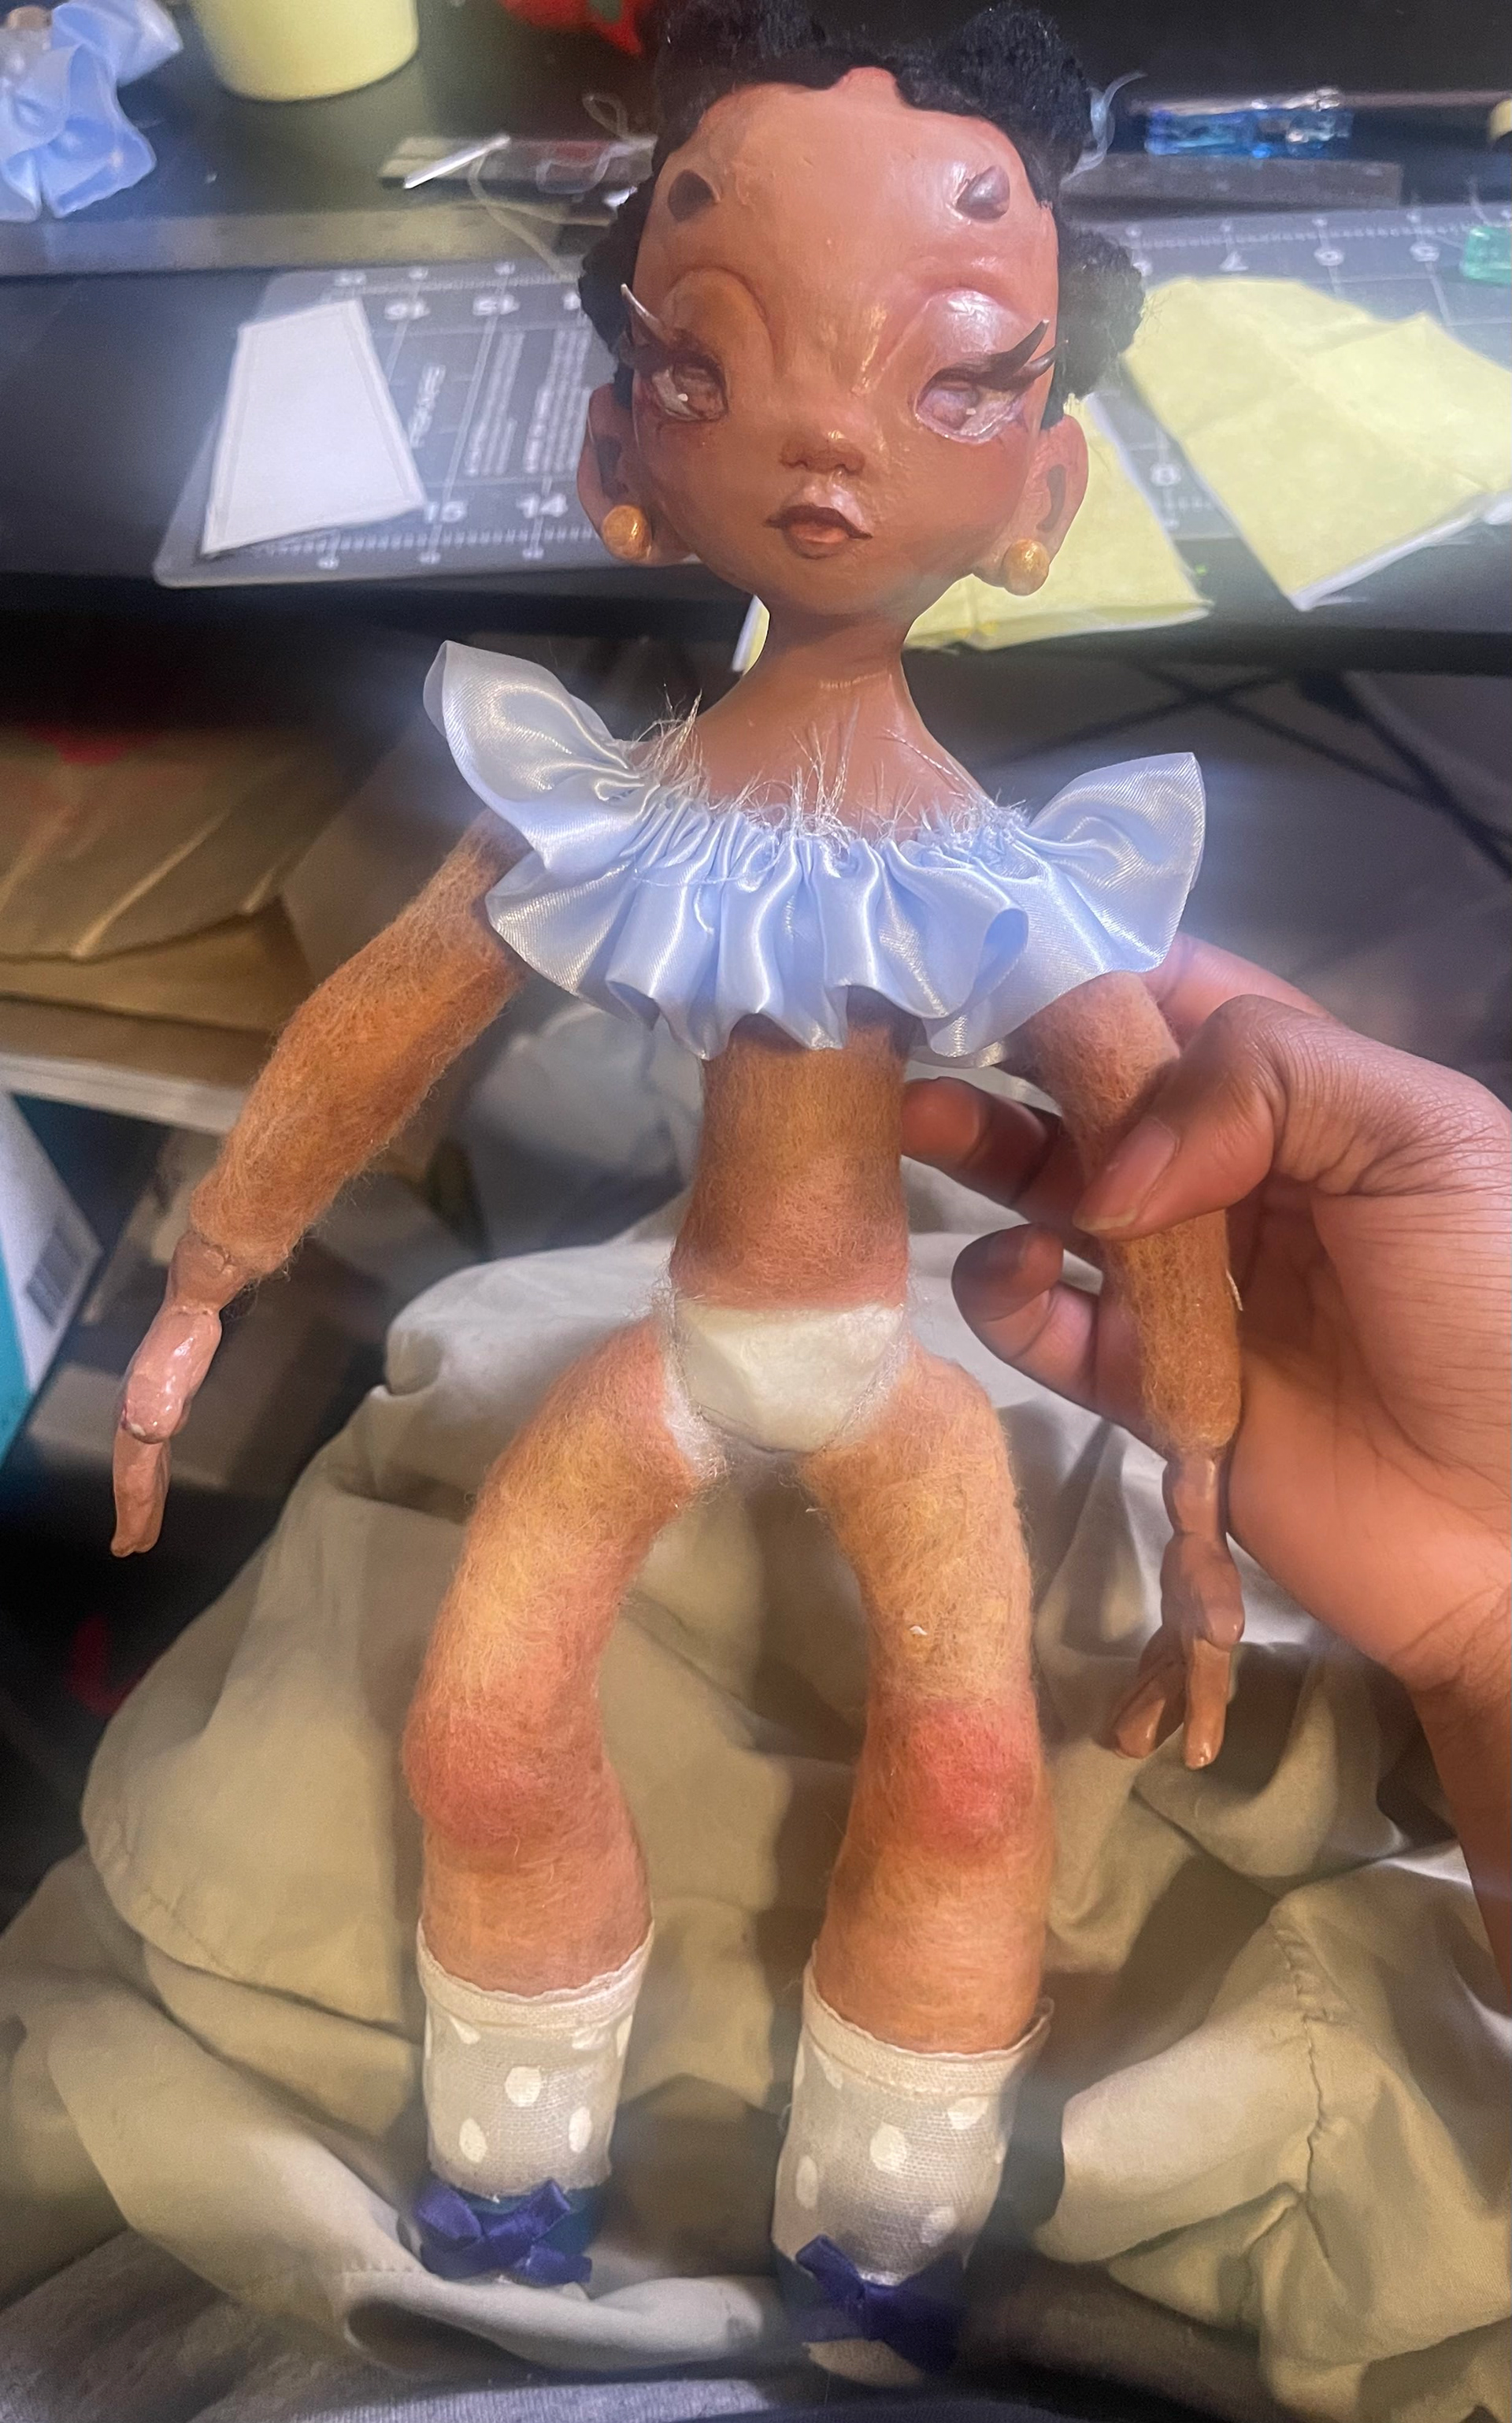
Beginning fabrication of her clothes, chiefly with her socks, shoes, and dress frills. I cut my sock pattern out of canvas, hand painted my dots, and hand stitched a delicate trim along the cuff.
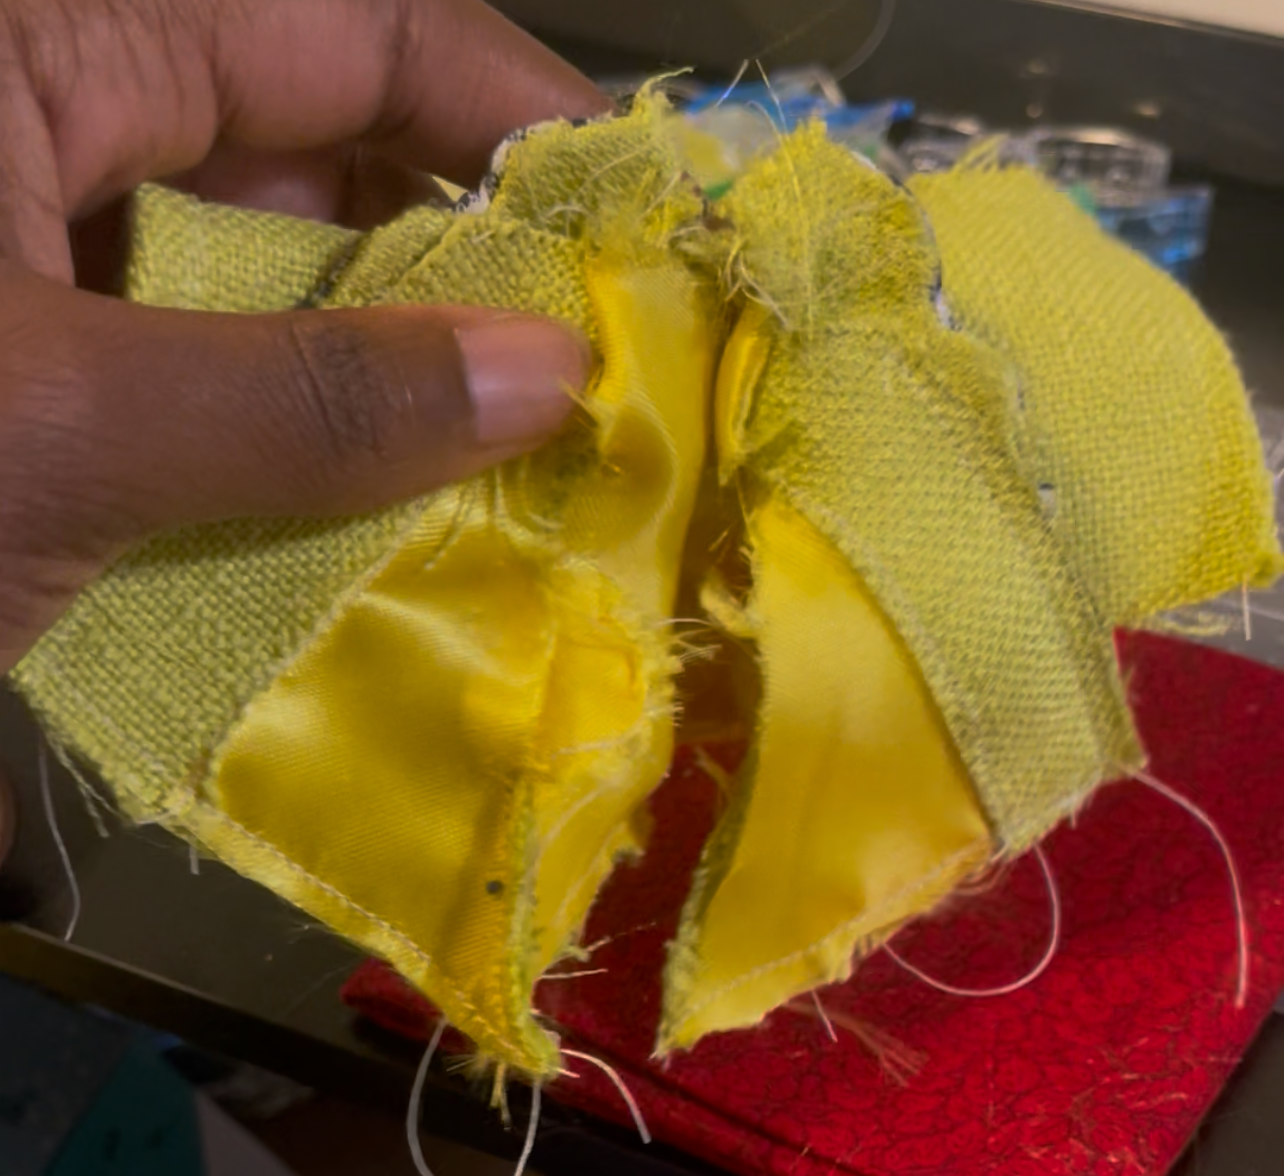
For the frills of her dress, I hand basted my gathers to avoid damaging the silk with my sewing machine.
As Naima's design dealt considerably less with exposed skin, I could get away with covering her legs with stockings, salvaged from a ripped pair of my own. However, I still wanted her hosiery to appear see-through, and chose to layer a fabric matching her skin tone underneath and stretched the stocking fabric more taut over her knees and shins to see the color underneath.
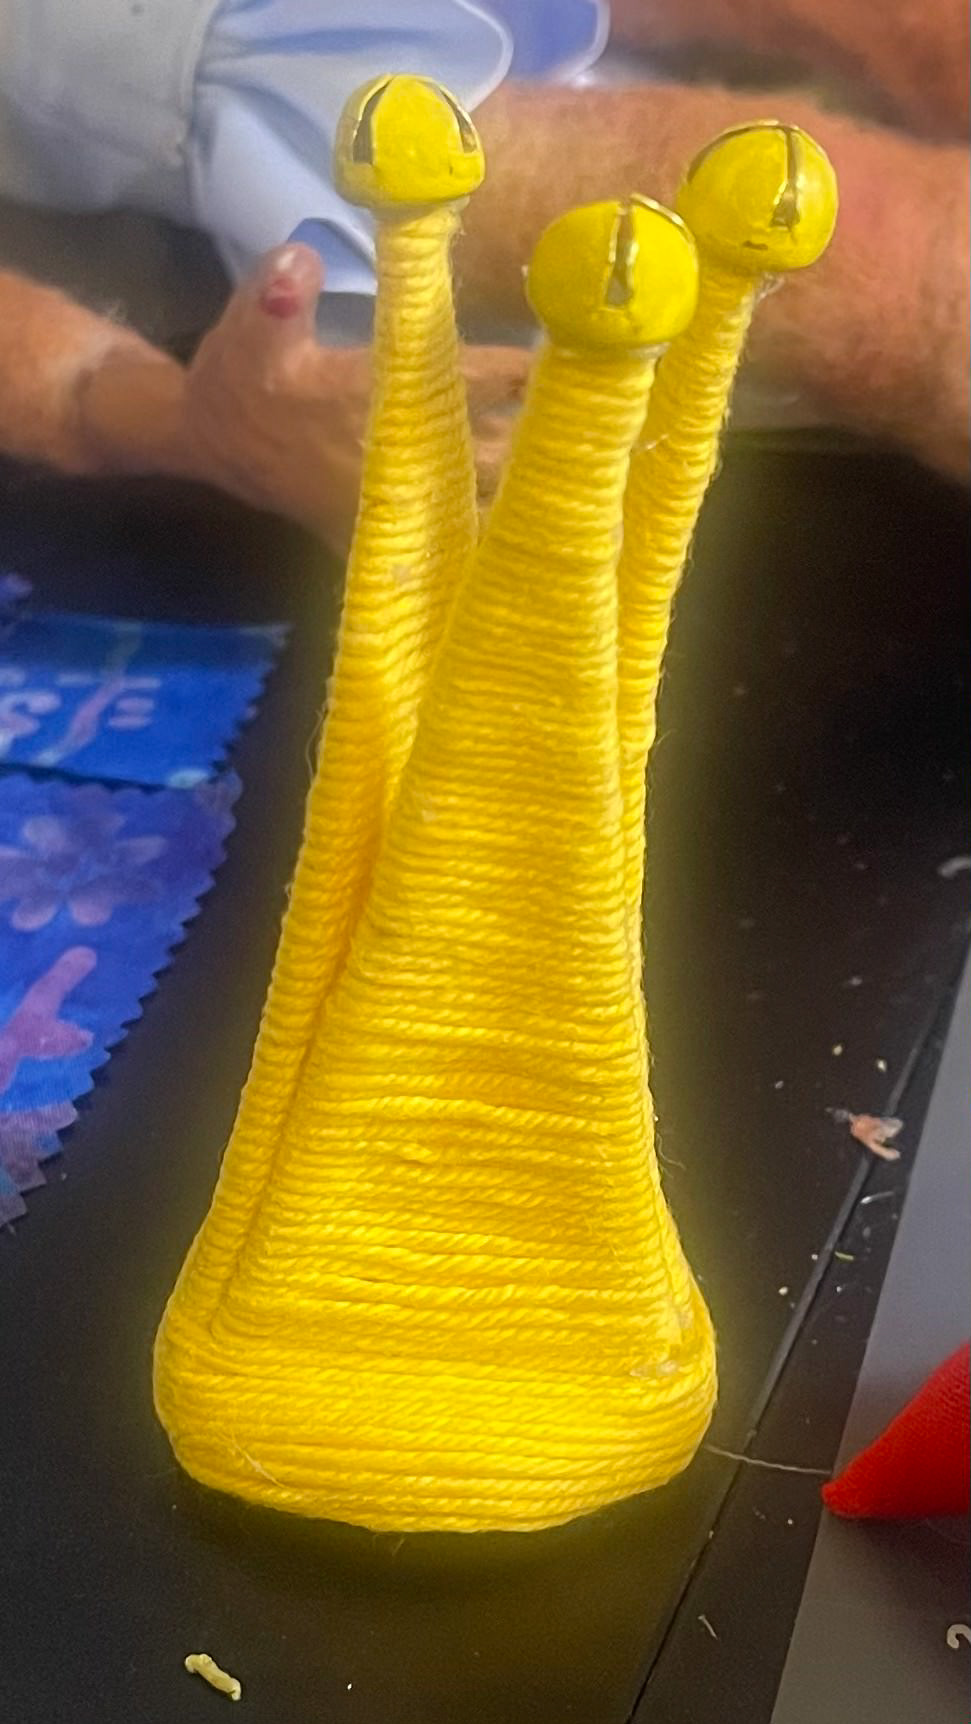
I made Celeste's crown from aluminum wire, miniature bells, and yarn.
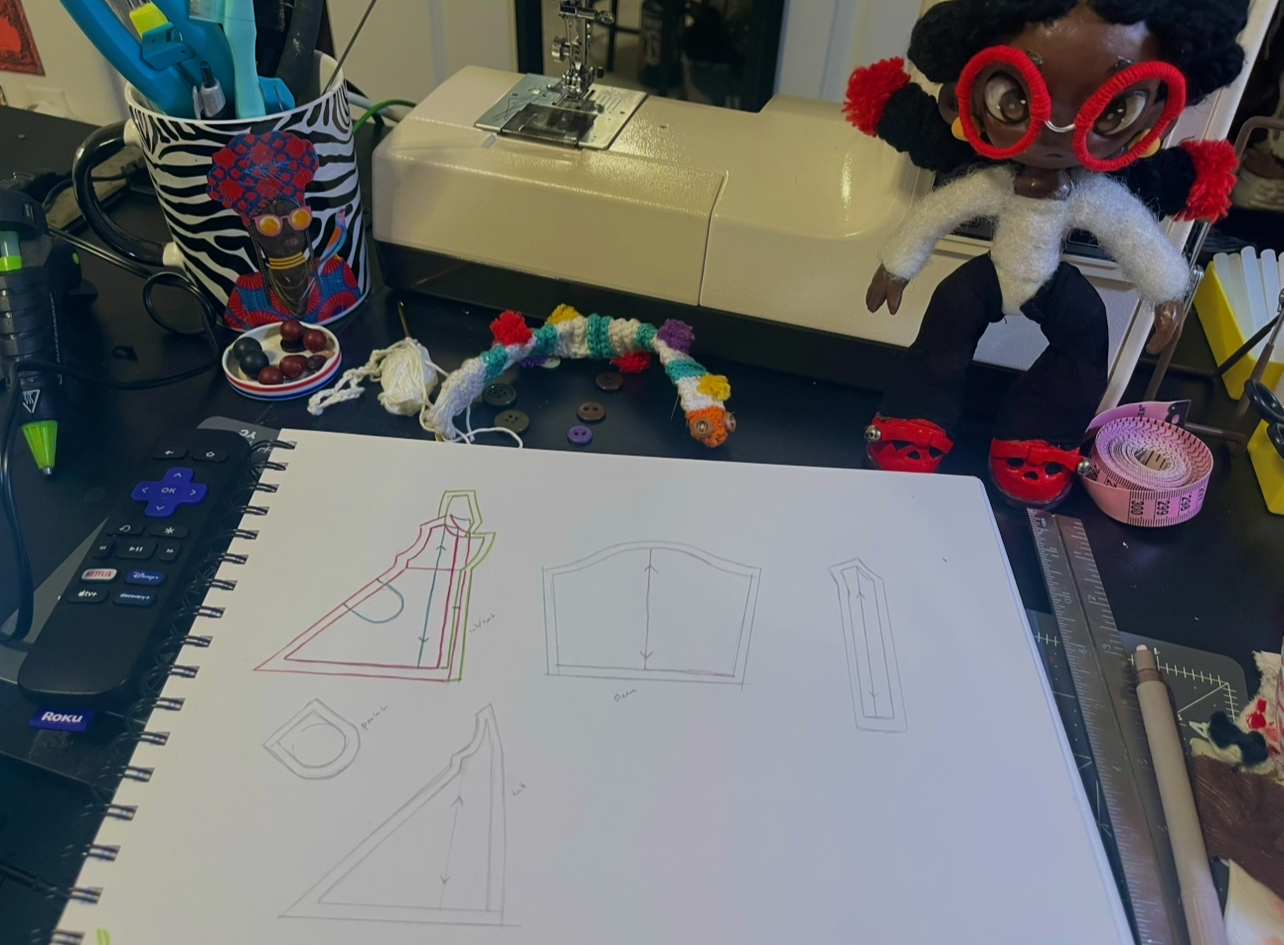
The patternmaking process for Naima's coat! Lots of trial and error at this point, I ended up redrafting this particular pattern because my seam allowance was too narrow.
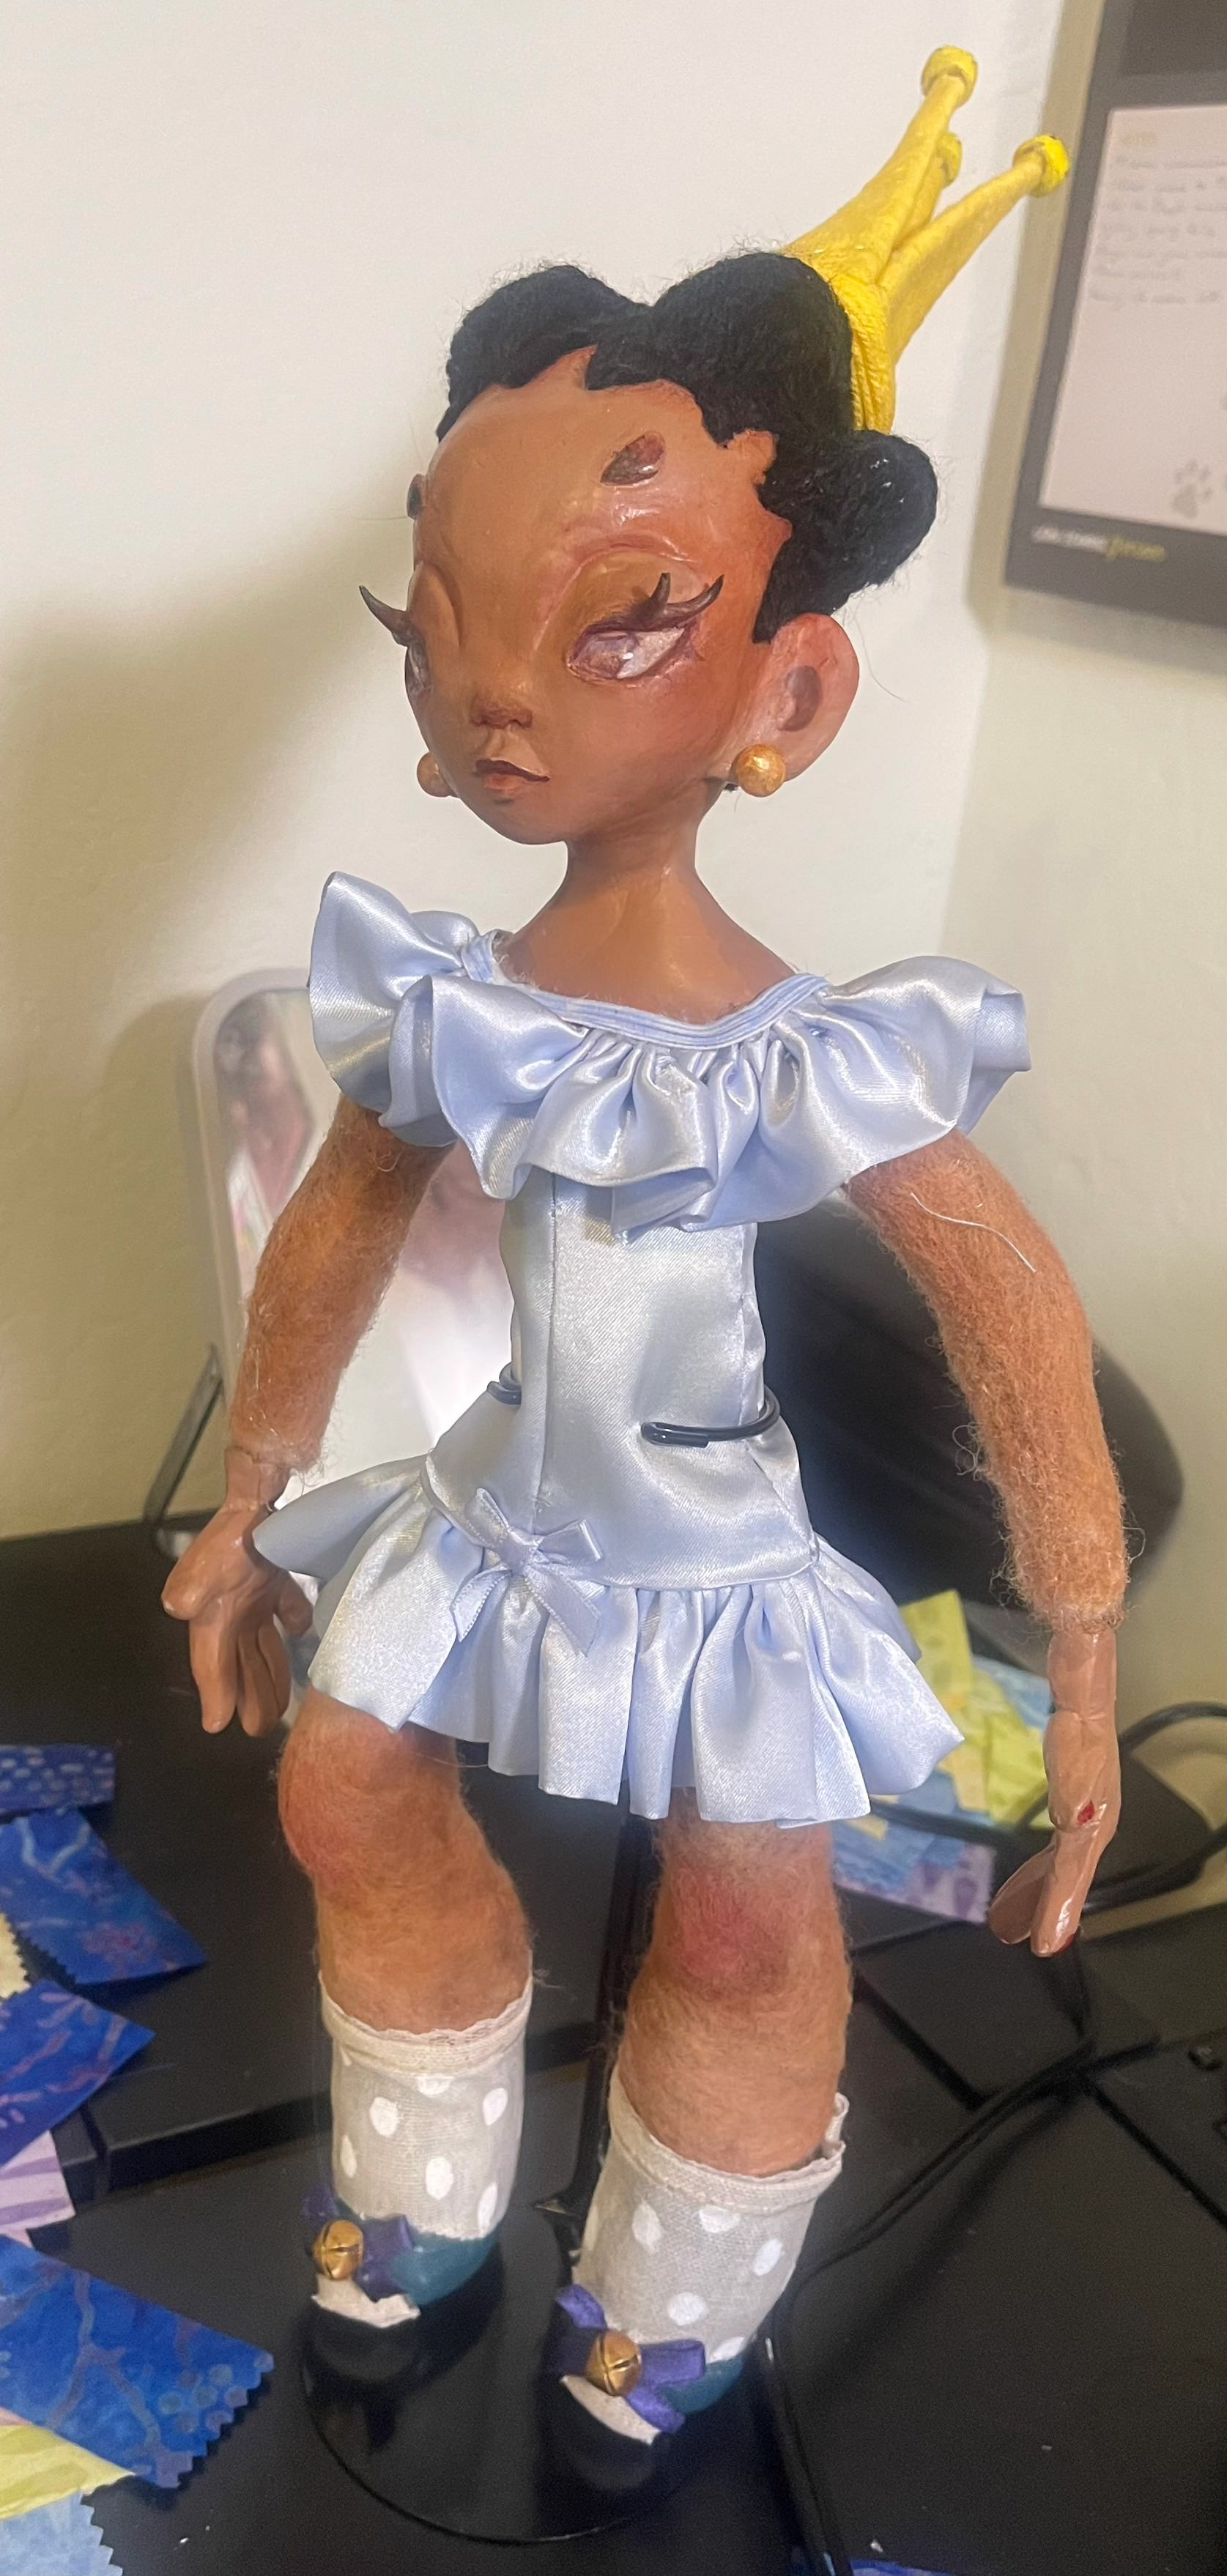
Her finished dress! All hand sewn.
First and second drafts of Naima's coat. My sewing machine ended up causing me quite a bit of grief at this step, as it chewed up my delicate silk inner lining, frayed the outer sable fabric, and resulted in an incredibly messy final product. For my second attempt, I combatted fraying by gluing the edges of each pattern piece, swapping the inner silk lining for a much better behaved cotton, and hand sewed the entire garment together.
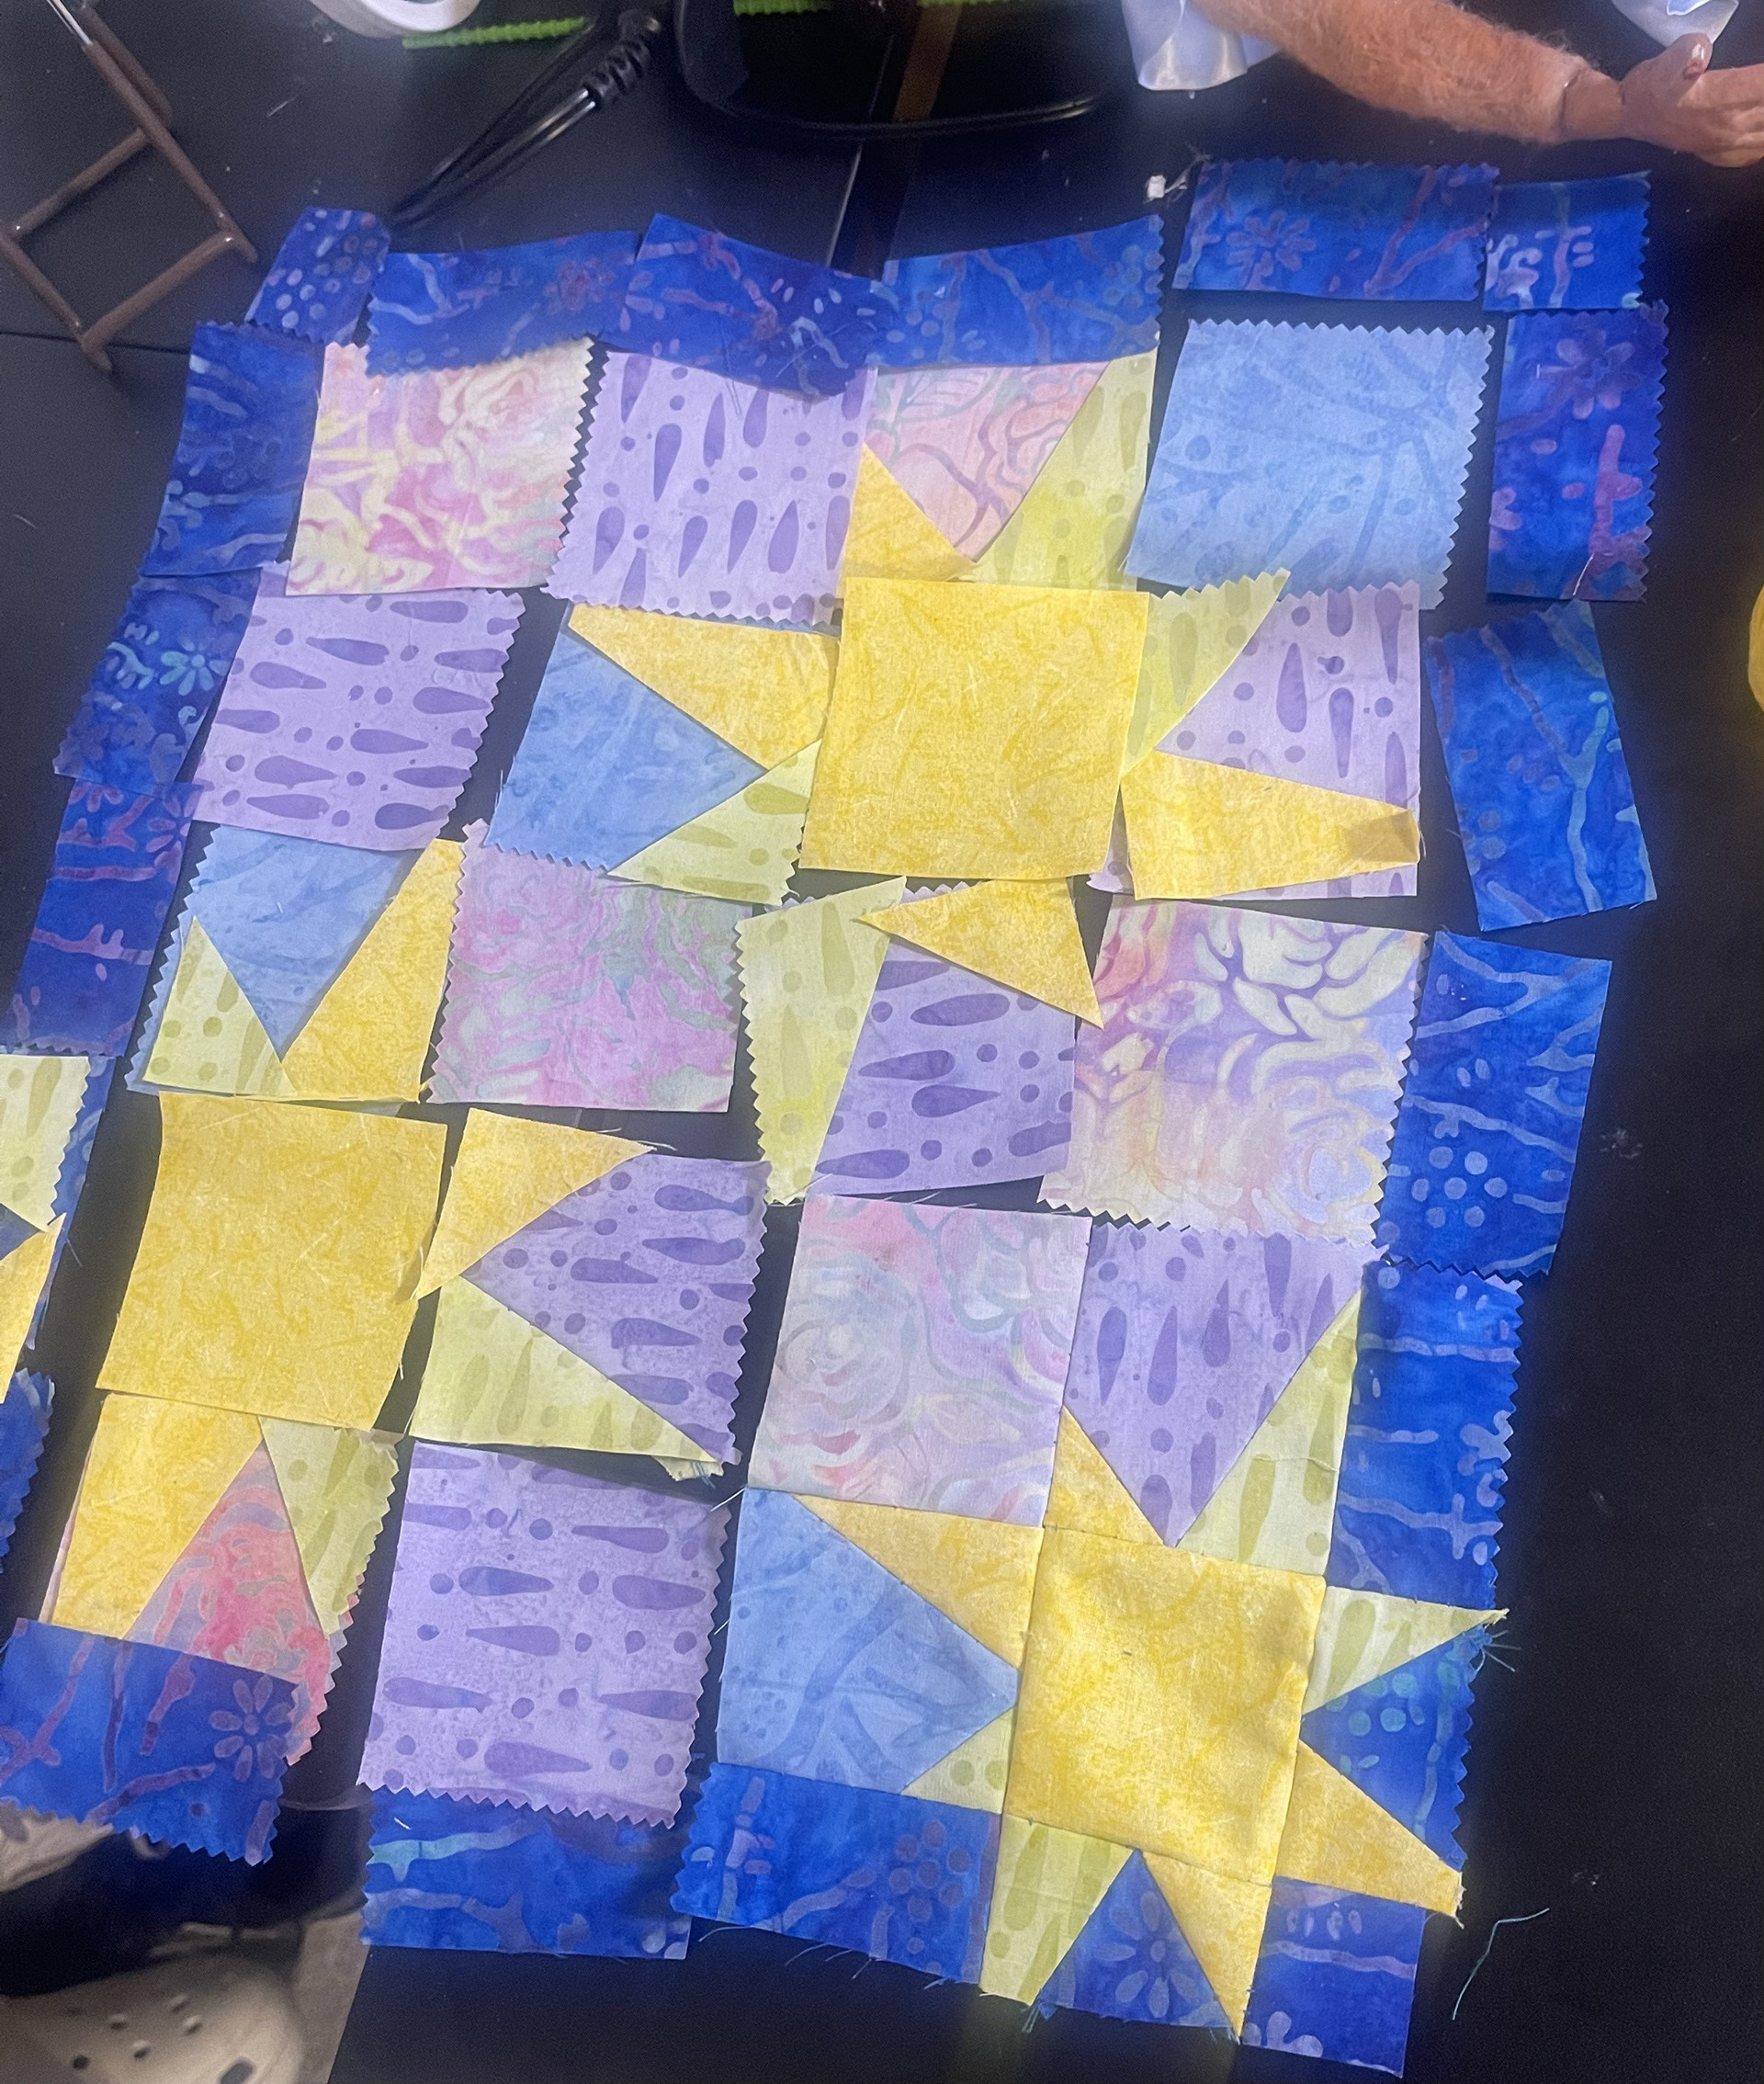
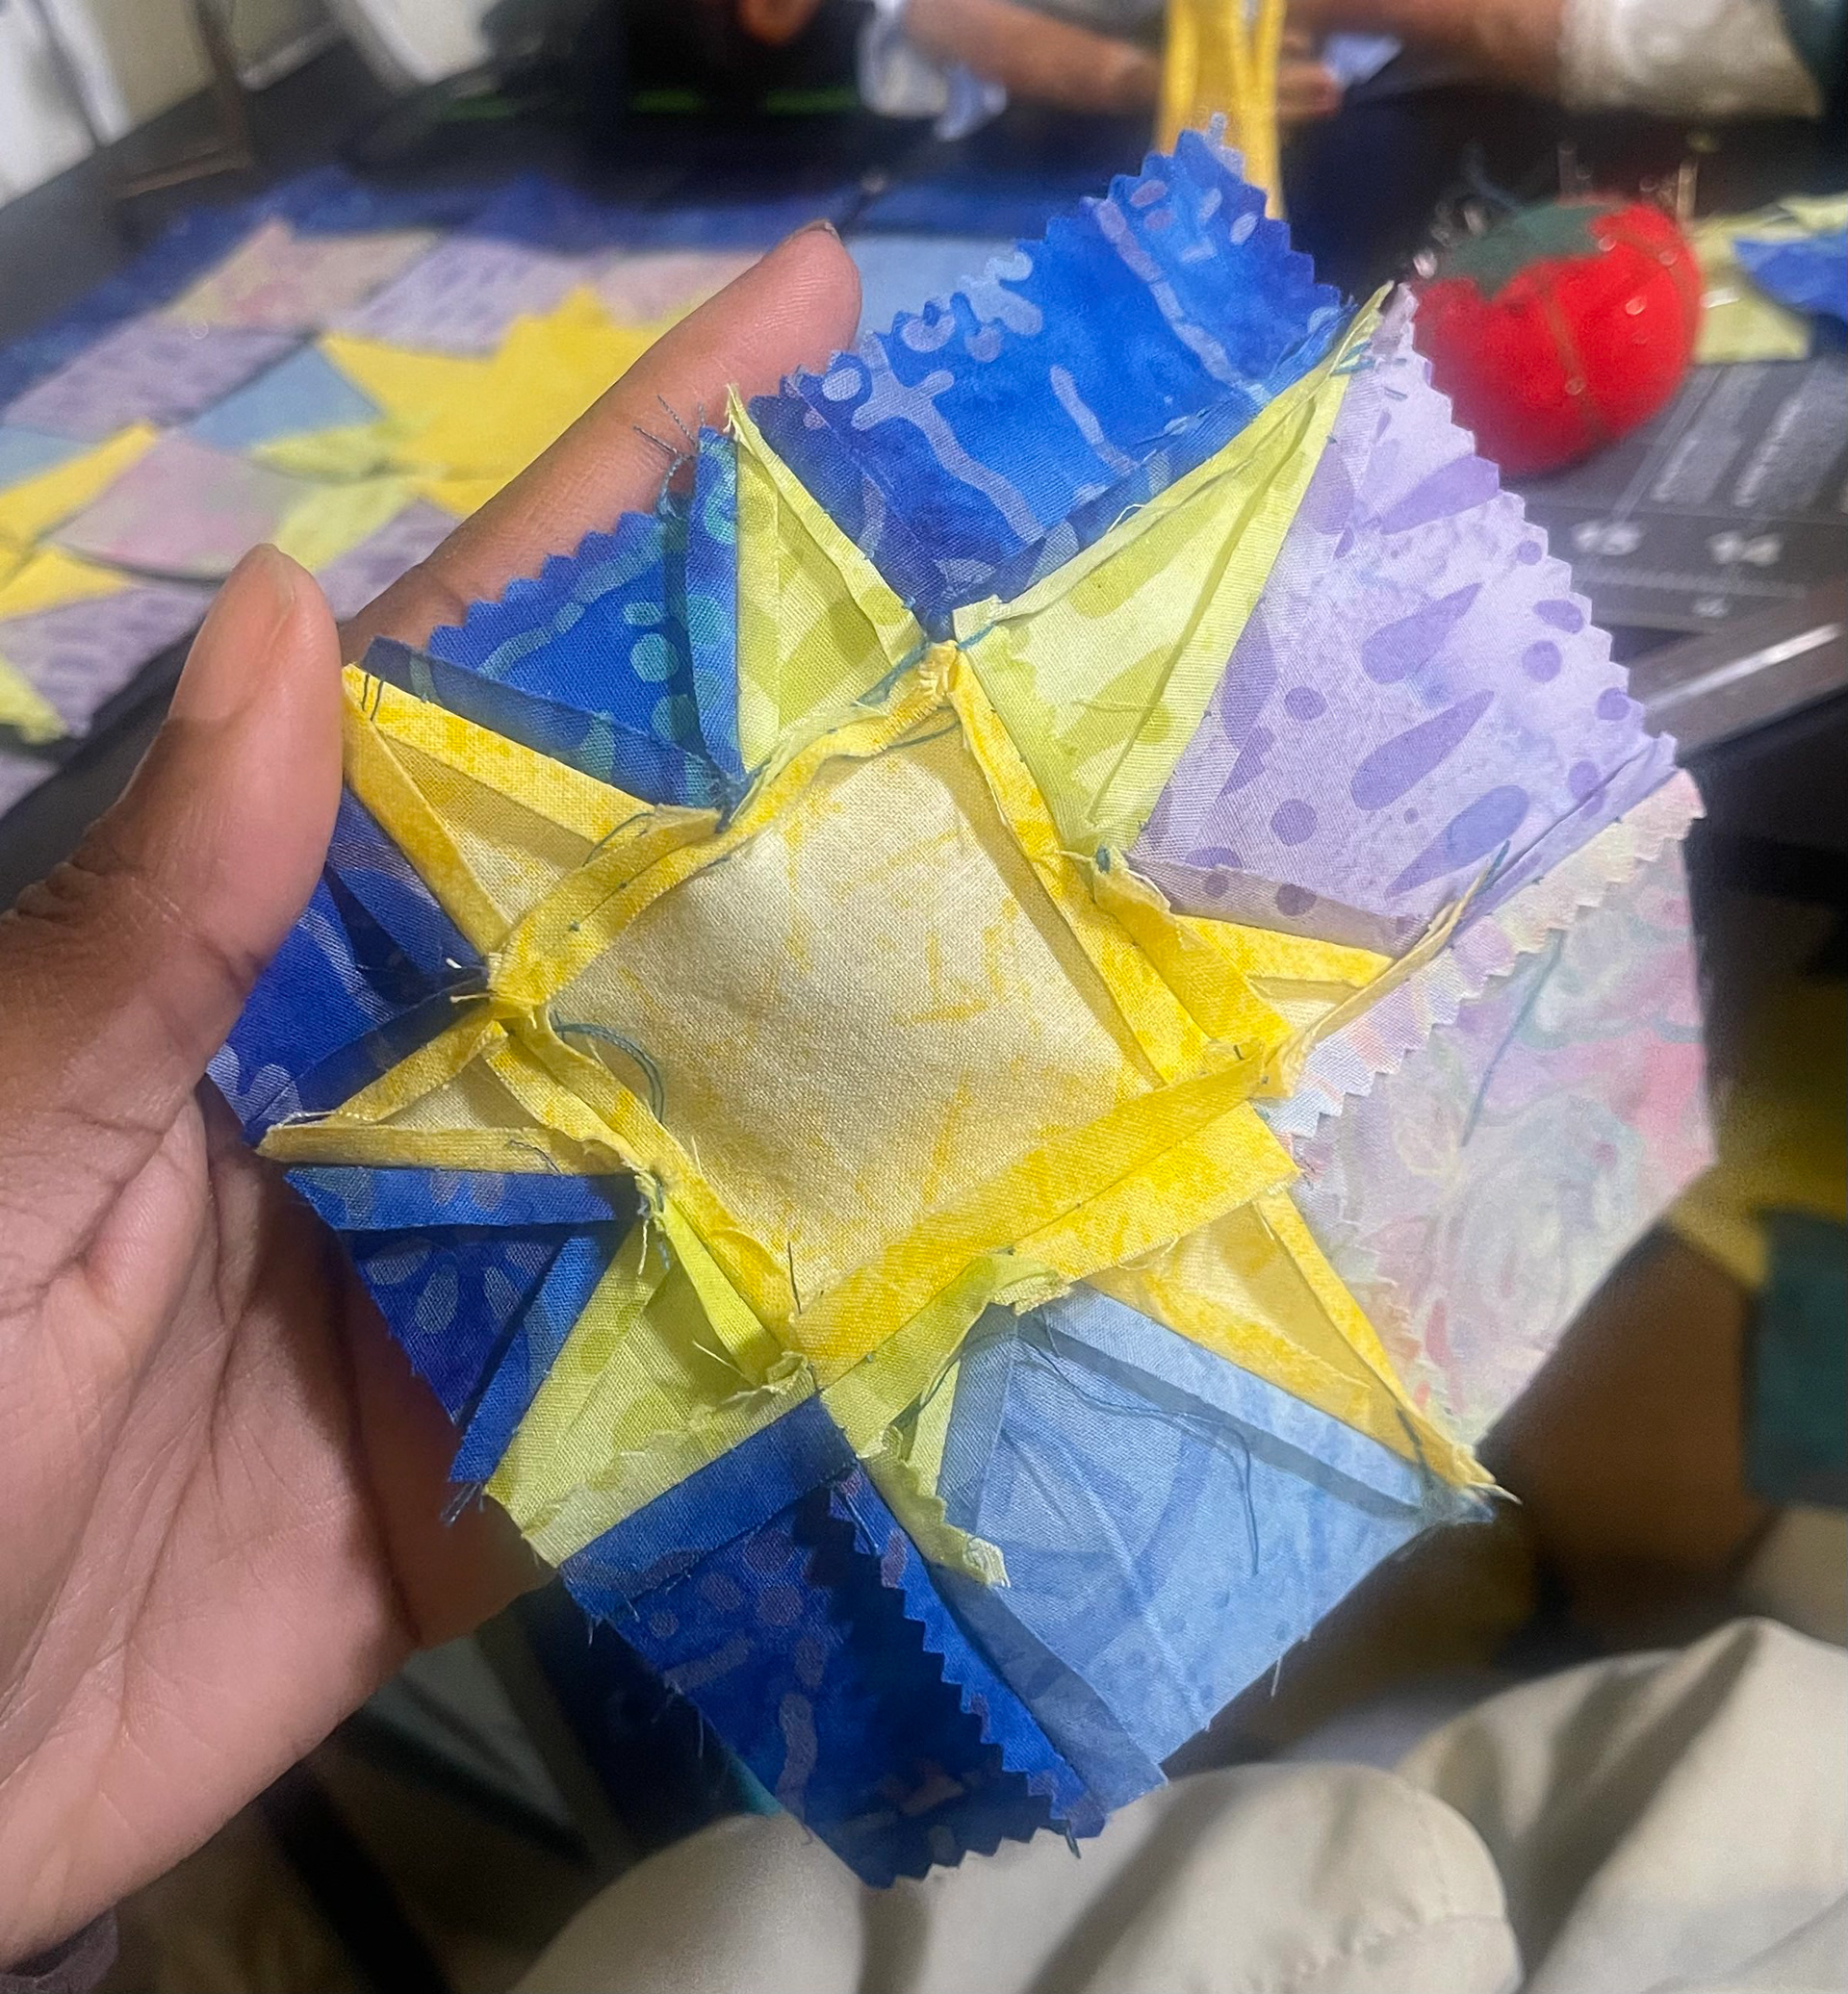

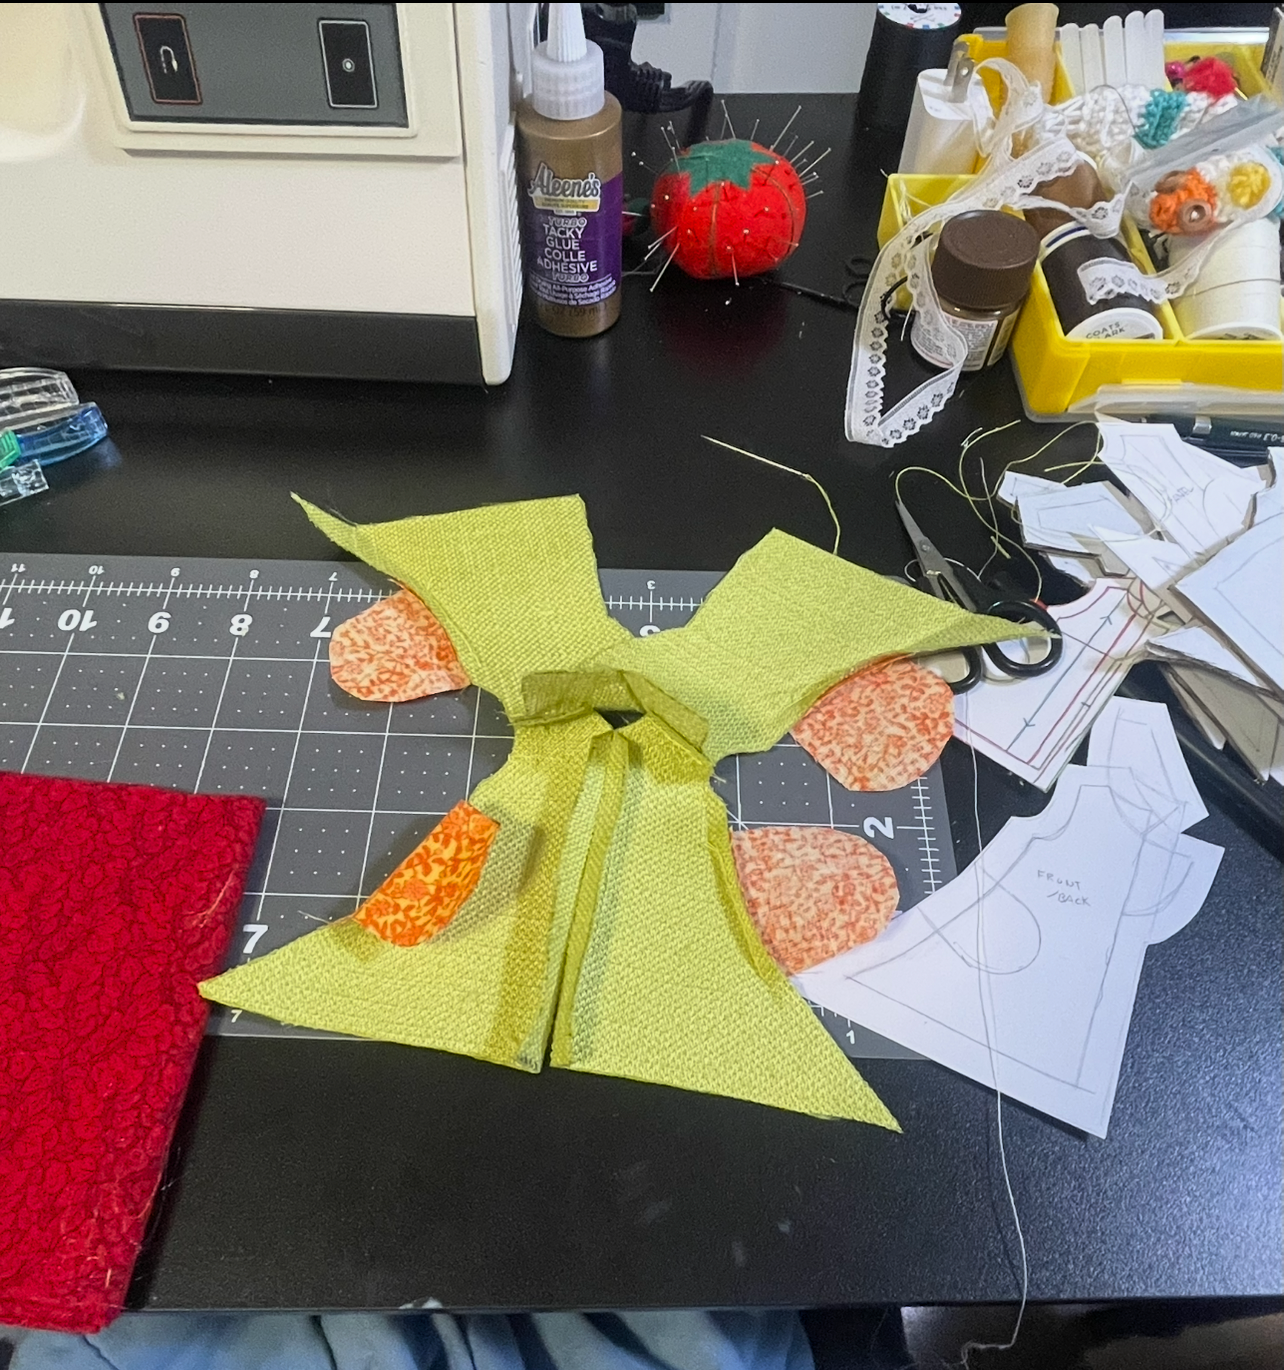
Snippets of the quilting process for Celeste's final accessory! I sourced some lovely batik quilting blocks from a local shop in downtown Phoenix. I really wanted this quilt to look handmade and well loved, so I chose to make the binding stitch exposed.
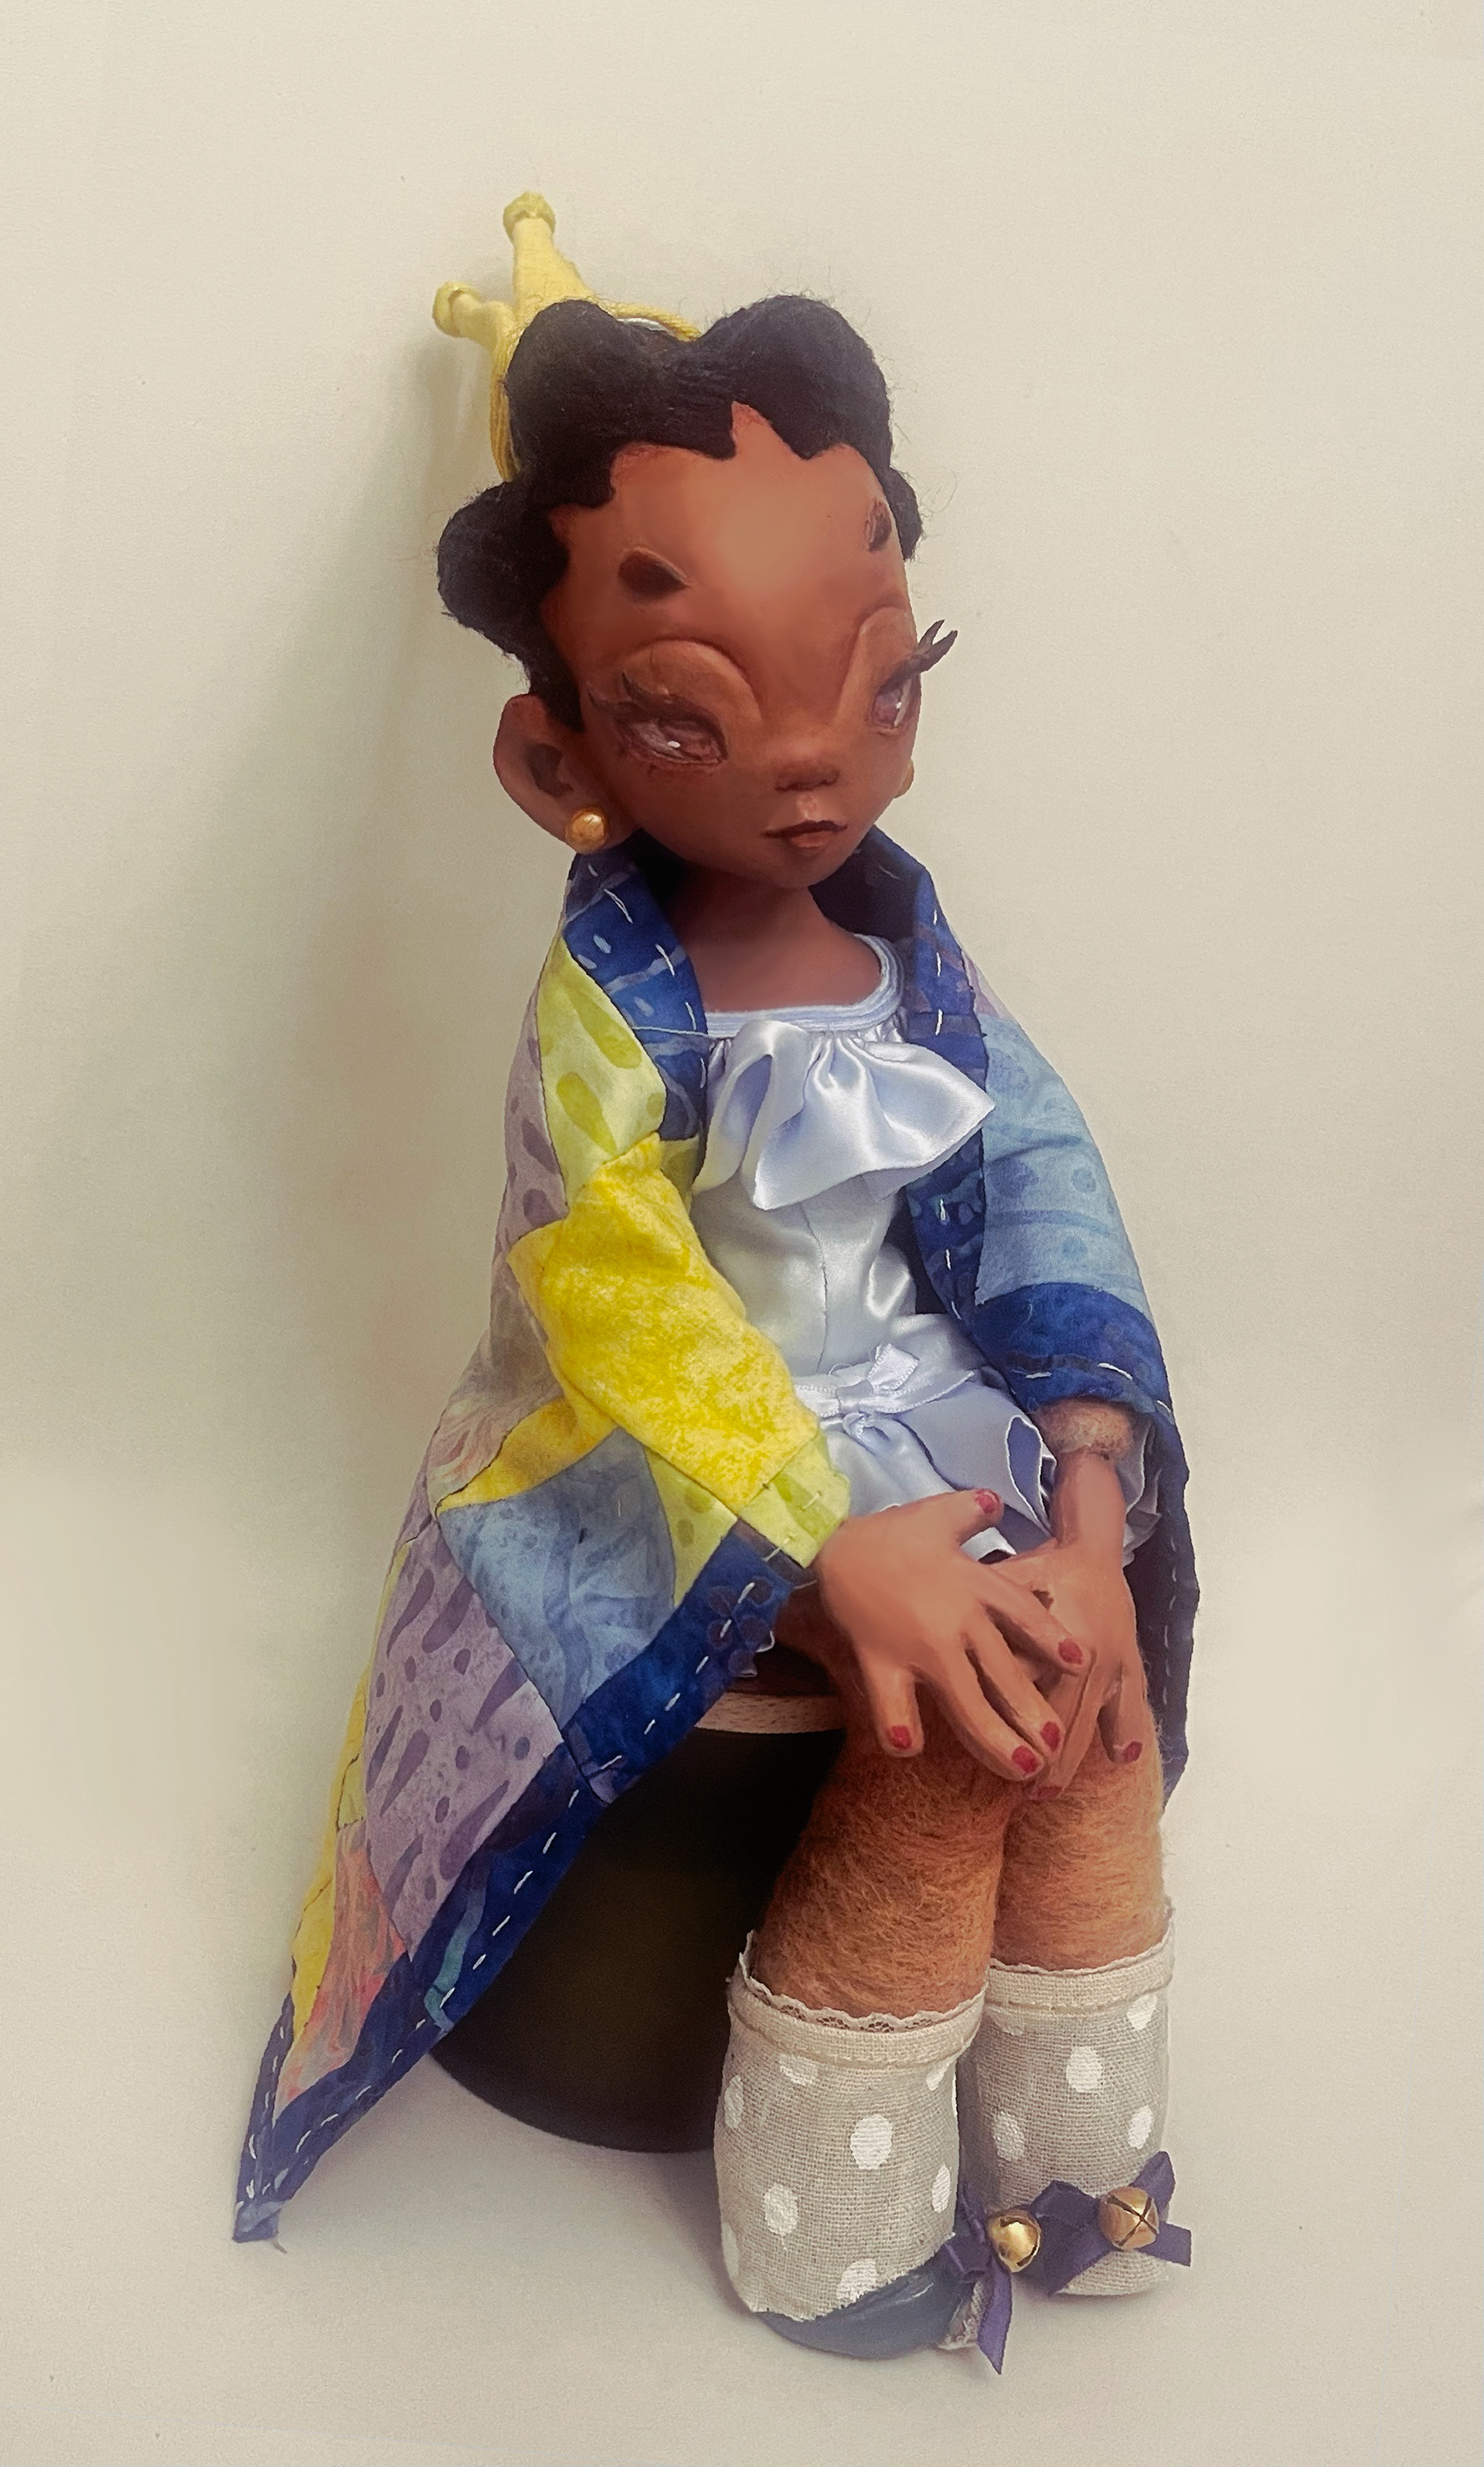
Finals!

